Jetveo Resorts – Blog Management
A blog is a great way to keep people up to date on what is going with your business. Jetveo Hotel and Resort uses its blog to promote coming events, recap past events and encourage people to visit.
This tutorial will show you how to establish a professional blog that will connect the Jetveo backend to Gatsby, an open-source frontend that will serve as the cover for the user interface.

This tutorial will show how to implement the following elements:
- Use a CMS template
- Connect to Gatsby
NOTE: This text is similar to the “Connect Jetveo CMS to the Gatsby Cloud” tutorial. The Jetveo Platform and App Builder is established through the template, although it can be customized.
Connect Jetveo CMS to the Gatsby Cloud
The blog post will be based on a template: the Jetveo Content Management System (CMS). It will establish the data source for a blog that will be built with pages powered by the Gatsby Cloud.
Later, it can be adjusted to add additional features to the dashboard.
Gatsby (https://www.gatsbyjs.com/) provides development teams with an open-source frontend framework for creating dynamic and fast websites. It will enhance the Jetveo programming experience with a graphic boost for the display of blog information.
This tutorial will take you through the process of establishing a blog.
Overview
There are three general phases with a total of seven steps to establish the connection between the Jetveo CMS and Gatsby in order to create the Resort Blog:
-
Steps 1, 2, and 3: Creation of the Resort Blog with the Jetveo CMS Template on the Jetveo Platform
-
Steps 4, 5, and 6: Connect the Resort Blog to the Gatsby Cloud, including
-- the establishment of the new “gatsby-starter-jetveo-blog” repository on your VSC of choice (i.e., GitHub)
-- the establishment of an account for the Gatsby Cloud and the copying of the “gatsby-starter-jetveo-blog” repository to that new account
-- the publication of the site; and -
Step 7: How to Use the Resort Blog App
The overall setup process will take 15 to 20 minutes, but the speed with which the blogs and information will be provided to end users will be many times faster every time they access it.
Several aspects of the Gatsby frontend can be customized, including color and font. There will also be other options to extend the project.
Creation of the Resort Blog with the Jetveo CMS Template on the Jetveo Platform
STEP 1
On the Jetveo Platform, at the top of the sidebar, click + Create App. (If you do not have a Jetveo account, go to https://jetveo.io/ and, in the upper right, click Free Account. You need only provide your name and an email address.)
- For
Application Name, type: [the name for your app] (i.e., Jetveo Resort Blog Management). - For
Application Template, select: Jetveo CMS for Gatsby. - Click
Create Application.
This will create a Development instance for the Resort Blog.
STEP 2
- Click
Settings - Go to the
Dev Instancetab to get the login credentials for the instance (i.e., Test User Email, Test User Password). ClickSave. - Click
Start(if necessary) to activate the instance. - Click
Open Instanceto open the interface for the Jetveo Resort Blog Management backend. Log in.
STEP 3
The Resort Blog is the source code that defines how the data will be added and maintained. The initial version is a bare-bones template with dummy data. Information for using the Resort Blog is provided below for use after the connection to Gatsby is established.
Connect the Resort Blog to the Gatsby Cloud
STEP 4
Open a new browser tab. Copy and paste the following URL:
https://www.gatsbyjs.com/dashboard/deploynow?url=https://github.com/jetveo/gatsby-starter-jetveo-blog
Follow the on-screen instructions to your preferred Version Control System (VCS) in order to establish the new “gatsby-starter-jetveo-blog” repository. Then, there is a three-step wizard to connect to the Gatsby Cloud:
(1 of 3) Configure the Jetveo CMS Repository on the Gatsby Cloud
An account for the Gatsby Cloud will be established and the “gatsby-starter-jetveo-blog” repository will be linked to that new account. It will take a few moments for the new repository to be configured. Note: If you encounter a problem, log out of the Gatsby site then log back in with the link above. For more information: https://support.gatsbyjs.com/hc/en-us/articles/360055994714-I-get-an-error-when-trying-to-create-a-site-from-my-Github-repository.
(2 of 3) Allow integration with other third-party providers
Skip this page. Jetveo is the third-party that is being integrated.
(3 of 3) Define the Environment Variables for the connection between Jetveo and Gatsby
Two Build Variables need to be added:
JETVEO_API_BASE_URL
The first environment variable is: JETVEO_API_BASE_URL
- In the Build Variable data box, type JETVEO_API_BASE_URL in the
Keydata-box - Move to the Jetveo Platform and locate the Resort Blog App Overview
- Click
All Instance URLs - Copy and paste the text in the
Application Instance URLbox - Switch back to the Gatsby Cloud wizard. Paste the Application Instance URL in the
Valuebox - IMPORTANT: At the far right side of the Application Instance URL, add the following: /api
The final version of the JETVEO_API_BASE_URL should look similar to this: https://f9d995ef-354b-48f2-b069-14906b7a62d5.eu.jetveo.io/api
JETVEO_API_KEY
The second environment variable is: JETVEO_API_KEY
- Click
Add Variable + - In the Build Variable data box, type JETVEO_API_KEY in the
Keydata-box - Move to the Jetveo Platform and locate the Resort Blog App Overview
- Click
Settings - Go to the
APItab - In the Actions column, click
Generate Key - Copy the generated API Key
- Click
Save - Switch back to the Gatsby Cloud wizard. Paste the API Key in the
Valuebox
The final version of the JETVEO_API_KEY should look similar to this: x8HiXioGPhRqjiUakQ0rhnZqUfp97O2c
STEP 5
The initial build will start automatically. The progress will be shown in the Production section as “Triggered by Gatsby Cloud”. It may take a few moments to build the page.
On the Gatsby Cloud overview, the URL for the frontend for the Resort Blog will be shown under “Hosted on Gatsby Cloud”. When it is built, go to the URL to see the template with dummy data.
STEP 6
The Jetveo backend needs to be connected to the Gatsby Cloud so that changes made in the database will be published.
- Go to the Gatsby Cloud Site Settings tab
- Find the
Builds Webhooksection - Copy the Webhook URL
- Move to the Jetveo Platform and locate the Resort Blog App Overview
- Click
Settings - Go to the
Configurationtab - Click
Change - Copy the Webhook URL into the
Gatsby Cloud Publish Webhookbox
The final version of the Gatsby Cloud Publish Webhook will look similar to this: https://webhook.gatsbyjs.com/hooks/data_source/publish/3a2249bb-3fa9-4964-98bc-b76147c78d20
At this point, the Resort Blog is connected to the Gatsby Cloud.
How to Use the Resort Blog
STEP 7
The initial Resort Blog has dummy text and images. Click Publish to build changes on the Gatsby Cloud and present them to end users. Note that it may take about a minute for the changes to take effect. You may need to refresh the browser to see the updated status on the Gatsby Cloud Overview.
Note: Occasionally , especially when large image files are added, it may be necessary to go to the Trigger Build drop-down menu and select “Clear Cache and Build Main”.
Here is a quick explanation for the initial version of the Resort Blog:
- On the Resort Blog App instance, click
Start(if necessary) - Click
Open Instance
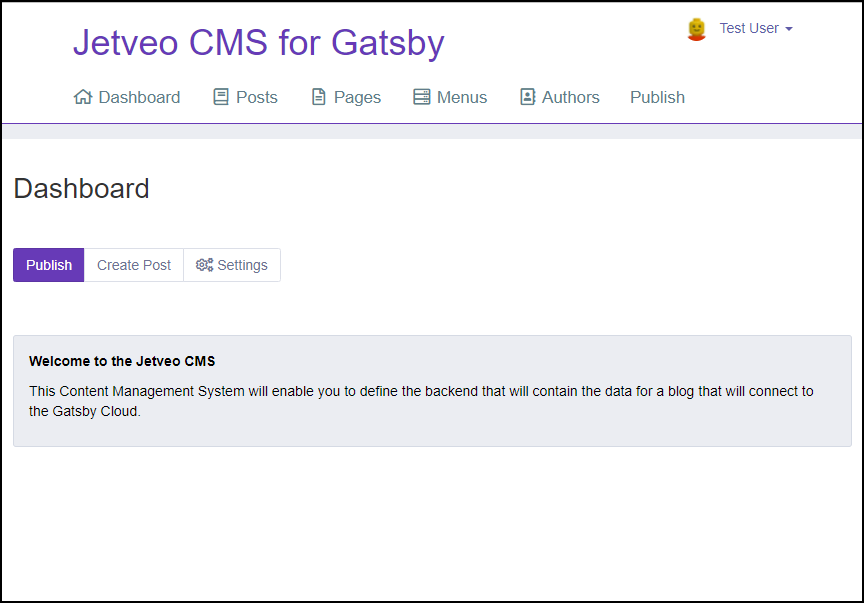
The Blog App includes at top bar menu and a simple Dashboard with additional links.
Resort Blog Top bar Menu
Dashboard
Returns the user to the main Dashboard.
Posts
Link to the list of existing posts. Click the Title to edit a post.
Click + Post to establish a new entry (see Post screenshot).
![]()
Title — This text will appear at the top of the blog, on the blog list page, and under the blog image in the Latest Blogs section of the Home page. The title is H2 by default.
Note: Paste text as “plain text”. The text boxes used throughout the app include many options, like text size, alignment, bold, italics, underline, strikethrough, unordered list, ordered list, indent, and the ability to expand the box for editing purposes. The ellipse has advanced features, like specific fonts, specific sizes, color for text and background, tables, images, and videos.
Subtitle — The text that is used here will appear on the blog list as a teaser for the blog post. It can also be a copy of the first paragraph of the blog. It is recommended that the subtitle be a size smaller than the Title (i.e., H3 or H4)
Content — The content is treated as rich-text markdown. Text can be adjusted. Images and videos can be added. See Note above for more information.
Image — This image will be used on the Home page and on the blog list page. The aspect ratio for this image is 175 X 122 (i.e., 430 X 300). PNG is preferred.
Author — Choose the author of the blog post from the drop-down menu. Go to Authors in the top bar to define the options that will be available.
Slug — Establish the specific text that will be added to the URL for this blog post.
Meta Title — This text will be used in the tab of the browser.
Meta Keywords — List keywords for SEO purposes. Separate with commas.
Meta Description — Description for SEO purposes.
Note: When you click + Create the post is saved as a draft. Then, click Final Version if it is ready to be posted for end users; this will post it on the site the next time Publish is clicked.
Pages
Define different sections of the app that are accessible through the top bar menu. “Main” is provided by default; it serves as the front page for the blog and includes a section for “Latest Blogs”. Each page has a header and space for a block of text, which can include images and videos.
The initial page is a list of the Pages. Click + Page to establish a new entry (see Page screenshot).
![]()
Title — The title for the page.
Content — Additional text for the page. This will be displayed under the Title.
Slug — Add the URL extension (e.g., AboutUs) that will complete the link for the page. This is necessary in the Menus section as a target for the link.
Meta Title — This text will be used in the tab of the browser.
Meta Description — Description for SEO purposes.
Meta Keywords — List keywords for SEO purposes. Separate with commas.
Menus
Define the options that will be available in the top bar menu and the menu at the bottom of the page.
The initial page is a list of the established links. Click + Menu to establish a new entry (see Menu screenshot).

Title — The link that will be shown in the top bar menu. Generally, this is one word or a short phrase (i.e., About Us, Images)
Menu Target — Define the type of target to which the link will direct the user. Select Page or URL. (The next data-box below adjusts accordingly.)
Page / URL — Select the specific Page or URL to which the user will be directed.
Order — Define the order of the items in the top bar menu. “1” is the leftmost option. Each successive number is listed to the right. There is a limited amount of space.
Author
Additional information for each blog writer can be added.
The initial page is a list of the Authors. Click + Author to establish a new entry (see Author screenshot).

Name — The first name of the author.
Surname — The last name of the author.
Image — Upload a mugshot of the writer. The mugshot should be a vertical rectangle. The center of the image will be used as a circular representation next to the Author name on the blog post. The preferred format is PNG.
Publish
Link to the Publish dialog. Click Publish to render the information provided within the database for end users. Note that it may take a minute or so for the new data to appear on the live page for end users.
Blog App Dashboard
Publish — See above in the top bar menu section.
Create Post — See “Post” above in the top bar menu; this links skips the Post list and goes directly the + Post dialog.
Settings — The overall settings for the app are maintained in this section, including:
- Logo — The image that is at the top left of the top bar (i.e., “blog”)
- Home Page Image — The horizontal strip just under the top bar. The aspect ratio for this image is 336:43 (i.e., 1344 X 172). PNG is preferred.
- Author — This text is used in the copyright information at the bottom of the Home page.
- Default Meta Title — The title that is used in the web browser.
- Default Meta Keywords — List of keywords for SEO purposes. Separate with commas.
- Default Meta Description — Description for SEO purposes.
Specific Steps to Brand the Blog
1. Dashboard
Click Settings. There are several elements of the Dashboard that can be updated.
Logois the image that is at the top left of the top bar (i.e., “blog”)Home Page Imageis horizontal strip just under the top bar. The aspect ratio for this image is 336:43 (i.e., 1344 X 172). PNG is preferred.Authoris the name that will be used in the copyright information at the bottom of the blog.
2. Pages
Click on Home in the list. Change the Title and Content. The Title will be superimposed over the Home Page Image. The Content will be placed just underneath the Home Page Image.
You can also create another Page (e.g., About Us). Know that you will also need to add this page to the Menu (and adjust the order as necessary).
3. Author
Add author name and mugshots. This will used when you make posts. Delete the dummy data.
4. Posts
Add a post. (See the instructions above for more details.)
- The image will be used on the Home page and on the blog list page. The aspect ratio for this image is 175 X 122 (i.e., 430 X 300). PNG is preferred.
- Delete the dummy-data post. (Note: at least one blog posts needs to be in the “Final Version” state.)
5. SEO
Adjust the Meta information (i.e., Default Meta Title, Default Meta Keywords, Default Meta Description) for SEO purposes, as necessary.
Then the blog is ready to go. Continue to add blogs as necessary. You can also customize parts of the blog through the App Builder.