Simple Form Boot Camp
This quick tutorial will create a simple form as an introduction to the basic pages of the Jetveo Platform and App Builder. It is a bare-bones app that will take about five minutes.
ISSUE:
I would like a simple form to take and maintain the basic contact information of potential customers.
SOLUTION:
Create a simple form.
NOTE: This is the same Boot Camp that automatically appears upon the initial log in. These instructions will require a preliminary step. On the Jetveo Platform, click (+) Create App. Set Application Name to: Simple Form. Click Create Application. Click OK.
Click Edit Application to go to the App Builder.
Define the Data
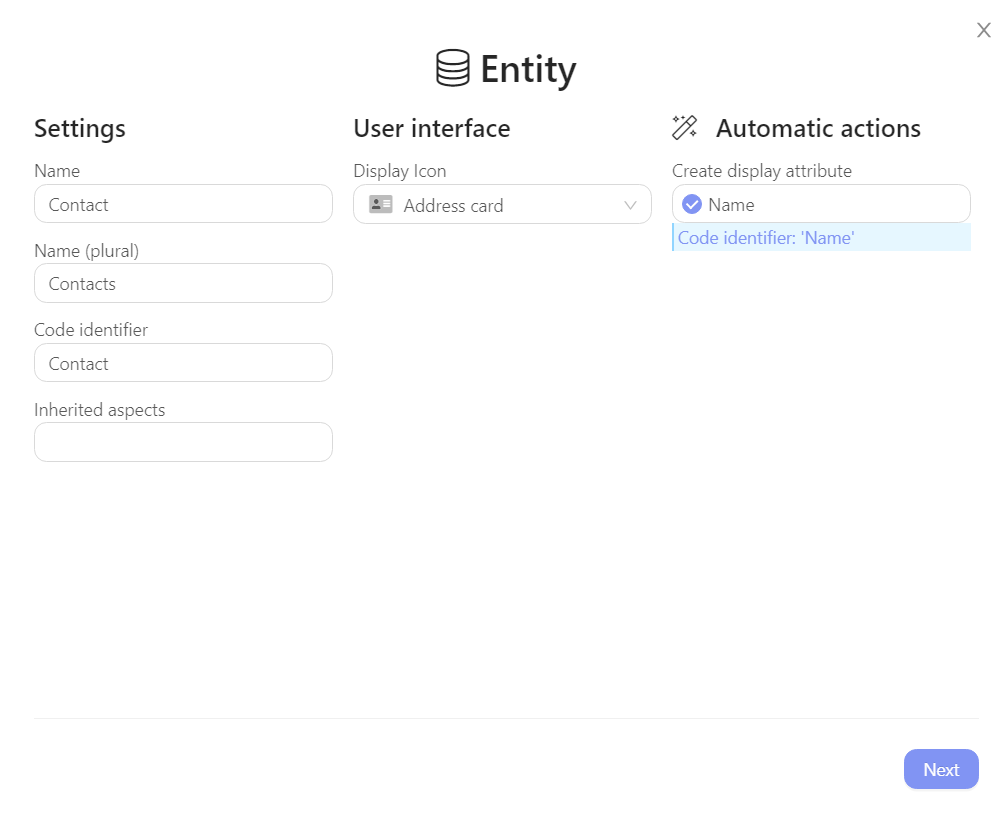
1. Create an Entity to Store Data
- At the top of the side panel, click
(+) Create. Click Entity. This will start a two-step wizard. - Name your Entity: Contact
- Set the
Display Iconto: Address Card (i.e., type the word into the search bar or scroll through the drop-down menu) - Verify that the
Create Display Attributecheck circle is marked and that it is named Name. This will create an attribute and set it as a display expression for entity records.
-
Click
Next -
On the second step of the wizard, verify that the
Create Pagesbox has the following preselected: Create Page, Detail Page, and List Page. These pages will be generated and used in the User Interface section (below).
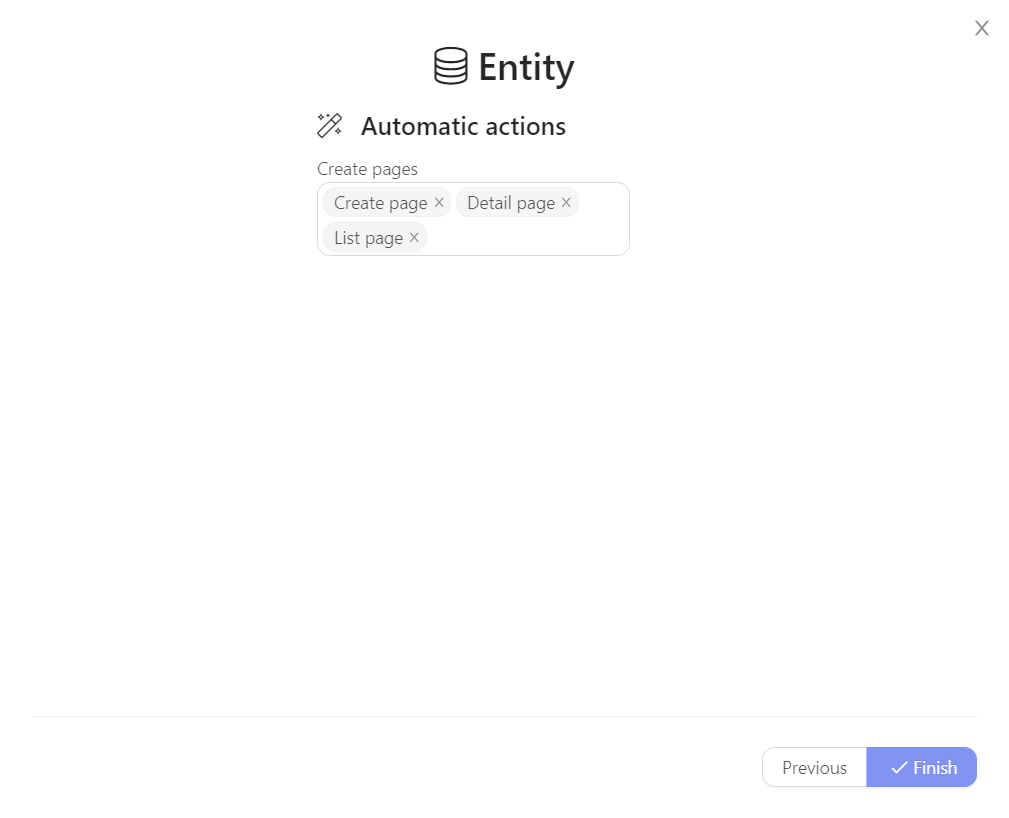
- Click
Finish
2. Add Attributes to the Entity
- On the Contact entity (which will also be shown in the Data > Entities section of the sidebar menu) click
Add multiple(you can also add attributes one at a time by clicking theAdd attribute)
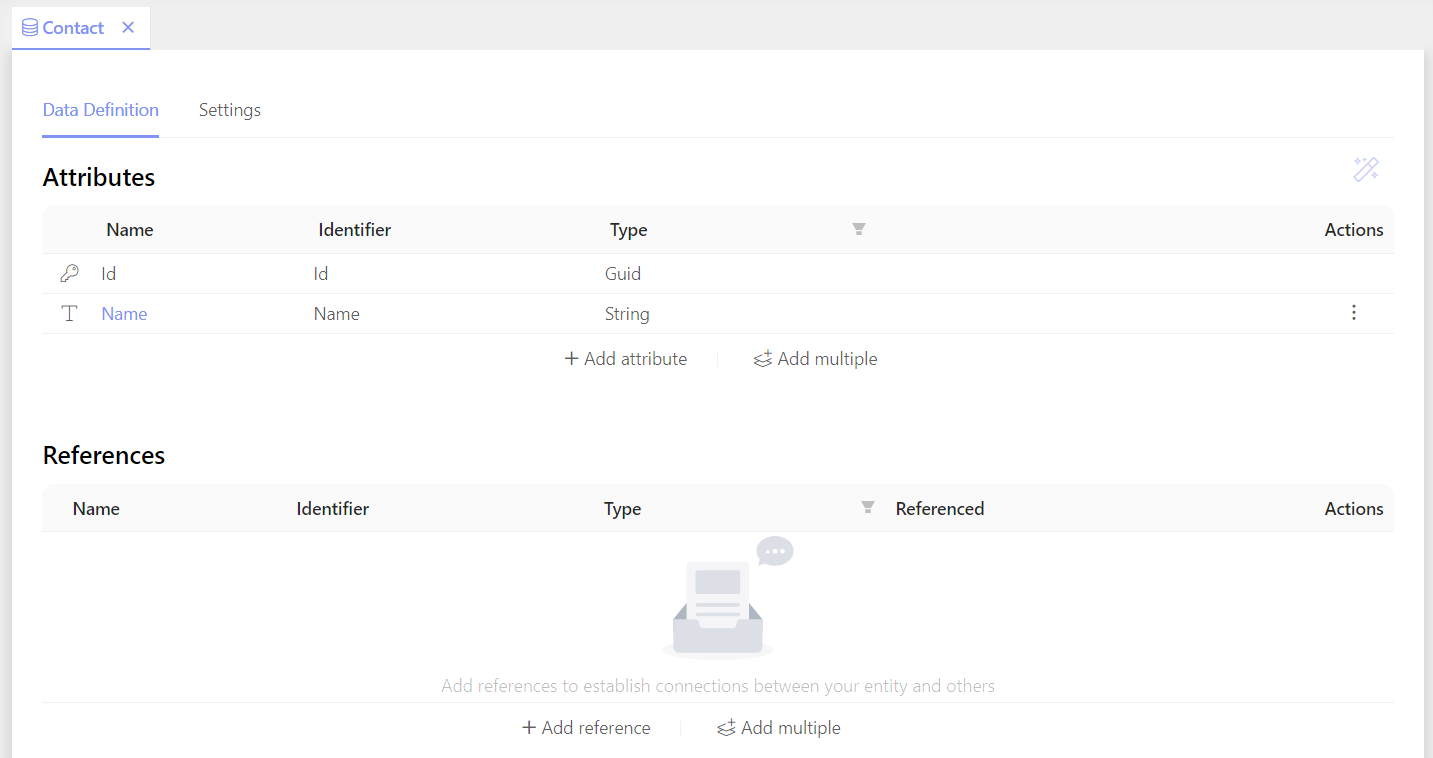
- Copy and paste the following list:
- Click the top Attribute name box and type
Ctrl + Vto paste the list
- Click the top Attribute name box and type
| Company |
| Street Address |
| City |
| State/Region |
| Postal Code |
| Country |
| Email Address |
| Phone number |
| Notes |
| Account Manager |
Locate Notes; change the type to Rich-text Markdown
Locate Account Manager; change the type to User
All of the other items should remain String

-
Click
Add Attributes -
Type
Ctrl + Sto save the page. Note that each page is saved when you move to a new tab.
Define the User Interface
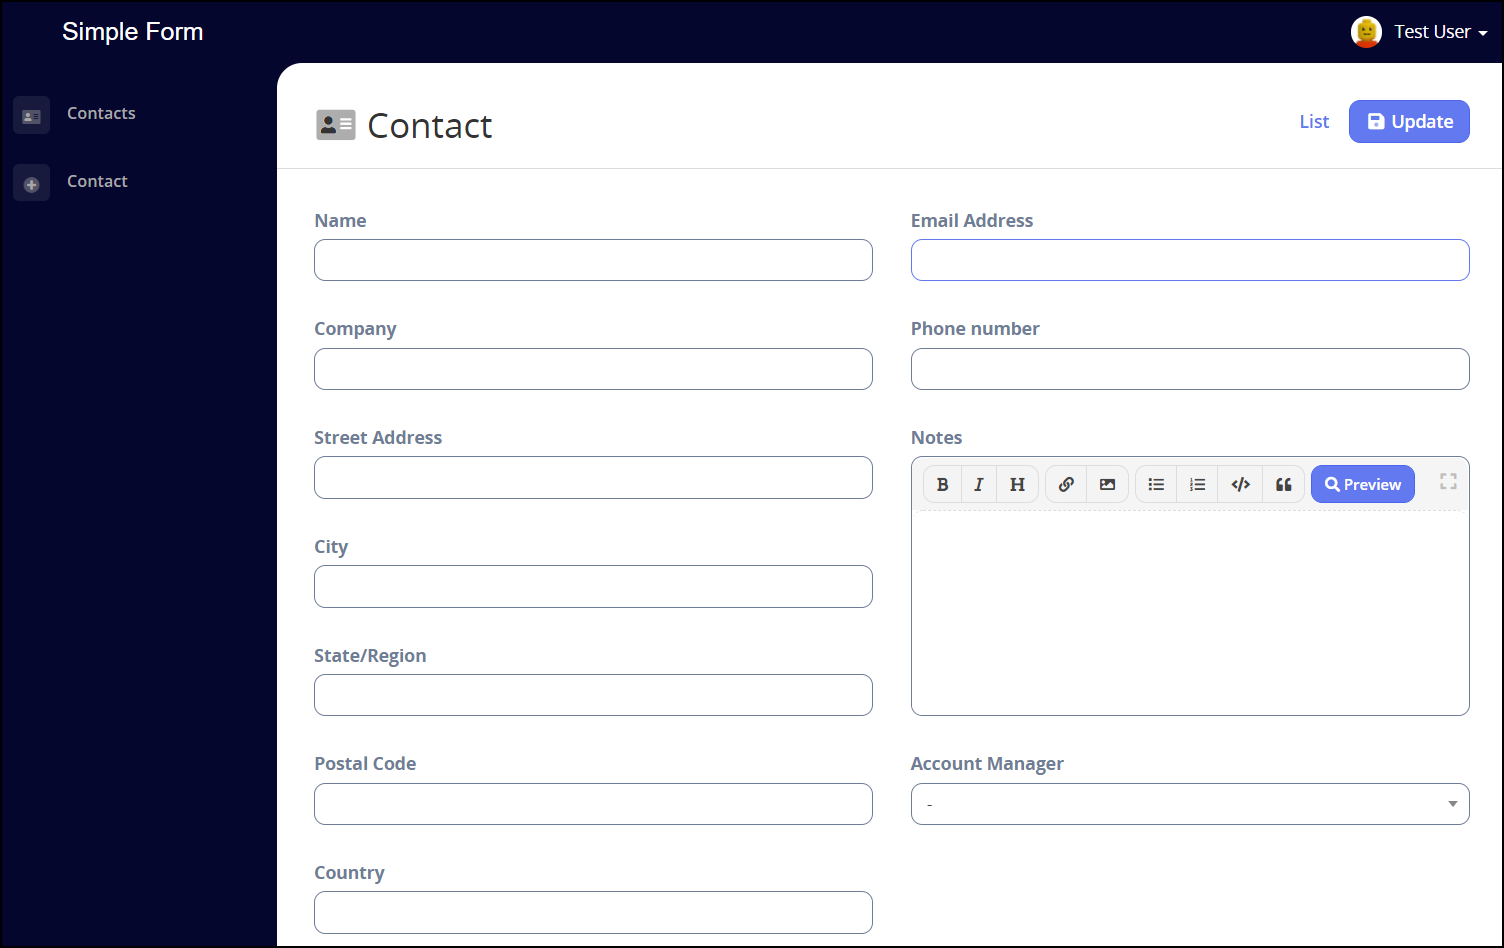
3. Define the Contacts Create Page
The Contacts Create page is the form that the user will fill out.
- In the sidebar, click
UI. In the UI side panel, locate the Entity Pages subsection - Double-click Contact Create
- In the center of the page, click
Add View. SelectCreate Empty View for Contact. - In the layout editor, expand the Data Fields menu. Click each of the Data Fields to place them on the page. The default layout has two columns. Drag and drop the elements as desired.
- Click
OK
Set the layout so that it can be shared.
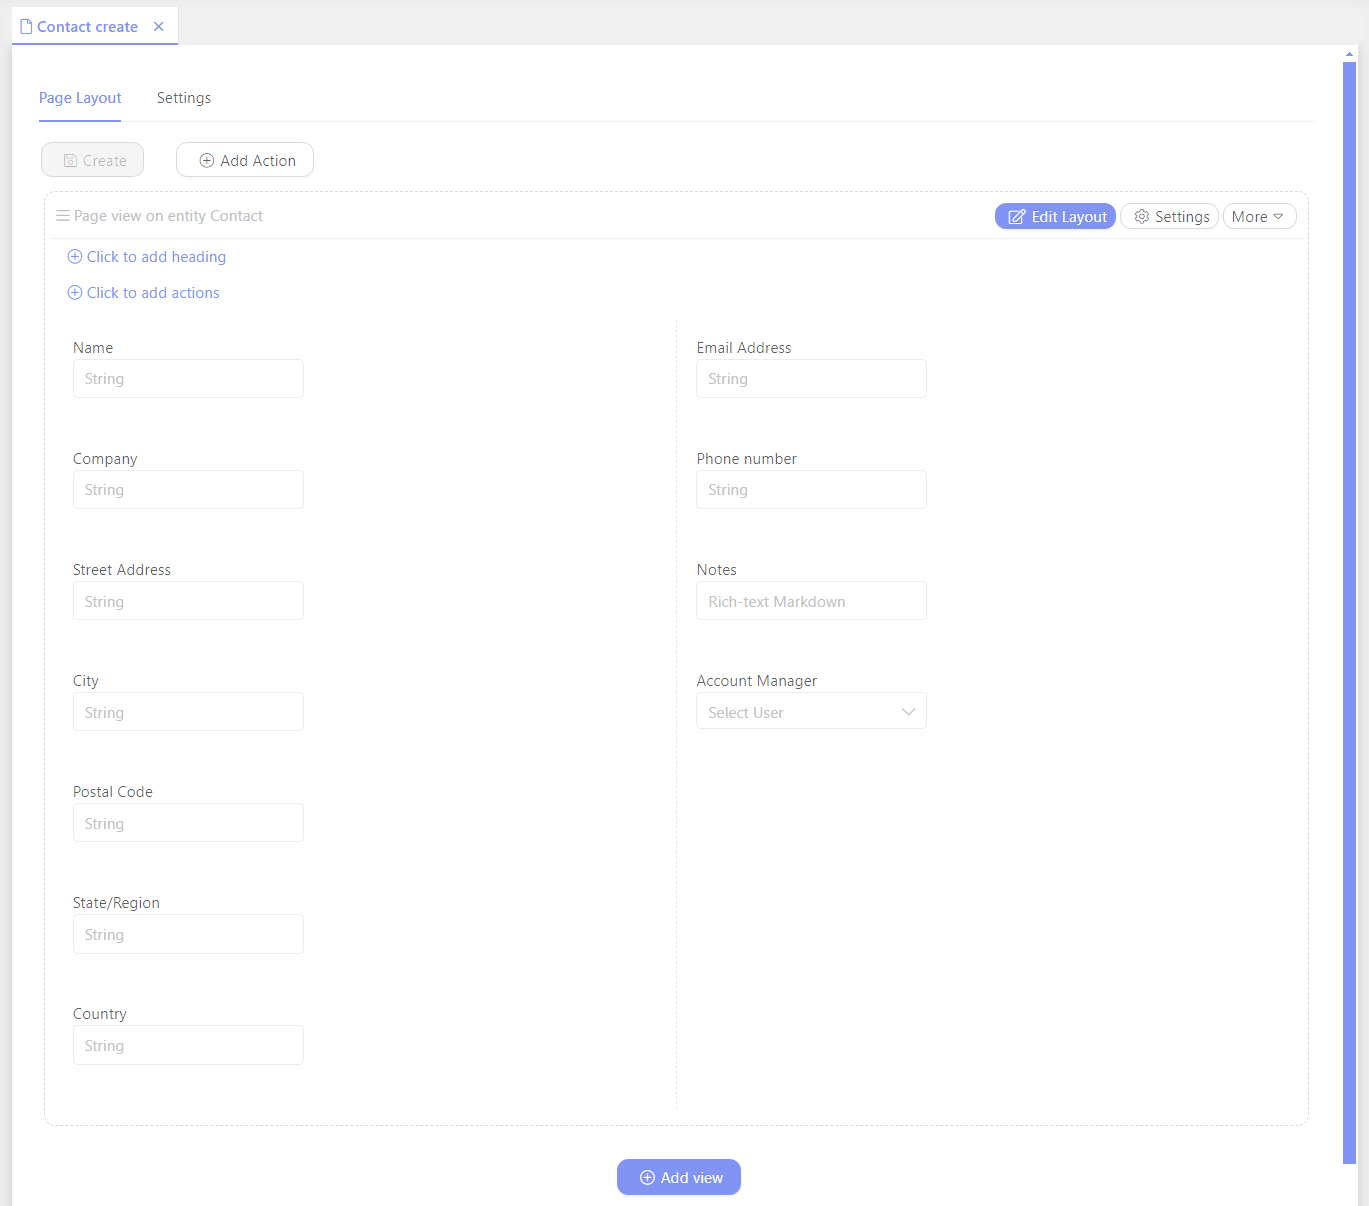
- In the Layout section, click the
More - Select Make Shared
- Type
Ctrl + Sto save the page
4. Define the Contacts Detail Page
The Contacts Detail page will serve as the repository for the entered data.
- In the Entity Pages subsection, double-click Contact Detail
- In the center of the page: Click
Add ViewSelectAdd Shared View for Entity Contact. - There is only one Shared View, so it will automatically be designated as the layout.
- Click
OK - Type
Ctrl + Sto save the page
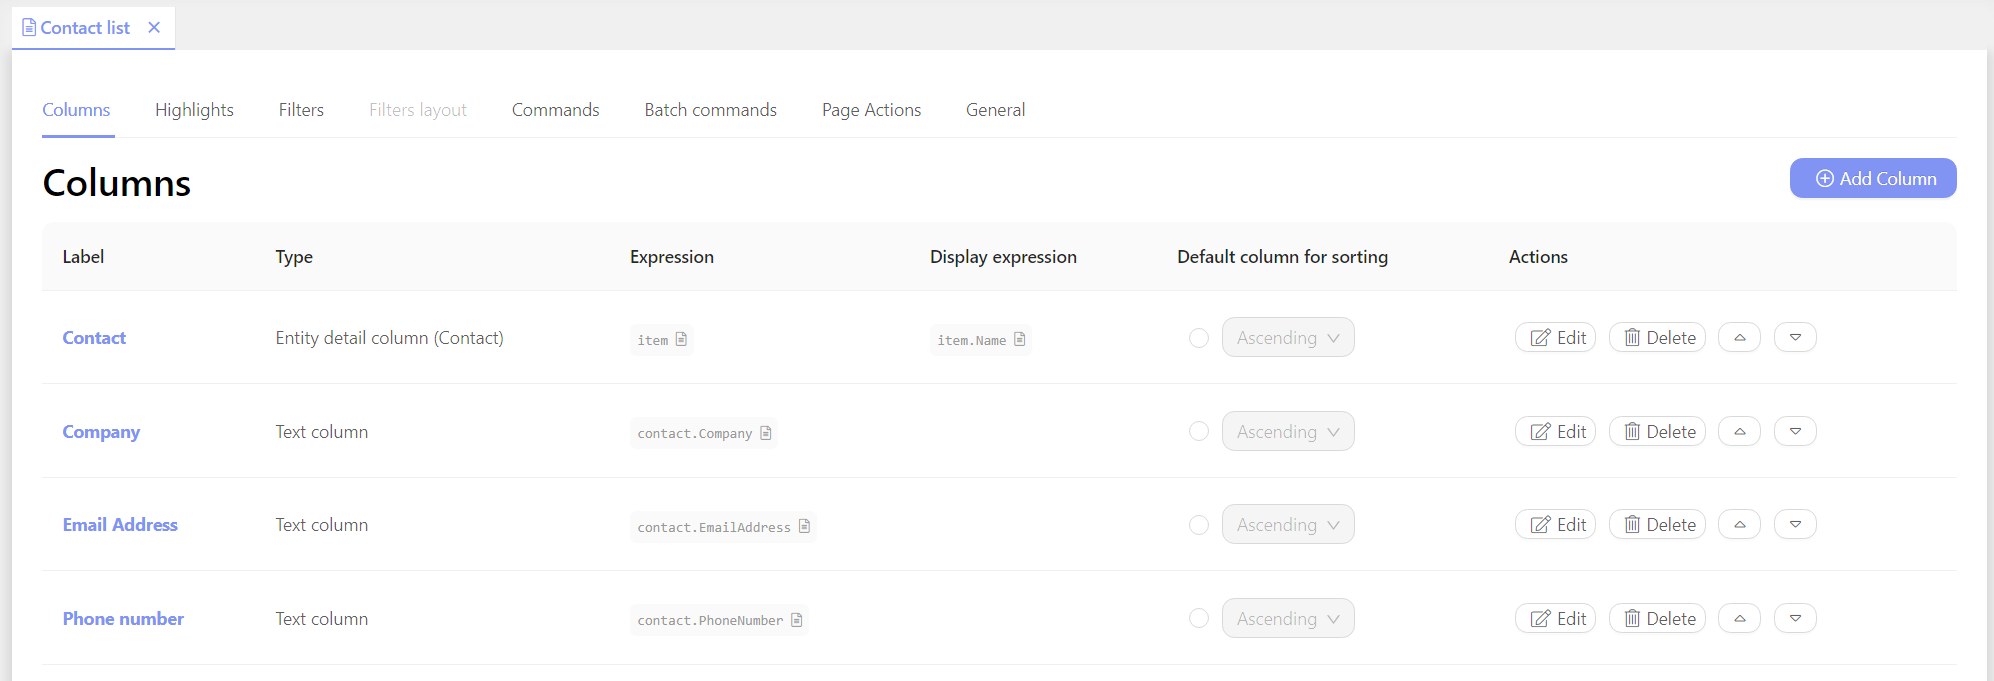
5. Define the Contacts List Page
- In the UI side panel, double-click Contact List
- In the Columns tab, the Contacts entity detail column is added by default to create a link to the detail page
- Click
(+) Add Column - Select the additional columns that will appear: Company, Email Address, Phone Number
- Click
Close - Type
Ctrl + Sto save the page
6. Application Menu
The User Interface now needs links to create and access the customer information.
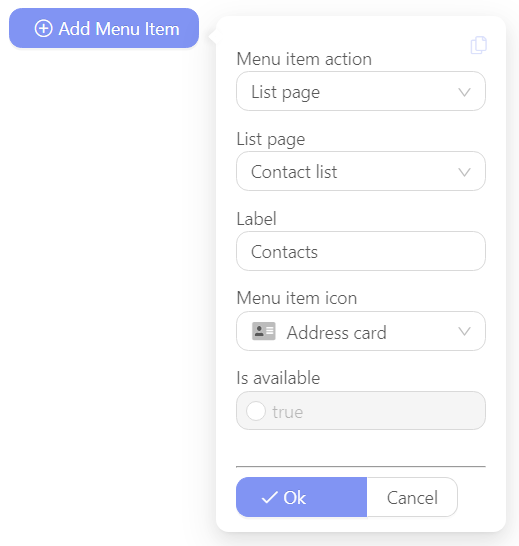
- In the UI side panel, locate the Application Menu button at the top
- Click
Application Menu - Click
(+) Add Menu Item - Set
Menu Item Actionto: List page - Set
List pageto: Contact List - Click
OK
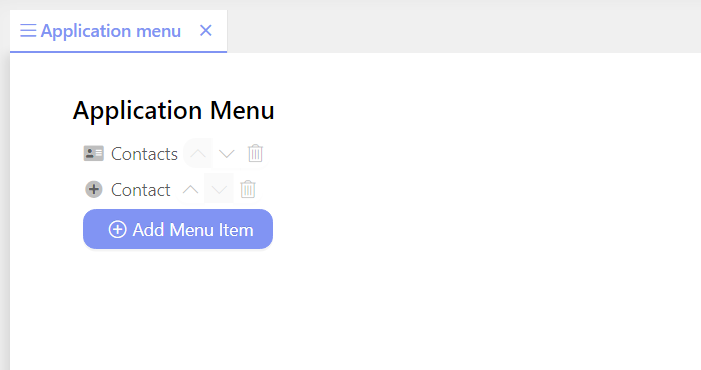
—
- Click
(+) Add Menu Itemagain - Set
Menu Item Actionto: Entity create page - Set
Entity Pageto: Contact create - Change the Menu Item Icon to:
+ Create - Click
OK
Deploy and Run the App
7. Release your Application
- On the sidebar, click
Release(Note: Make sure that every page is completely saved.) - On the Release dialog, type: Initial Release. Click
Release
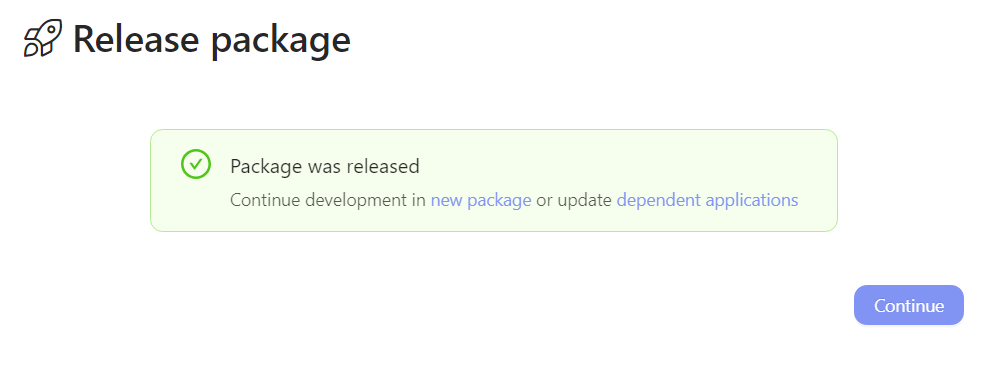
- Click
Continueto return to the App Builder Editor page - In the sidebar, click
Close
8. Access the App
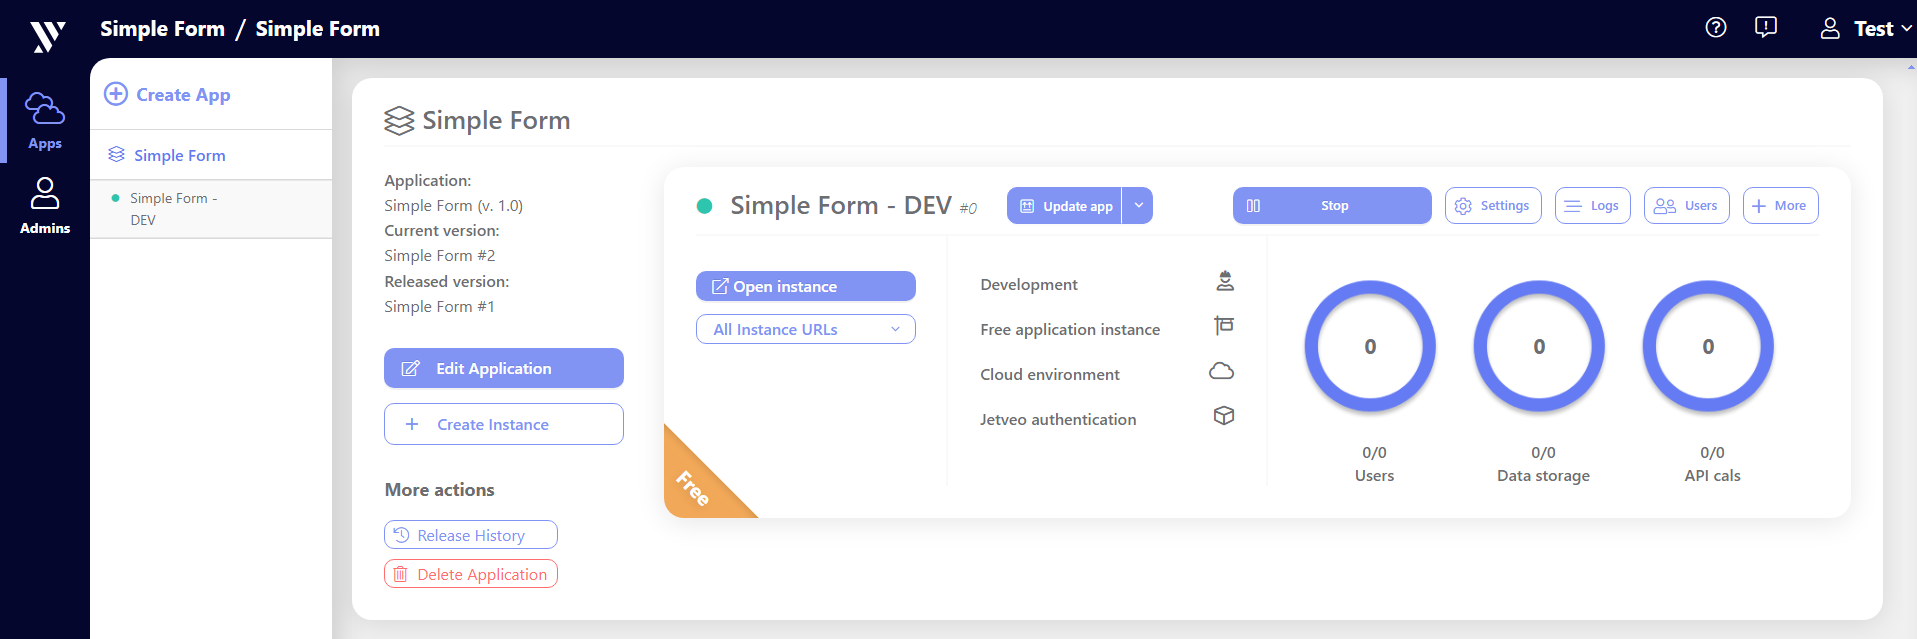
- On the App Overview, click
Settings. - Click the
Dev Instancetab. Note the credentials that you will need to access the app (i.e., Test User Email, Test User Password). - Click
Update App - Click
Start(if necessary) - Click
Open Instance. The app will open in a different browser tab.
This is just a simple app. Additional definitions can be added, including making certain attributes required, adding a search feature, and adding additional functions.
For more details and tutorials, see the following: