(2) Define the User Interface
- Support Ticket Tutorial -
With a simple data foundation complete, it is time to fill the Ticket Entity pages that were established above: Create Page, Detail Page and List Page.
7. Define the Ticket List Page
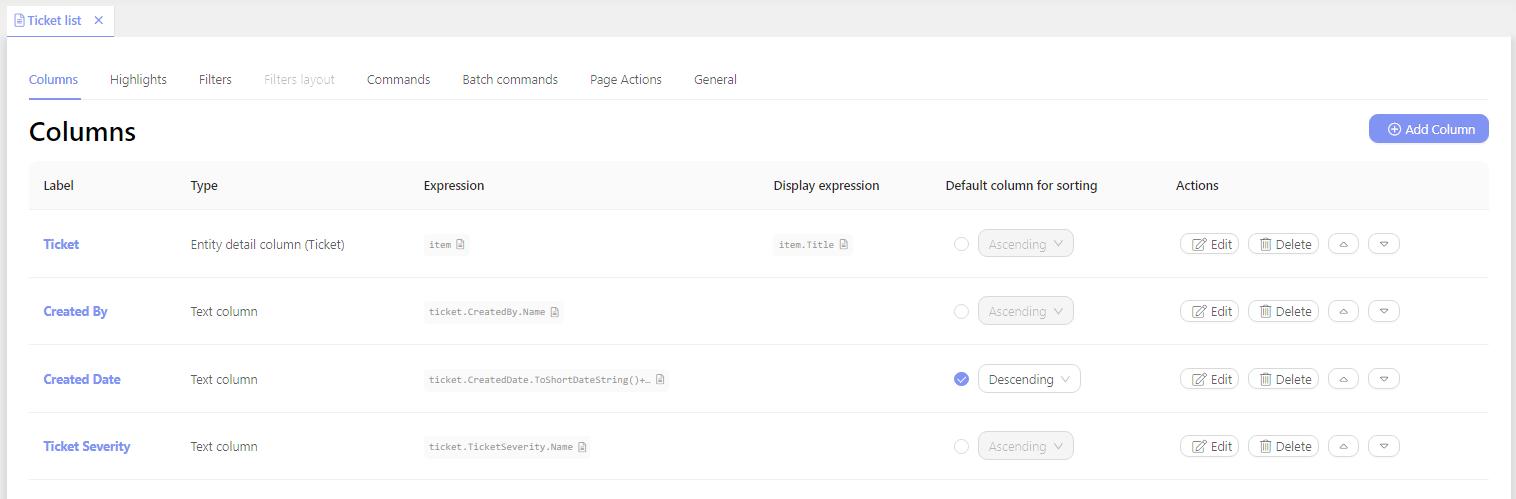
The Ticket List Page will be a simple list of Support Tickets, with the User, the Time Created and the Severity.
- In the sidebar, click
UI. In the UI side panel, locate theEntity Pagessubsection - Double-click Ticket List
- On the Ticket List overview, the
Columnstab will show by default - Entity detail column is added by default to create a link to the Ticket Detail page
- Click the
(+) Add Column - Select the additional columns that will appear: Created By, Created Date and TicketSeverity
- Click
Close - In the Created date row, click the checkbox in the
Default column for sortingcolumn and choose Descending from the dropdown- Tickets will be sorted from the most recent
- Save changes:
Ctrl + S
8. Define the Ticket Create Page
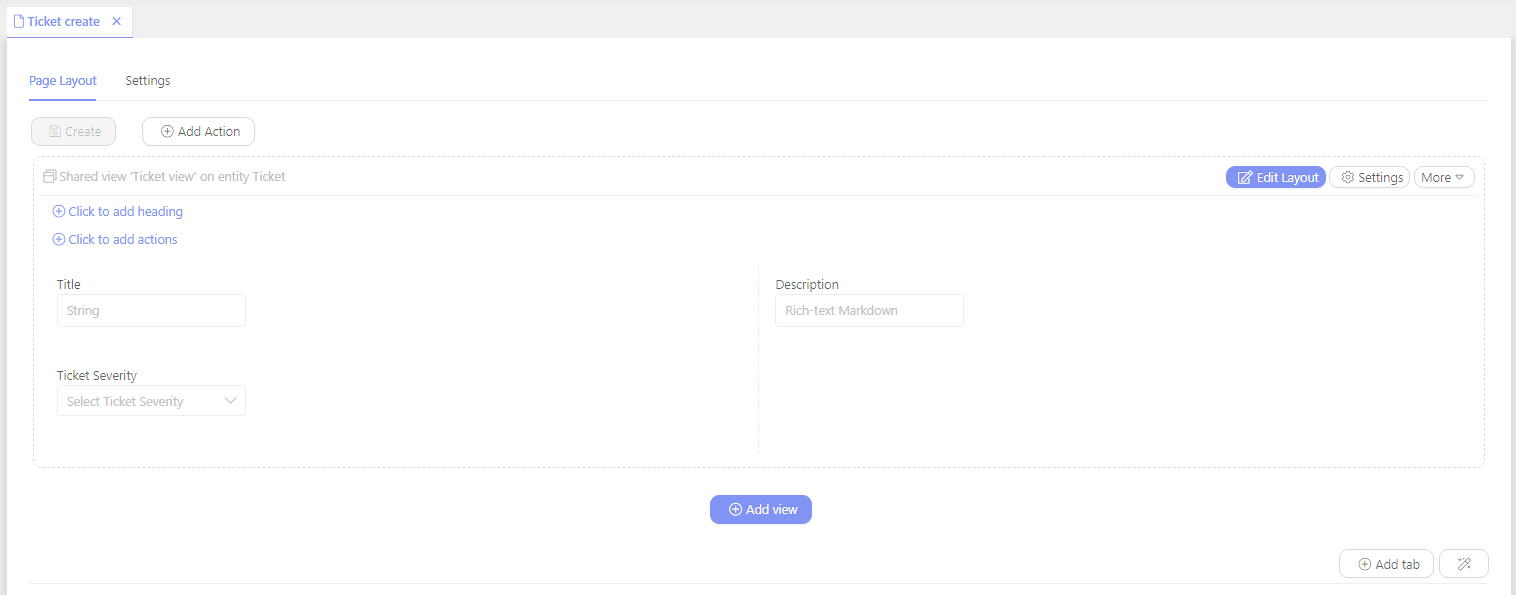
The Ticket Create page will define how new tickets will be created.
- In the
Entity Pagessubsection, double-click Ticket Create - In the center of the page, click
Add View. ClickCreate Empty View for Ticket - In the layout editor add
Data Fields. Click Title, TicketSeverity and Description - Click
OK - Click Title field
- Click
Magic Wandin Validations section - Click Not empty string
- This creates a validation to ensure that each ticket has a name filled in
Set the Layout so that it can be shared on the Ticket Detail page.
- In the Layout section, click
Morein the top-right corner of the view - Click
Make Shared - Click
Ctrl + S
9. Define the Ticket Detail Page
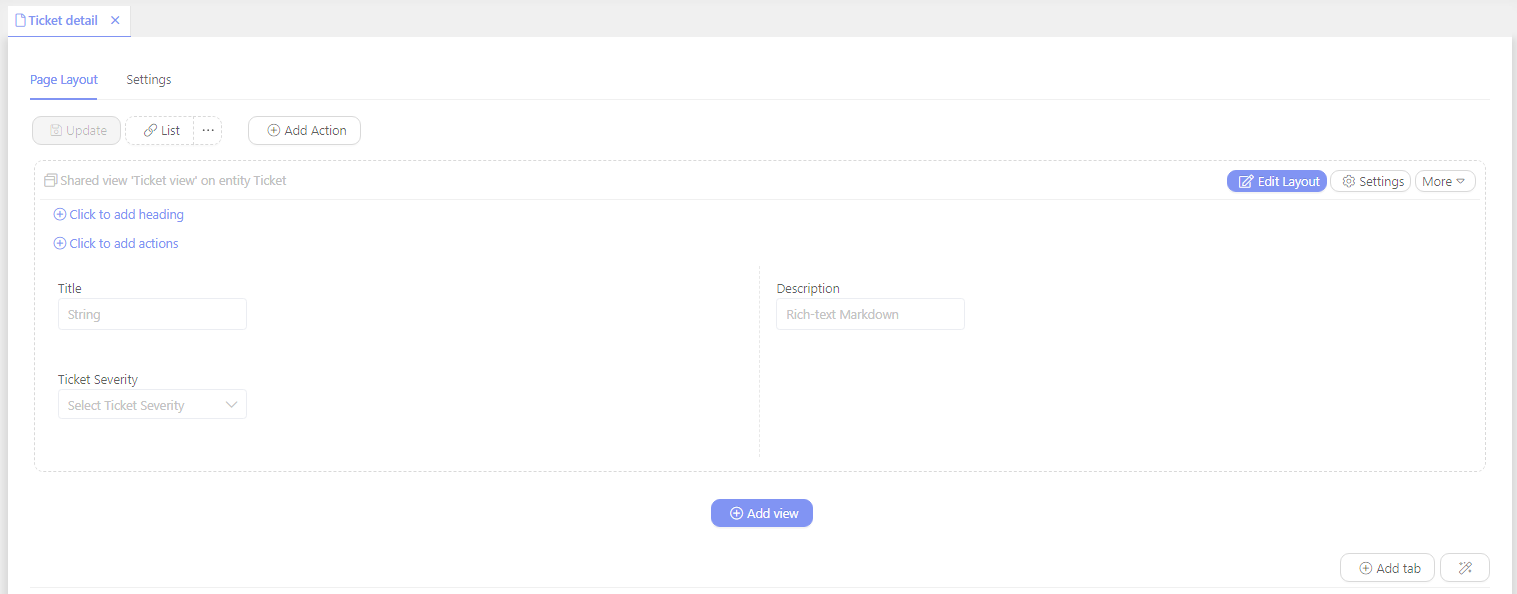
The Ticket Detail page will serve as the repository for the Support Tickets. It will use the shared view that was established on the Ticket Create page.
- In the
Entity Pagessubsection, double-click Ticket Detail - In the center of the page: Click
Add View - Click
Add Shared View for Entity Ticket - Save changes:
Ctrl + S
10. Application Menu
The User Interface now needs links to create and access tickets.
- In the UI side panel, locate the
Application Menubutton at the top - Click
Application Menu - Click
(+) Add Menu Item - Set
Menu Item Actionto List page - Set
List pageto Ticket list - Click
OK
- Click
(+) Add Menu Itemagain - Set
Menu Item Actionto Entity create page - Set
Entity Pageto Ticket create - Change the
Menu Item Iconto (+) Create - Click
OK - Save changes:
Ctrl + S
