(22) Command API
- Support Ticket Tutorial -
Communication With the Backend Server
This tutorial will show how to communicate with the backend server.
We will go through three different examples of using the Command API.
Create a Technical User
First we need to create a Technical User which we will use for all examples.
If you already have a Technical User created from (12) CRUDL APIs – Back End, skip the following steps.
- Go to Config > Technical User.
- Create a new tab; click
(+) - Enter API User
- Click
Finish
A) Change The Description of the Ticket via API
1. Create Custom Command
- Go to Business > Commands
- Click
(+) - Set
Nameto: Change Ticket Description - Verify that
Typeis set to: Custom command - Verify that
Result typeis set to: None - Click
Finish
— - Go to the
Modeltab - In the Attributes section click
Add attribute - Set
Nameto: Description - Set
Typeto: Rich-text Markdown - Click
Save
— - In the References section click
Add reference - Set
Nameto: Ticket - Set
Typeto: Direct - Set
Referencedto: Ticket - Click
Save
— - Go to the
Codetab - Copy and paste the following code:
Click to expand the code block
(model, db, ctx) =>
{
    var ticket = db.TicketSet.FirstOrDefault(t => t.Id == model.Ticket.Id);

    if (ticket == null)
    {
        App.Log.Error("The ticket does not exist.");
        return;
    }

    ticket.Description = model.Description;
}
- Save Changes:
Ctrl + S
2. Establish the Command APIs
- Go to Integrations -> APIs
- Click the second
(+) - Verify that
API Typeis set to: Custom command - POST - Set
Command to be invokedto: ChangeTicketDescription - Verify that
Service Nameis set to: Change Ticket Description - Verify that
Authenticationis set to: API key (technical user) - Set
Allowed Technical Usersto: API User - Click
Finish
3. Establish the API Settings
- Save all tabs and
Releasethe app. - Go to the App Overview.
- Update the instance you want to connect.
If you already have an API Key generated from (12) CRUDL APIs – Back End, skip the following steps.
- Go to instance
Settings. Select theAPItab. - In the Actions column, click
+ Generate key. The API Key will look something like this: 9lCiYDT5SU9EfynBCIC769Vi4Ip7x0Kn - Click
Save
4. Download API SDK
- Go to the App Overview
- Click
More - Click
Download API SDK - ZIP file with API SDK is downloaded
5. Run the API Command
- Extract the downloaded ZIP file
- Open the file called openapi3.json e.g. in VS Code
- Copy the contents of this file and paste it to this editor: https://editor.swagger.io/
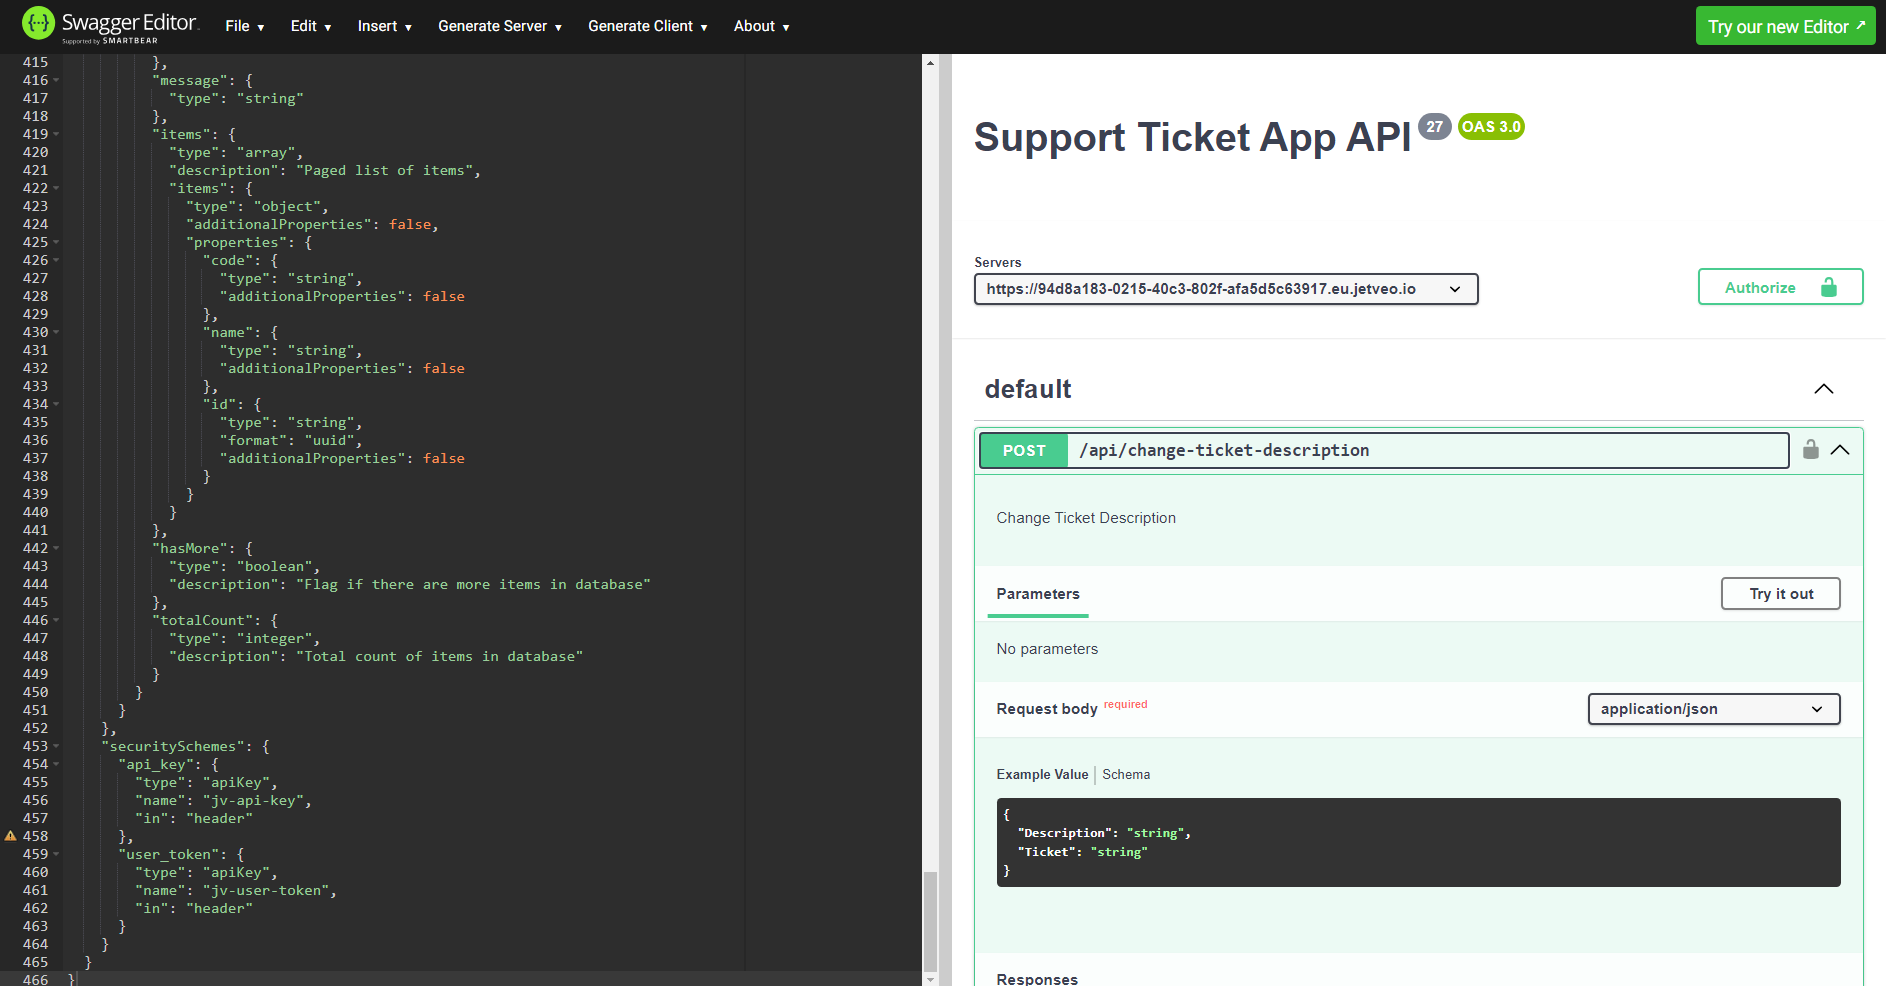
- Click
Authorizeon the right
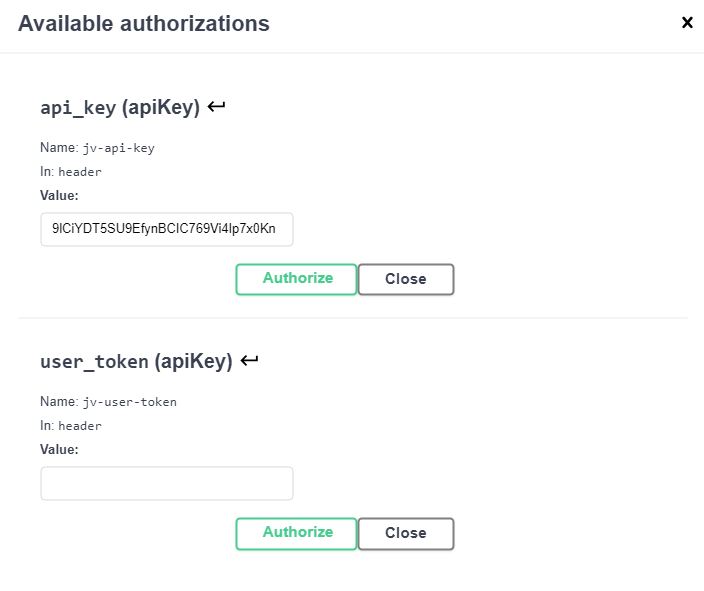
- Set
Valueof api_key to the API Key value from the instance settings - Click
Authorize - Click
Close
— - Click
Try it out - Change
Request bodyto something like this:
{
  "Description": "New description",
  "Ticket": "YOUR_TICKET_ID_HERE"
}
- Replace
YOUR_TICKET_ID_HEREwith the actual Ticket Id from your app instance- Go to the App Overview
- Click
Open instance - Open the detail page of the Ticket for which you want to change the description (or create a new Ticket)
- The Ticket Id is the last part of the url of the detail page, it will look something like this: 2292c766-32d5-4798-bea3-6d27248a503d
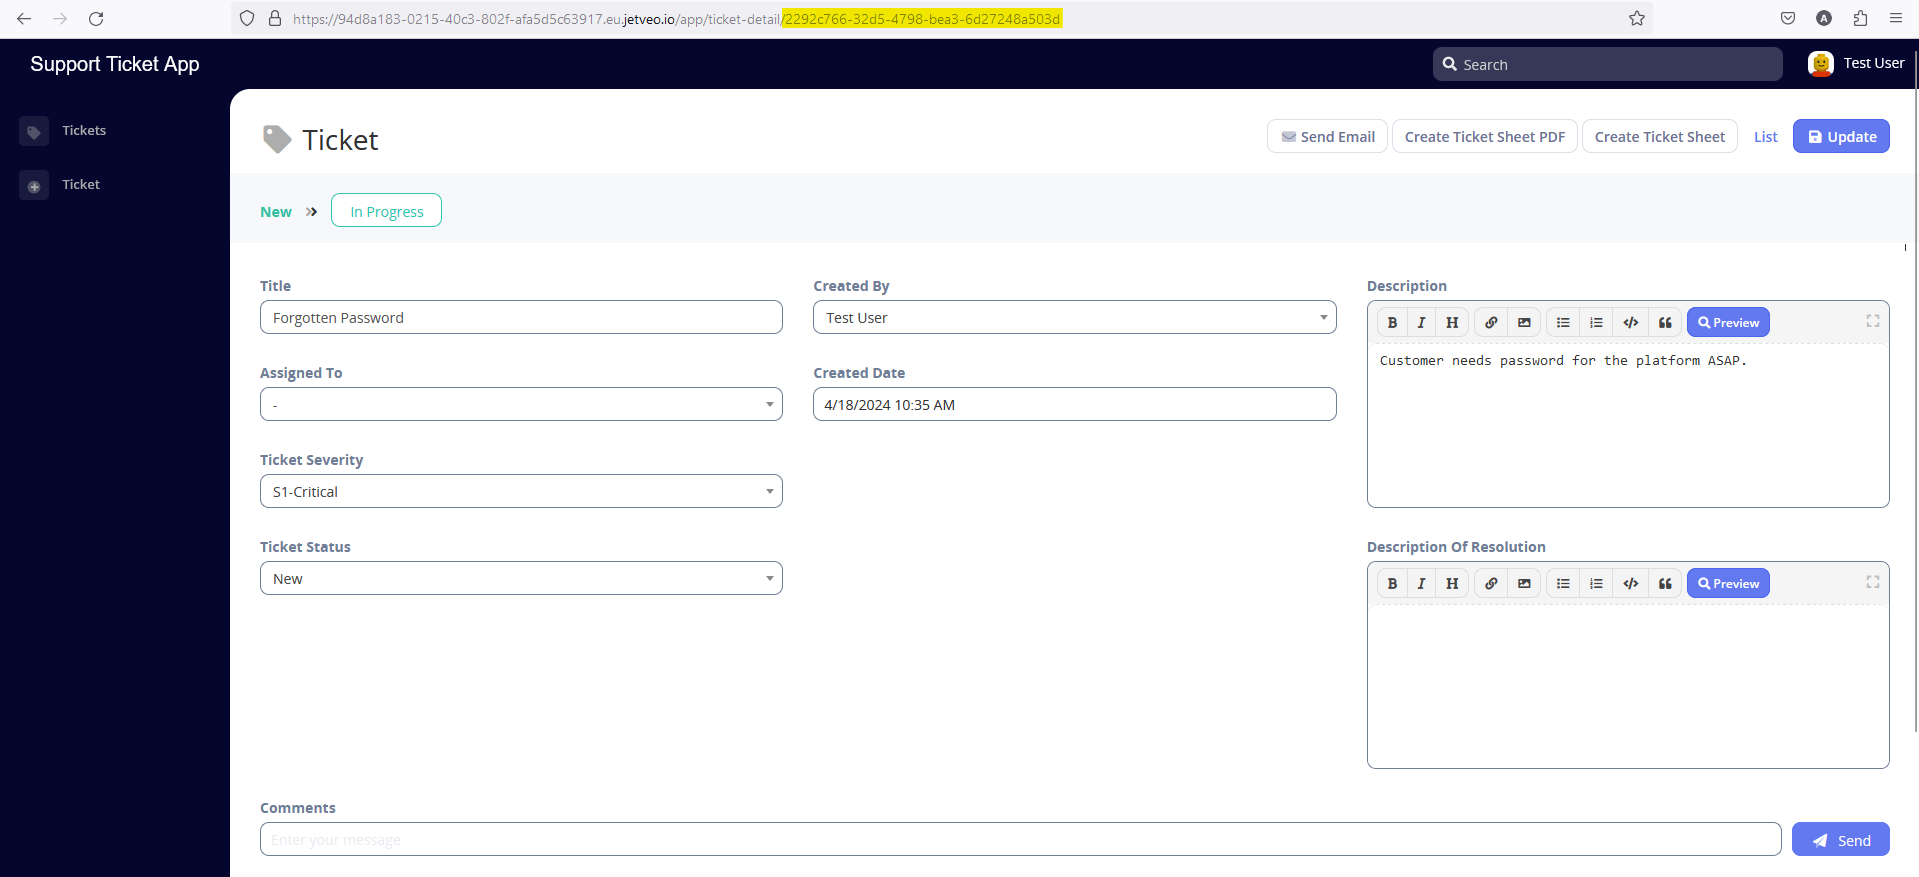
- Go back to Swagger Editor

- Click
Execute
— - Then go back to the Ticket detail page and verify that the Description has changed correctly
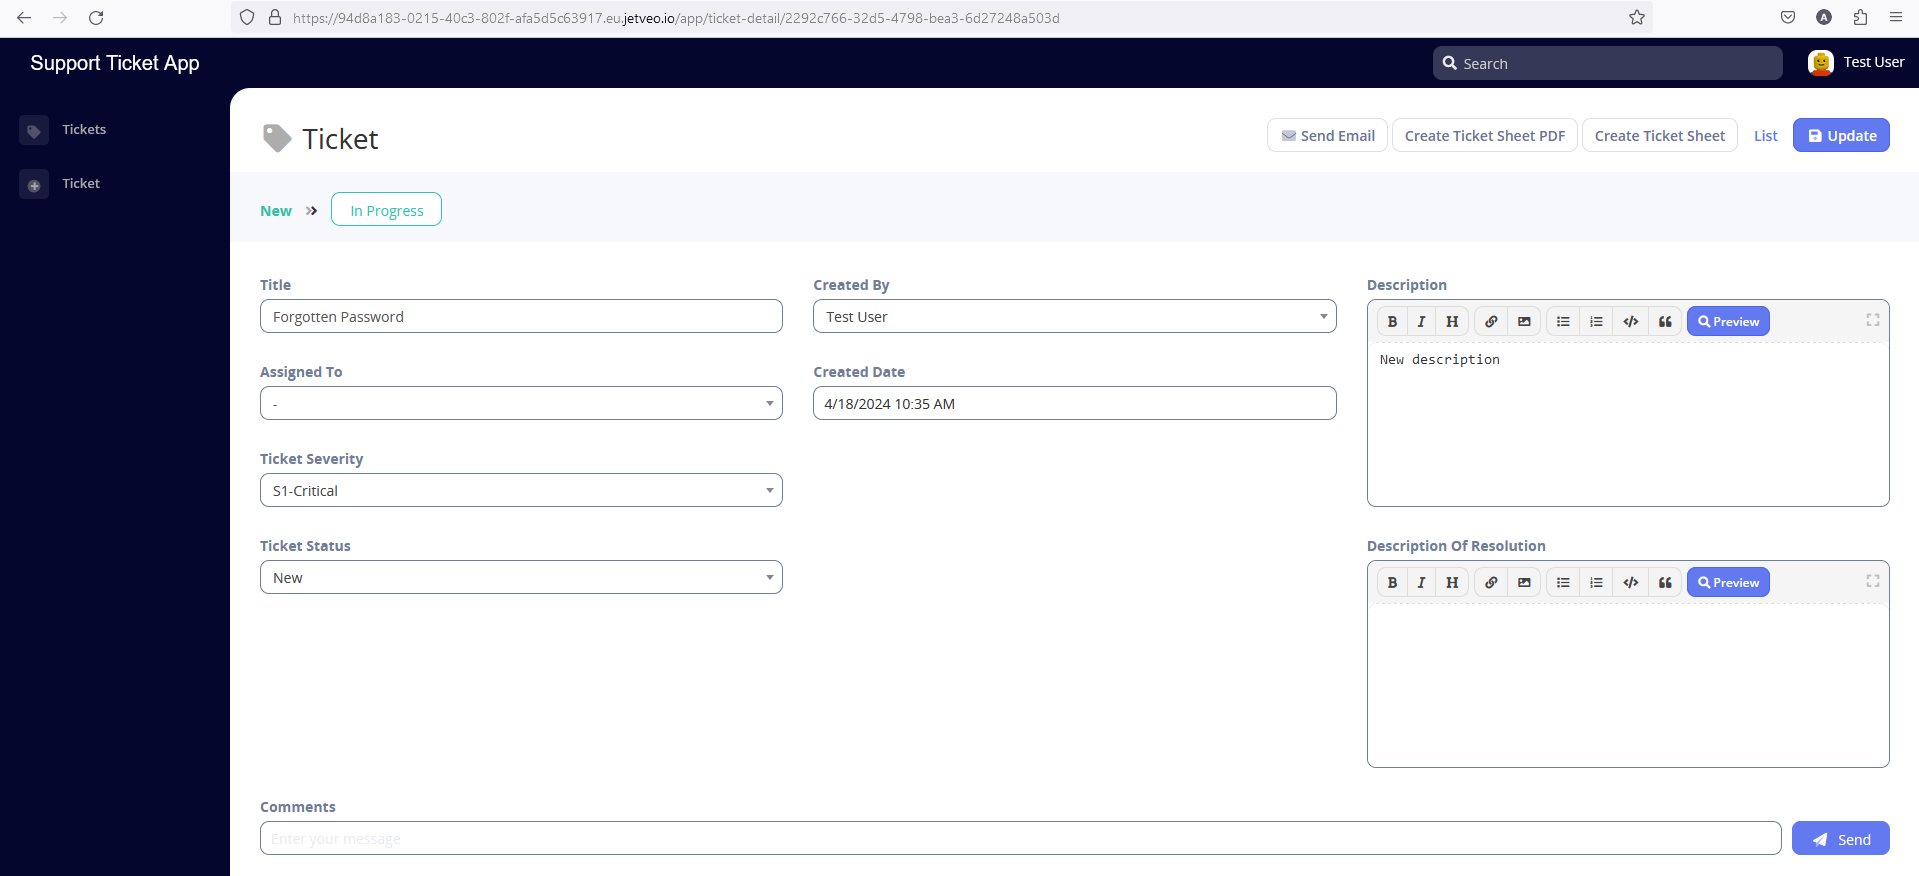
B) Get Pending Critical Tickets via API
The main difference from example A) is that in this example the Custom Command returns a Data Object.
1. Create Custom Command
- Go to Business > Commands
- Click
(+) - Set
Nameto: Get Pending Critical Tickets - Verify that
Typeis set to: Custom command - Set
Result typeto: Any - Click
Finish
— - Go to the
Codetab - Copy and paste the following code:
Click to expand the code block
(model, db, ctx) =>
{
    var tickets = db.TicketSet
            .Where(t => t.TicketSeverity == TicketSeverity.CRITICAL && t.TicketStatus != TicketStatus.CLOSED)
            .OrderBy(o => o.CreatedDate)
            .Select(t => new
            {
                Title = t.Title,
                CreatedDate = t.CreatedDate.ToShortDateString(),
                AssignedTo = t.AssignedTo.Name,
                DateInProgress = t.DateInProgress.HasValue ? t.DateInProgress.Value.ToShortDateString() : "–",
                Description = t.Description,
                Status = t.TicketStatus.Name,
            }).ToArray();

    return DataResult.CommandJson(tickets);
}
- Save Changes:
Ctrl + S
2. Establish the Command APIs
- Go to Integrations -> APIs
- Click the second
(+) - Verify that
API Typeis set to: Custom command - POST - Set
Command to be invokedto: GetPendingCriticalTickets - Verify that
Service Nameis set to: Get Pending Critical Tickets - Verify that
Authenticationis set to: API key (technical user) - Set
Allowed Technical Usersto: API User - Click
Finish
3. Establish the API Settings
- Save all tabs and
Releasethe app. - Go to the App Overview.
- Update the instance you want to connect.
If you already have an API Key generated, you can skip the following steps.
- Go to instance
Settings. Select theAPItab. - In the Actions column, click
+ Generate key. The API Key will look something like this: 9lCiYDT5SU9EfynBCIC769Vi4Ip7x0Kn - Click
Save
4. Download API SDK
- Go to the App Overview
- Click
More - Click
Download API SDK - ZIP file with API SDK is downloaded
5. Run the API Command
- Extract the downloaded ZIP file
- Open the file called openapi3.json e.g. in VS Code
- Copy the contents of this file and paste it to this editor: https://editor.swagger.io/
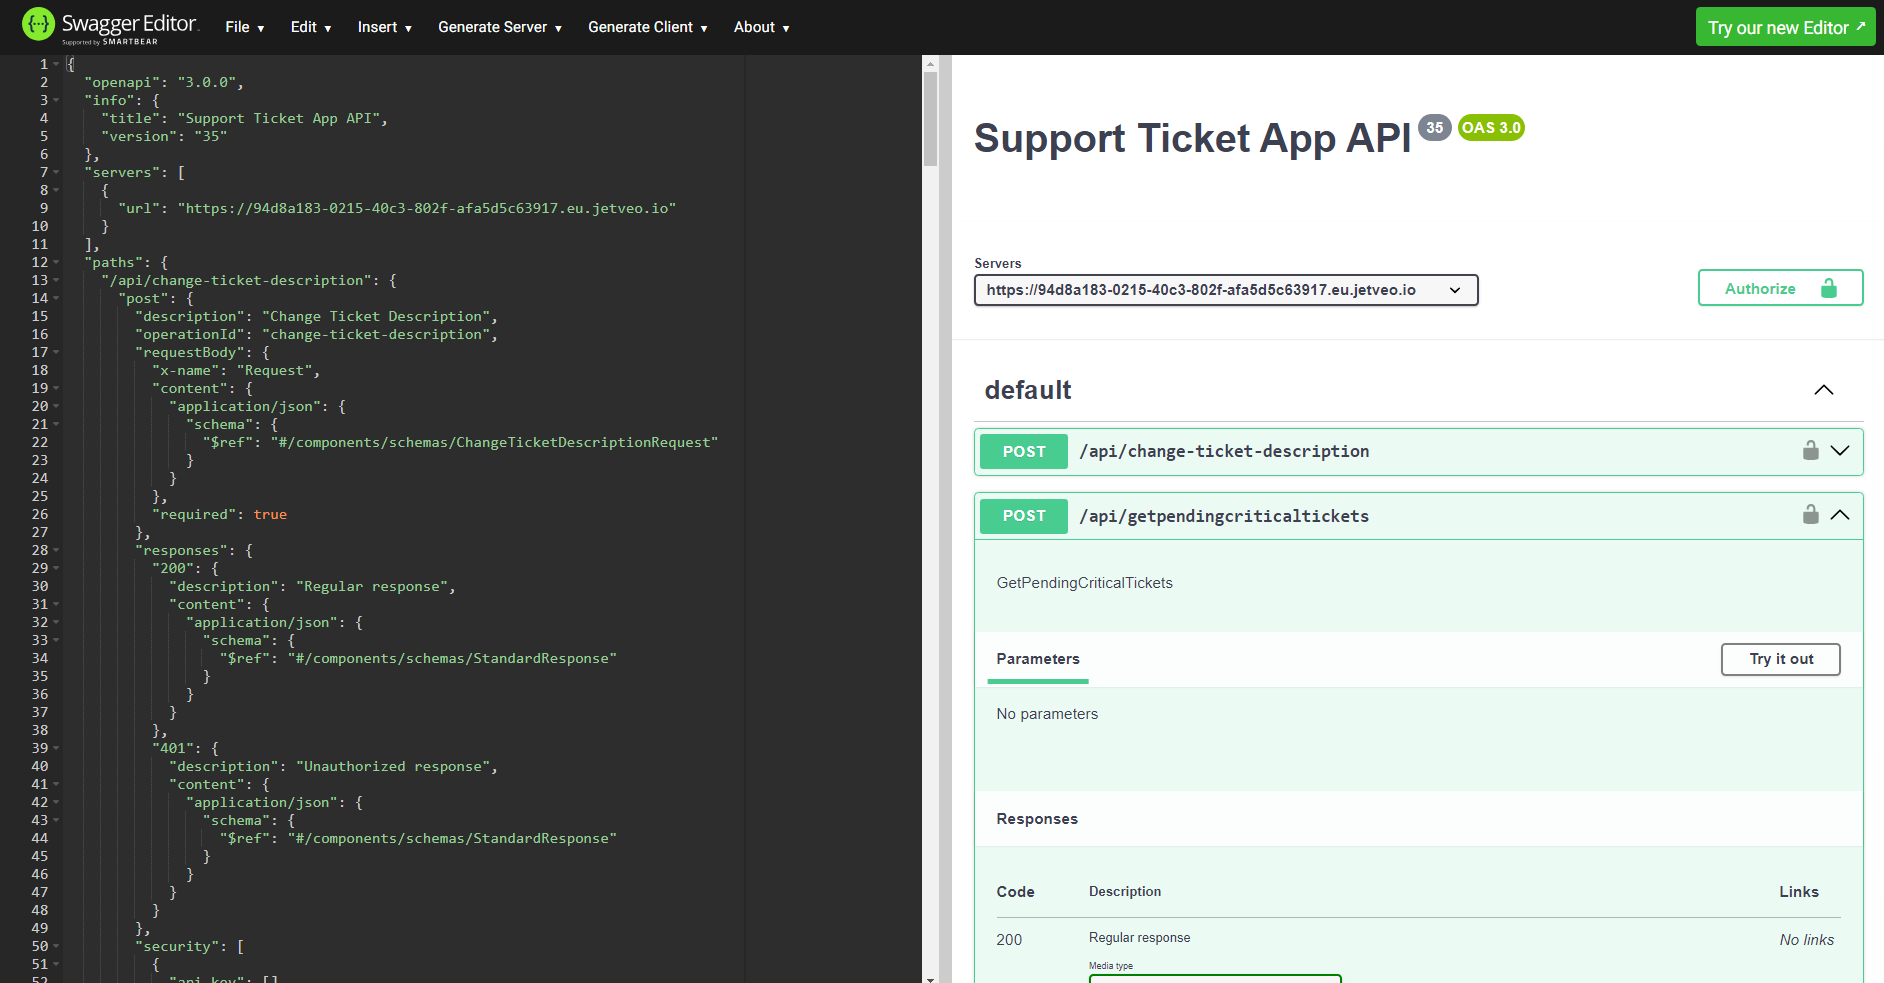
- Click
Authorizeon the right
- Set
Valueof api_key to the API Key value from the instance settings - Click
Authorize - Click
Close
— - Click
Try it out - Click
Execute
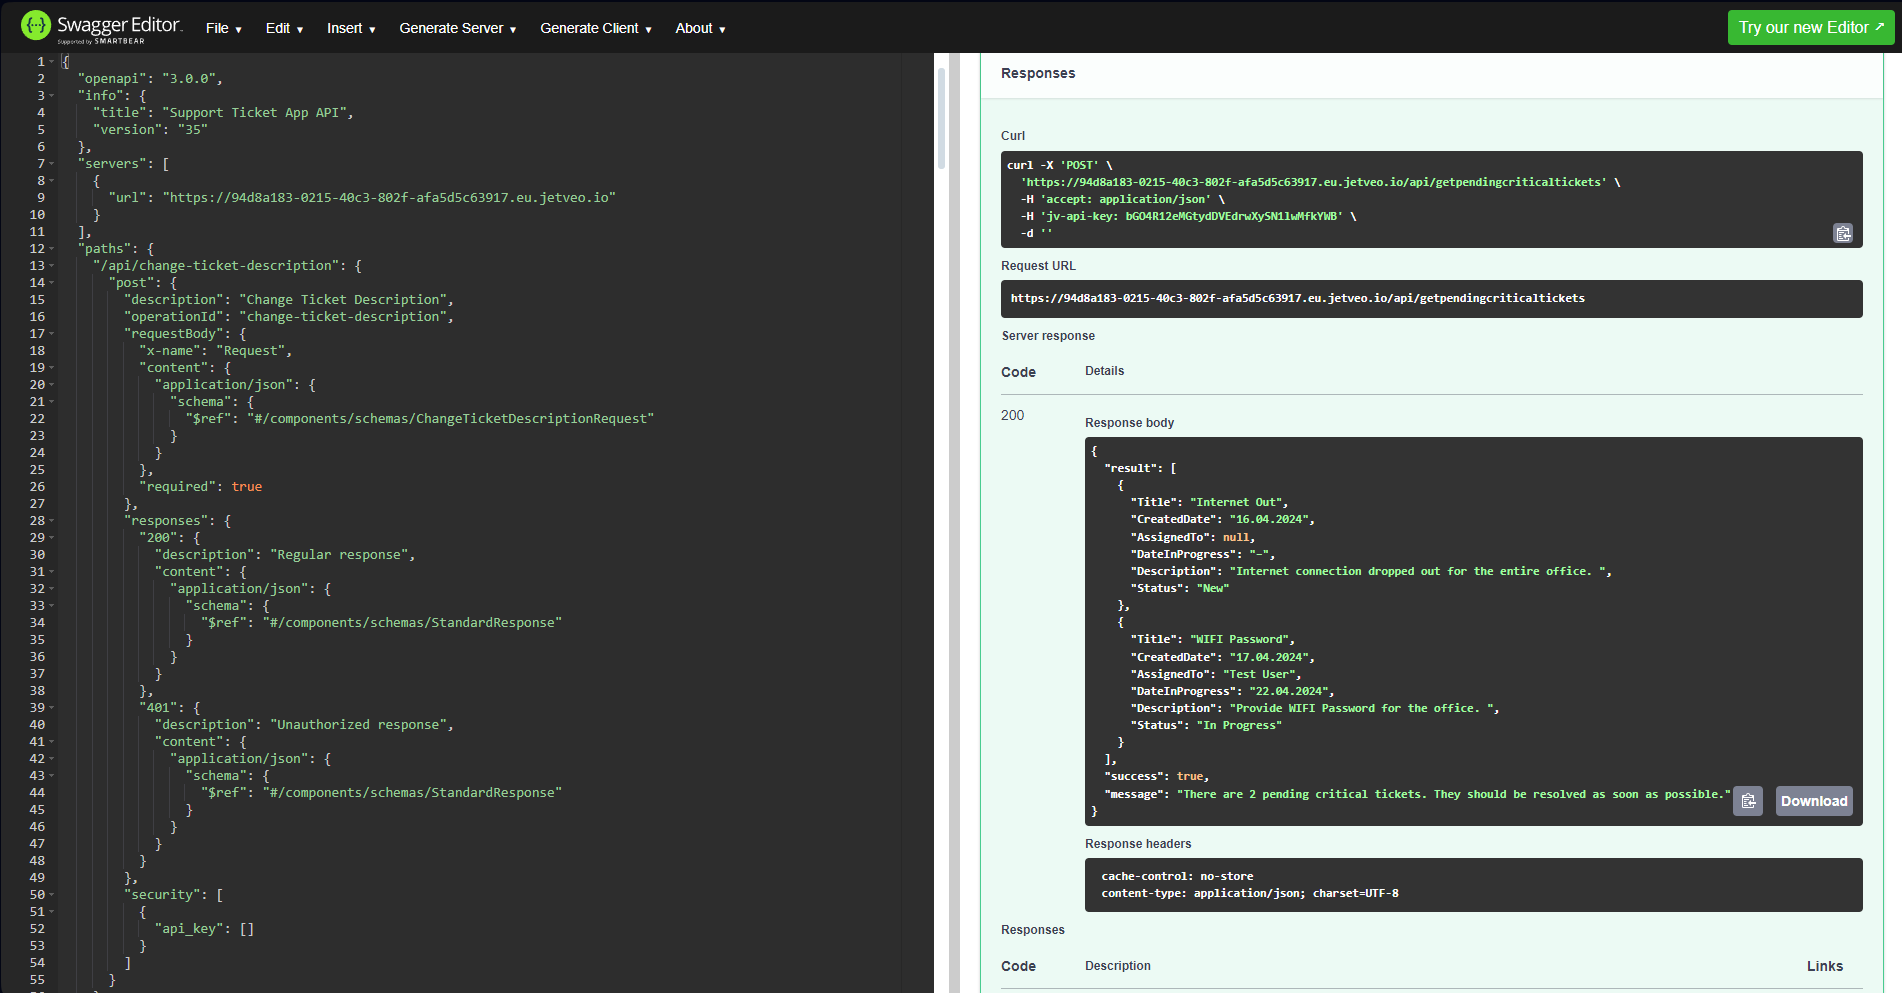
- See the Response body