(8) Workflows
- Support Ticket Tutorial -
Establish a System for Resolving Support Tickets
The foundation version of the Support Ticket app can only create and edit tickets. This Advanced Topic tutorial will add a mechanism to see the progress of a ticket from its creation to its resolution.
1. Define Ticket Status Codebook
- Type
Ctrl + Shift + C; click Codebook - Set
Nameto: Ticket Status - Verify that
Create Display Attributeis set to: Name
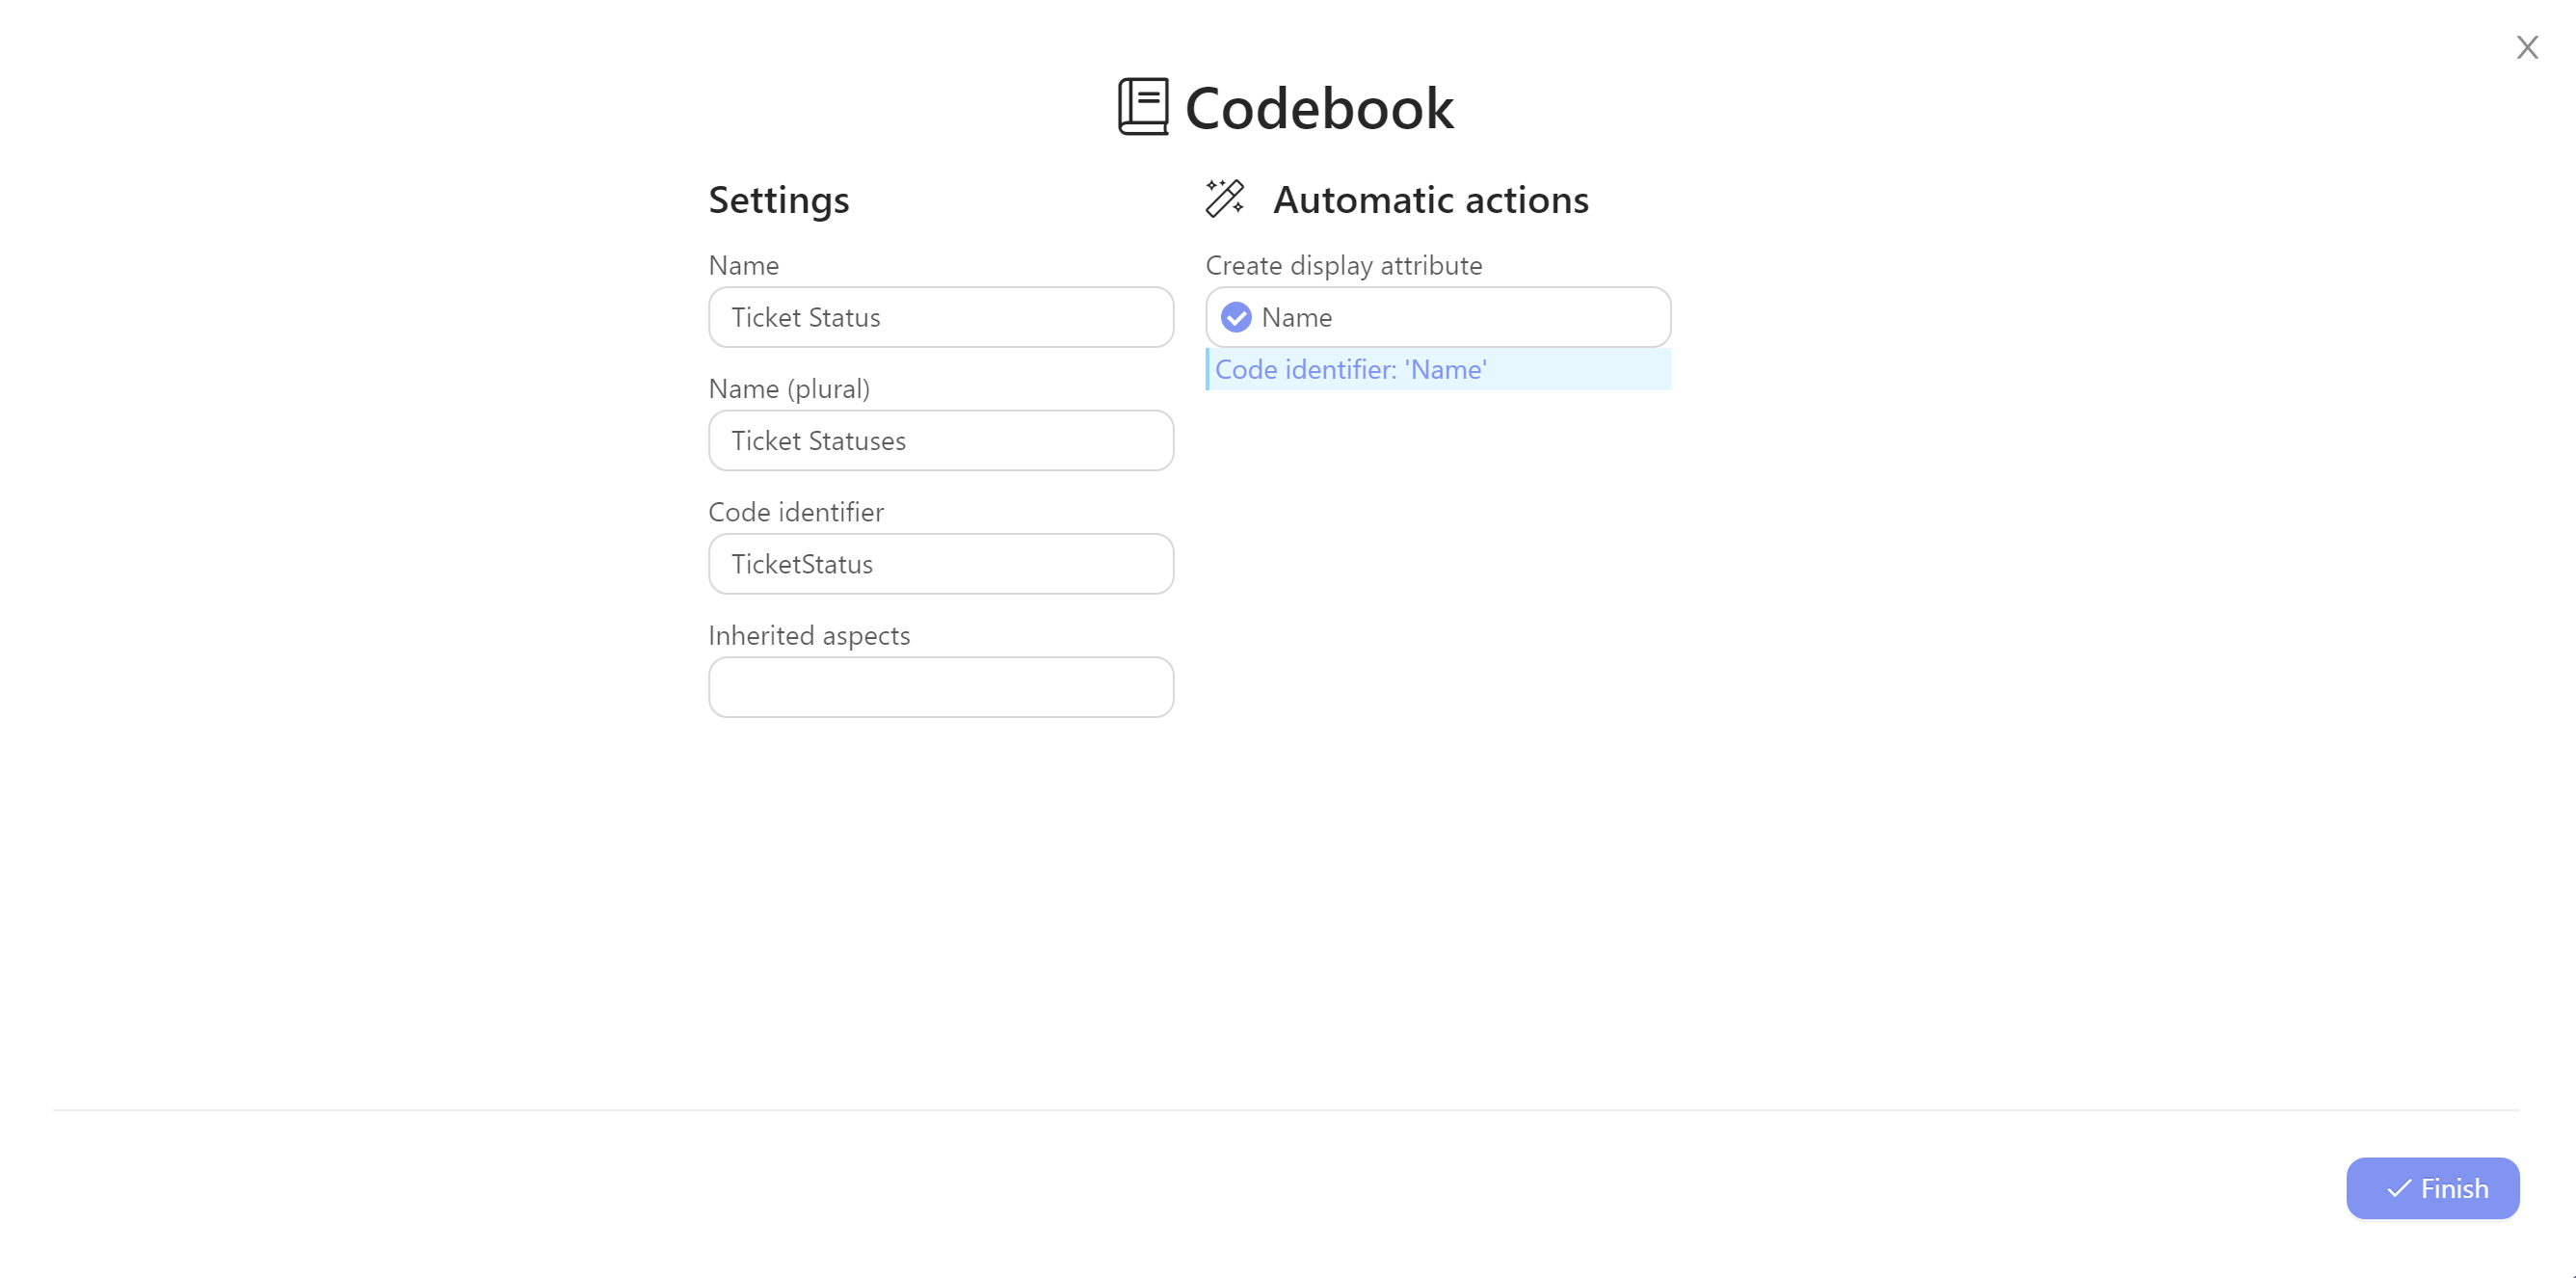
- Click
Finish
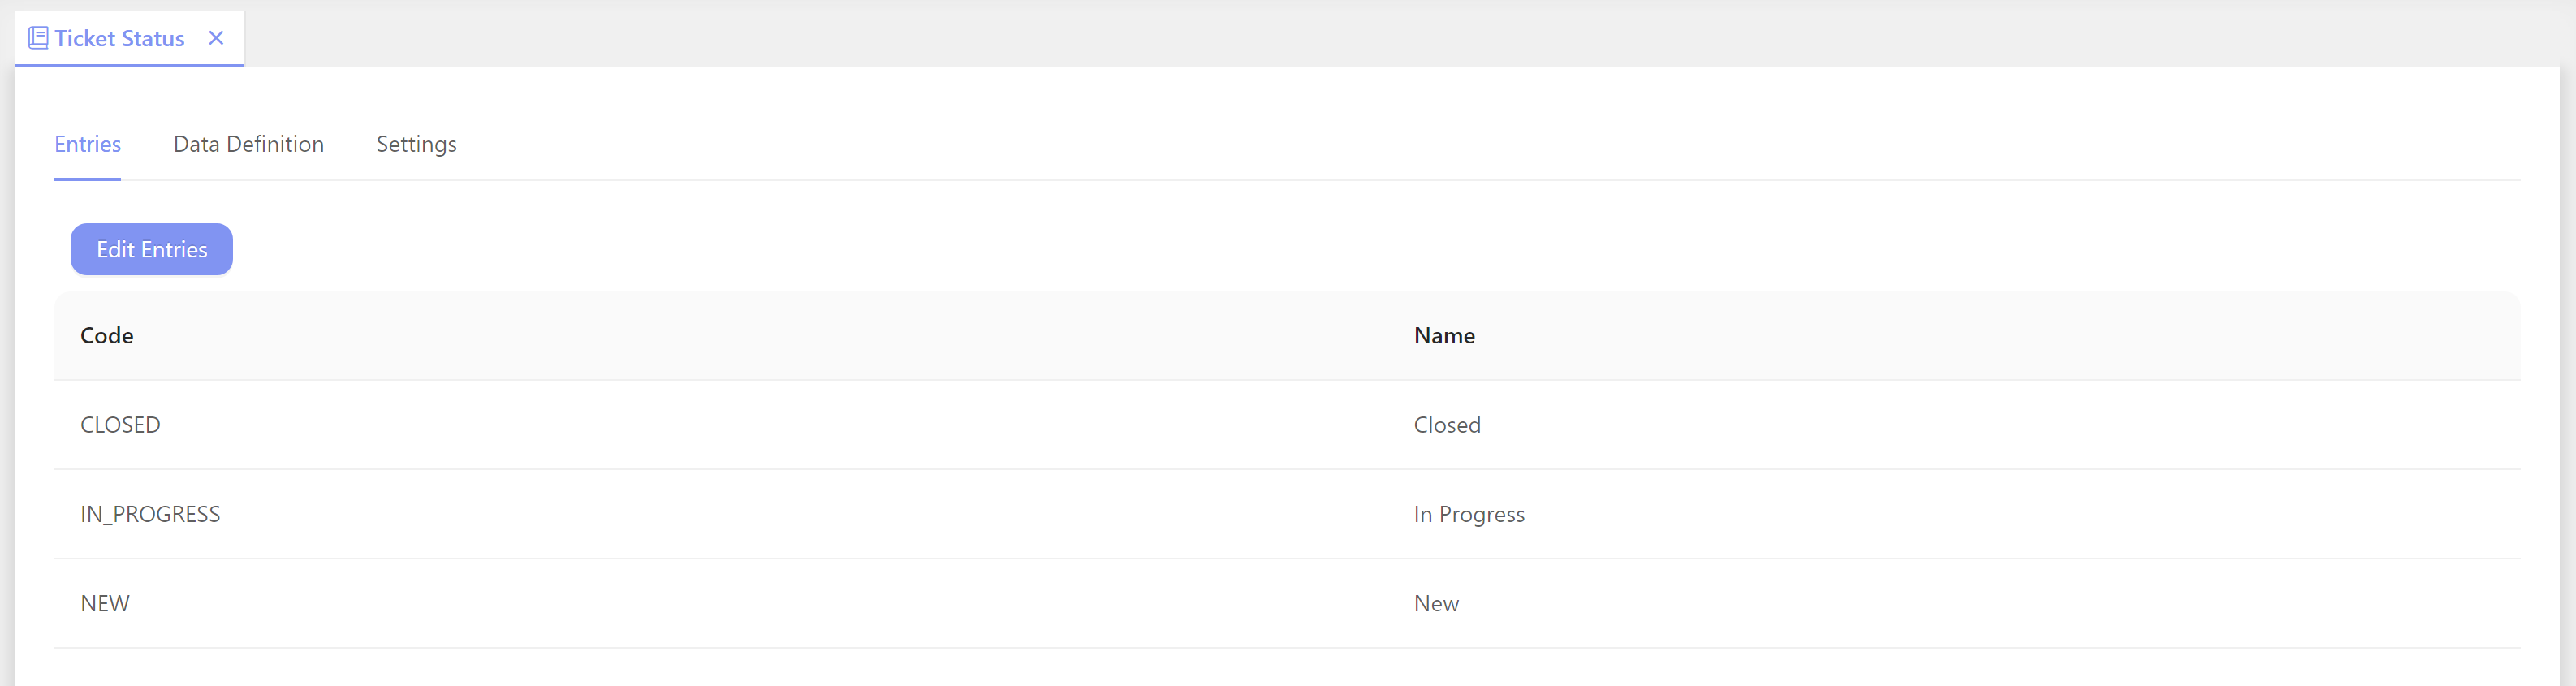
**— ** - On the Ticket Status codebook, click
Edit Entries - Copy and paste the entries from the table below (without table headers)
| Code | Name |
|---|---|
| NEW | New |
| IN_PROGRESS | In Progress |
| CLOSED | Closed |
- Click
OK - Save changes:
Ctrl + S
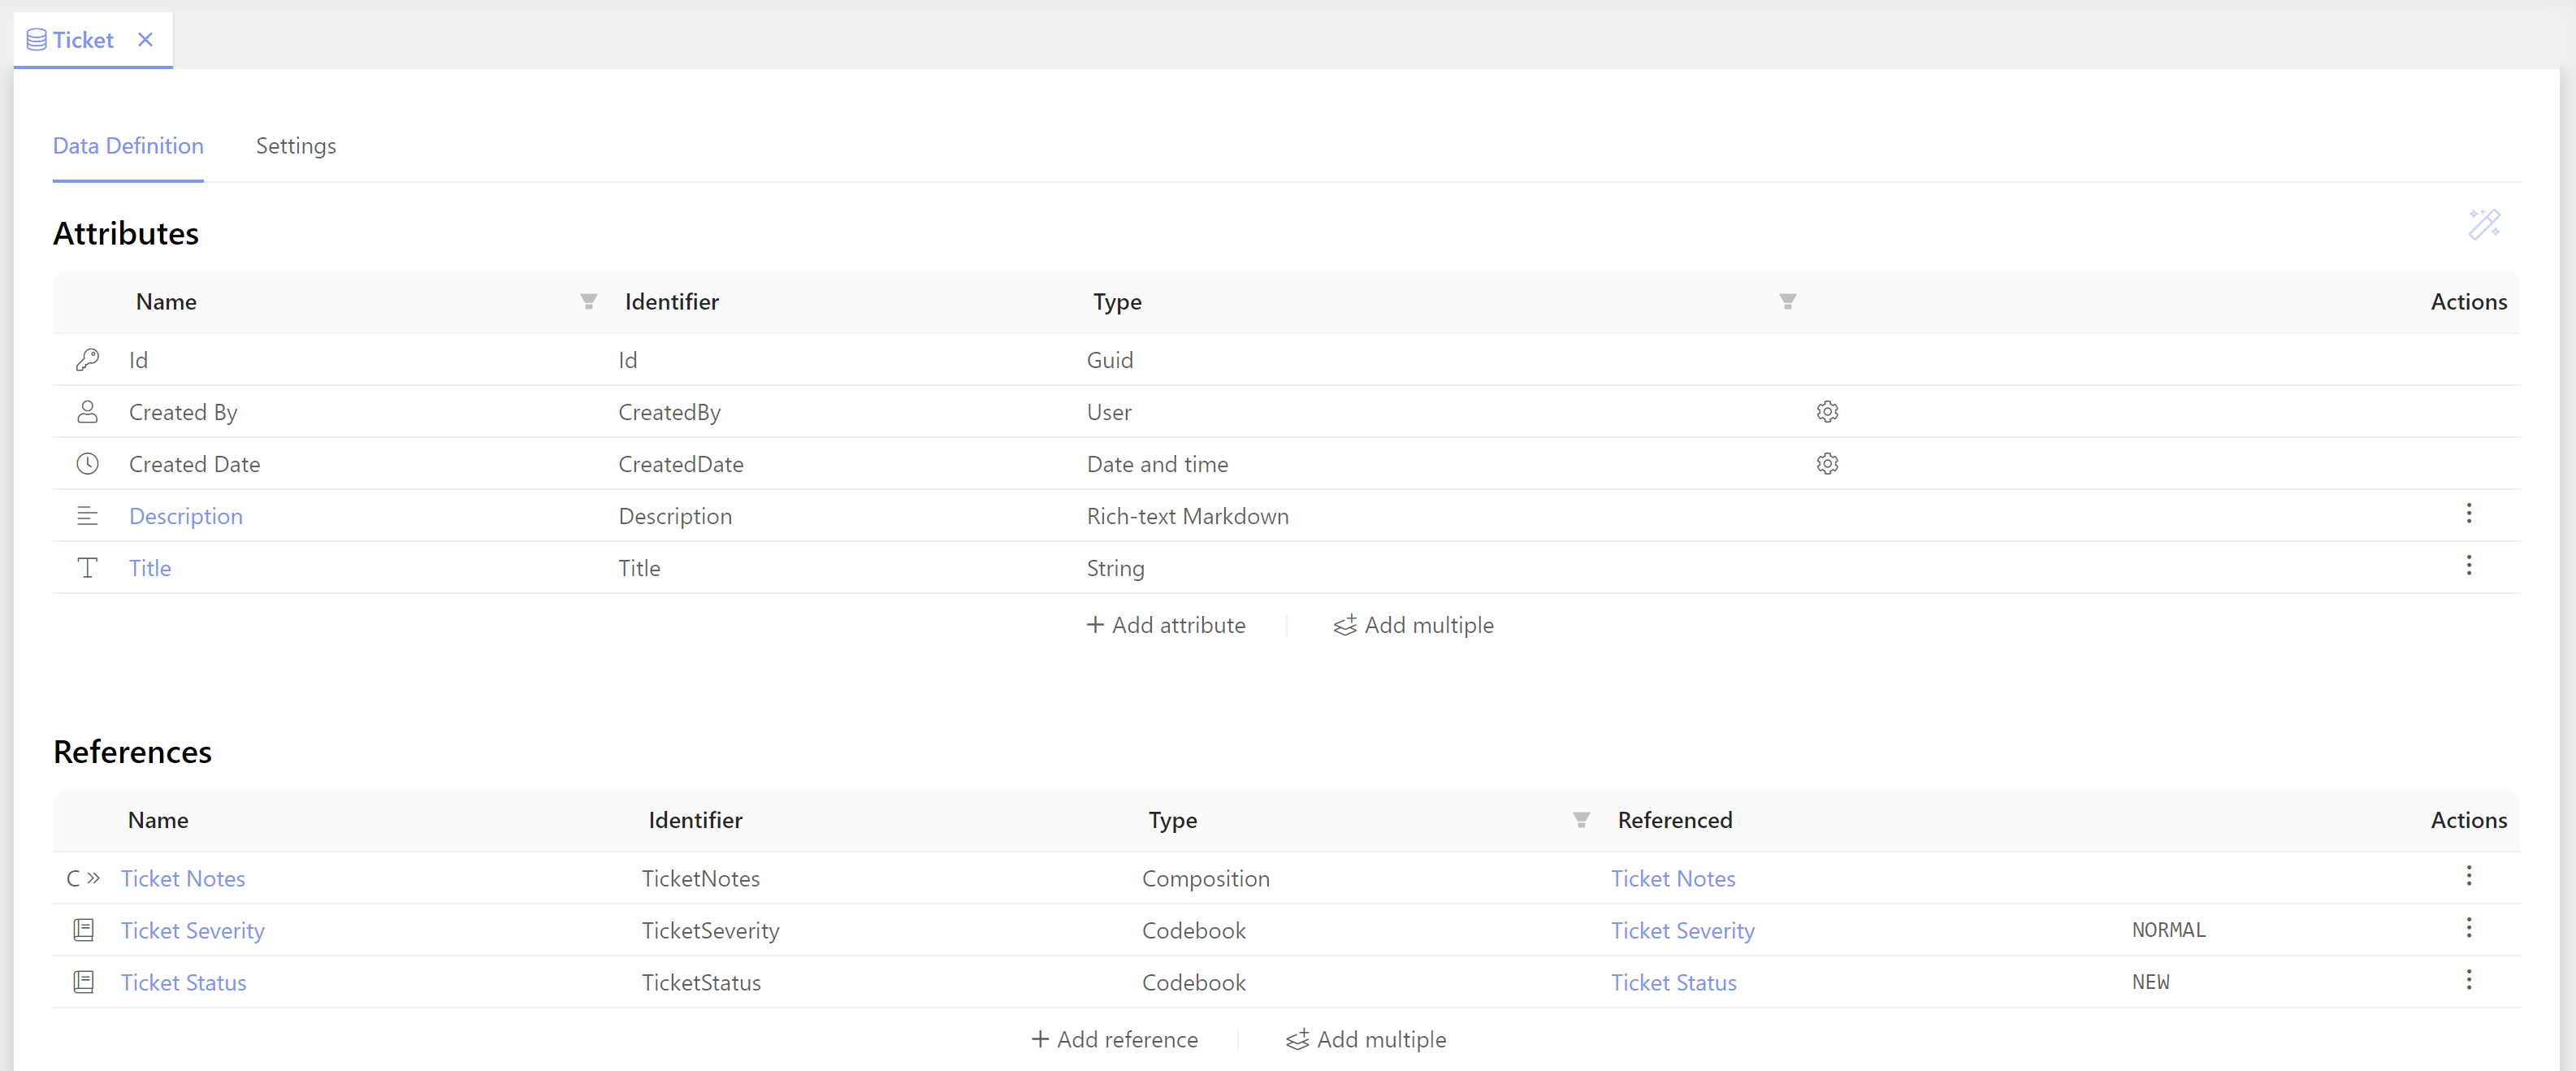
2. Update your Ticket Entity
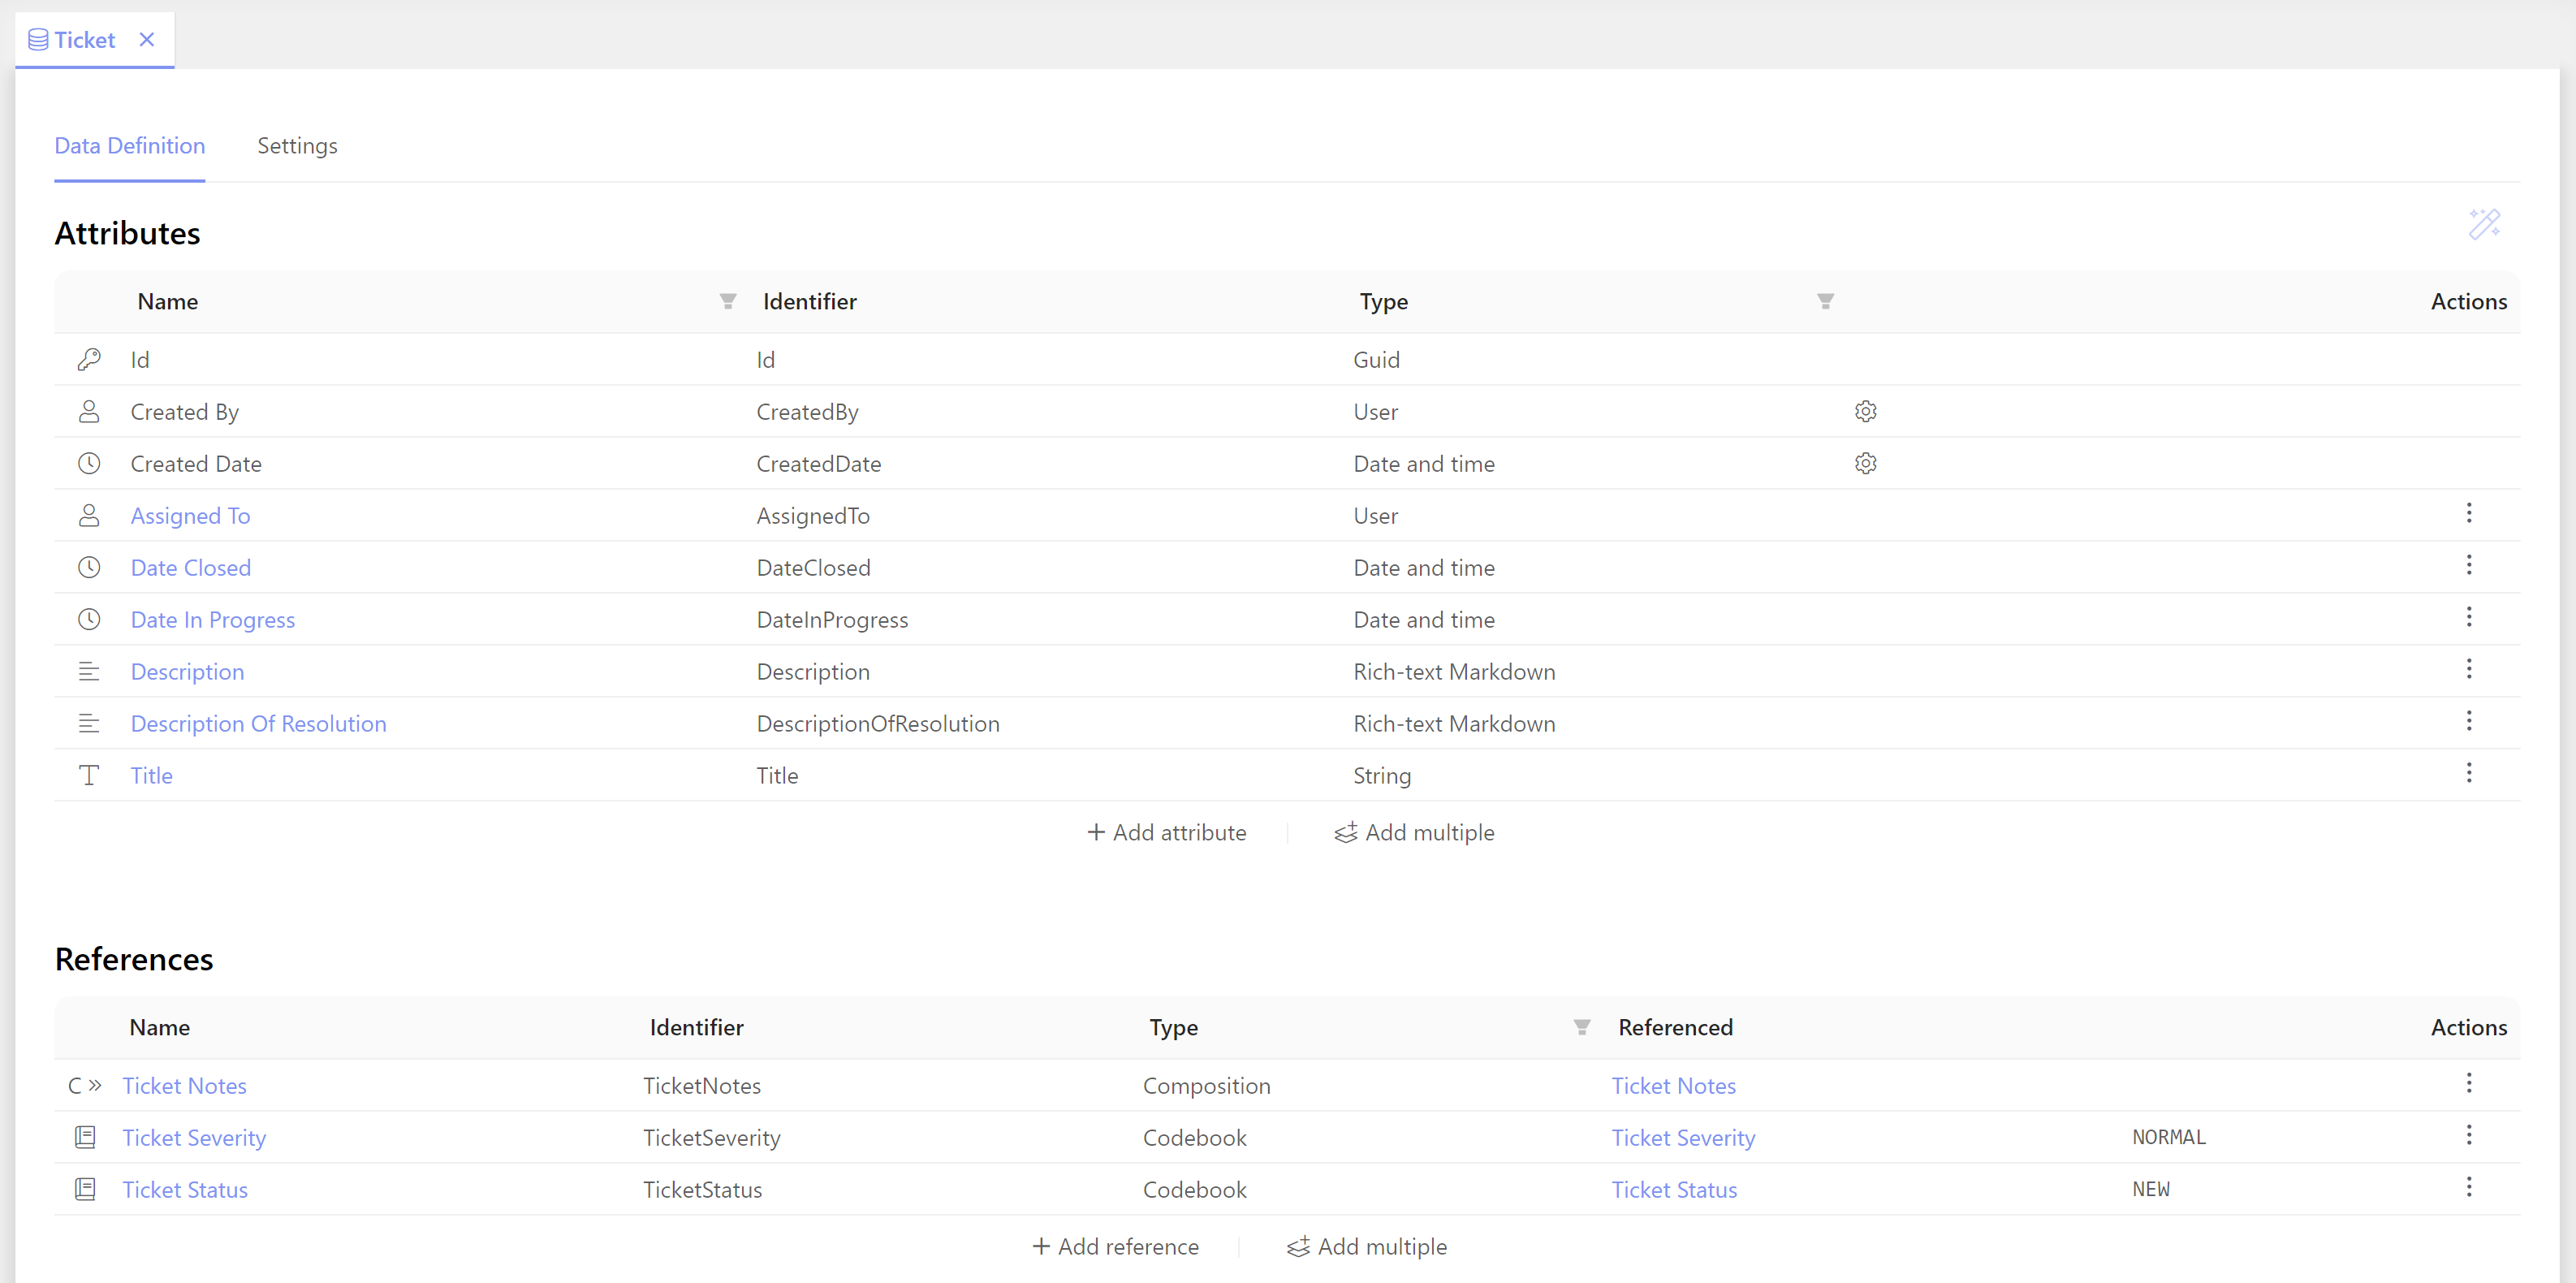
- Go to Data > Entities and double-click Ticket
- In Data Definition > References, click
Add Reference - Set
Nameto: Ticket Status - Set
Typeto: Codebook - Set
Referencedto: TicketStatus - Set
Please select default valuesto: NEW - Click
Save
—
- In Data Definition > Attributes, click
Add multiple - Set the following new attributes (i.e., Attribute name — Type):
Date In Progress – Date and Time (mark Allow null)
Date Closed – Date and Time (mark Allow null)
Assigned To – User
Description Of Resolution – Rich-text Markdown
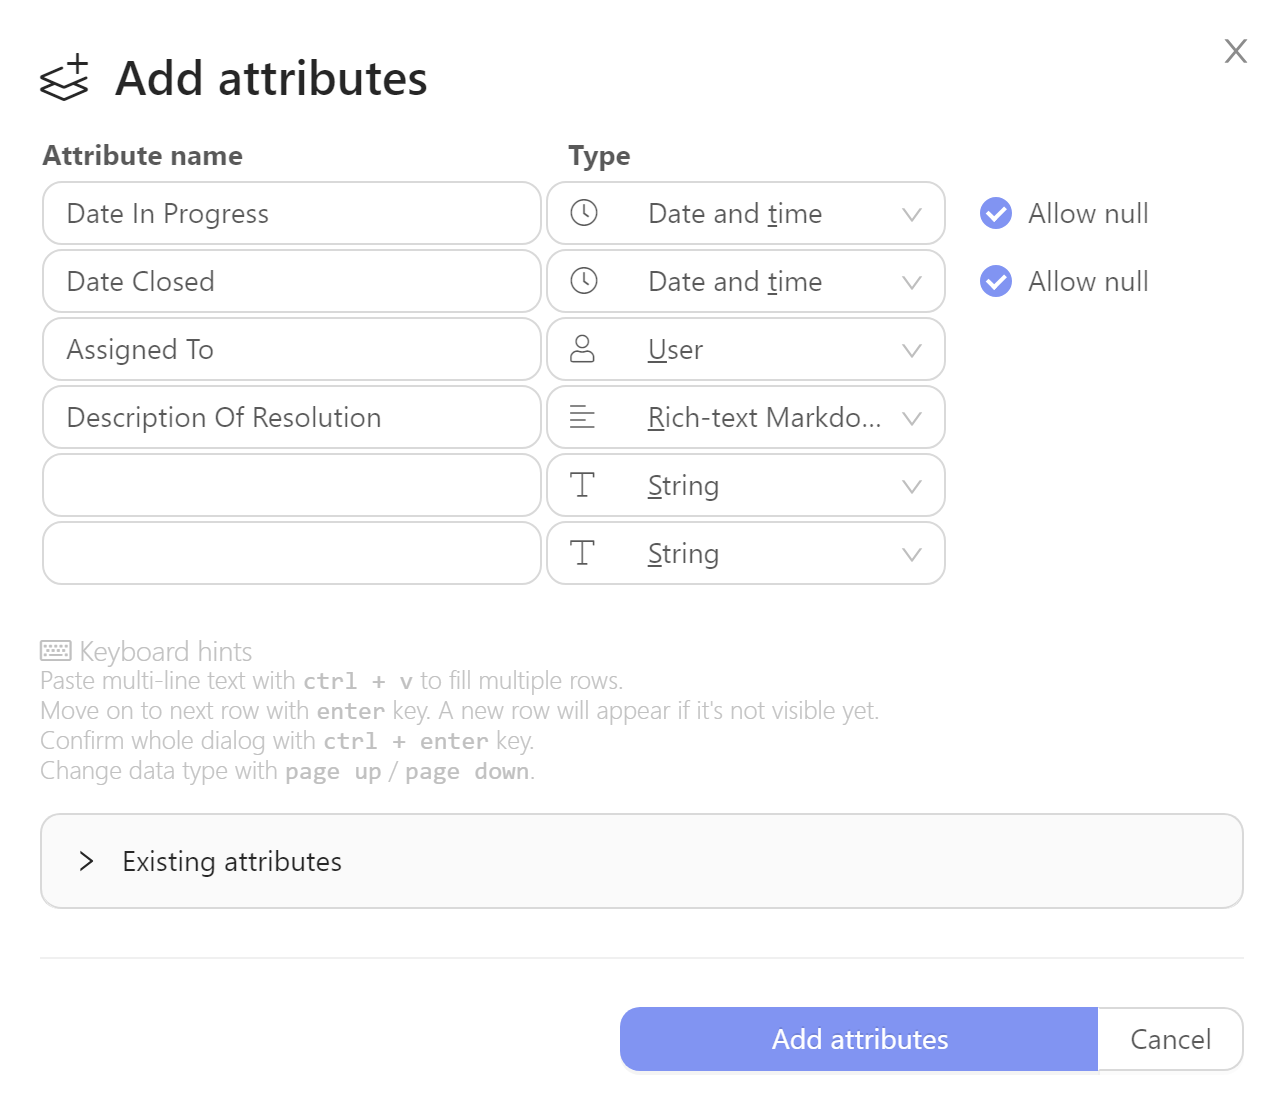
- Click
Add Attributes - Save changes:
Ctrl + S
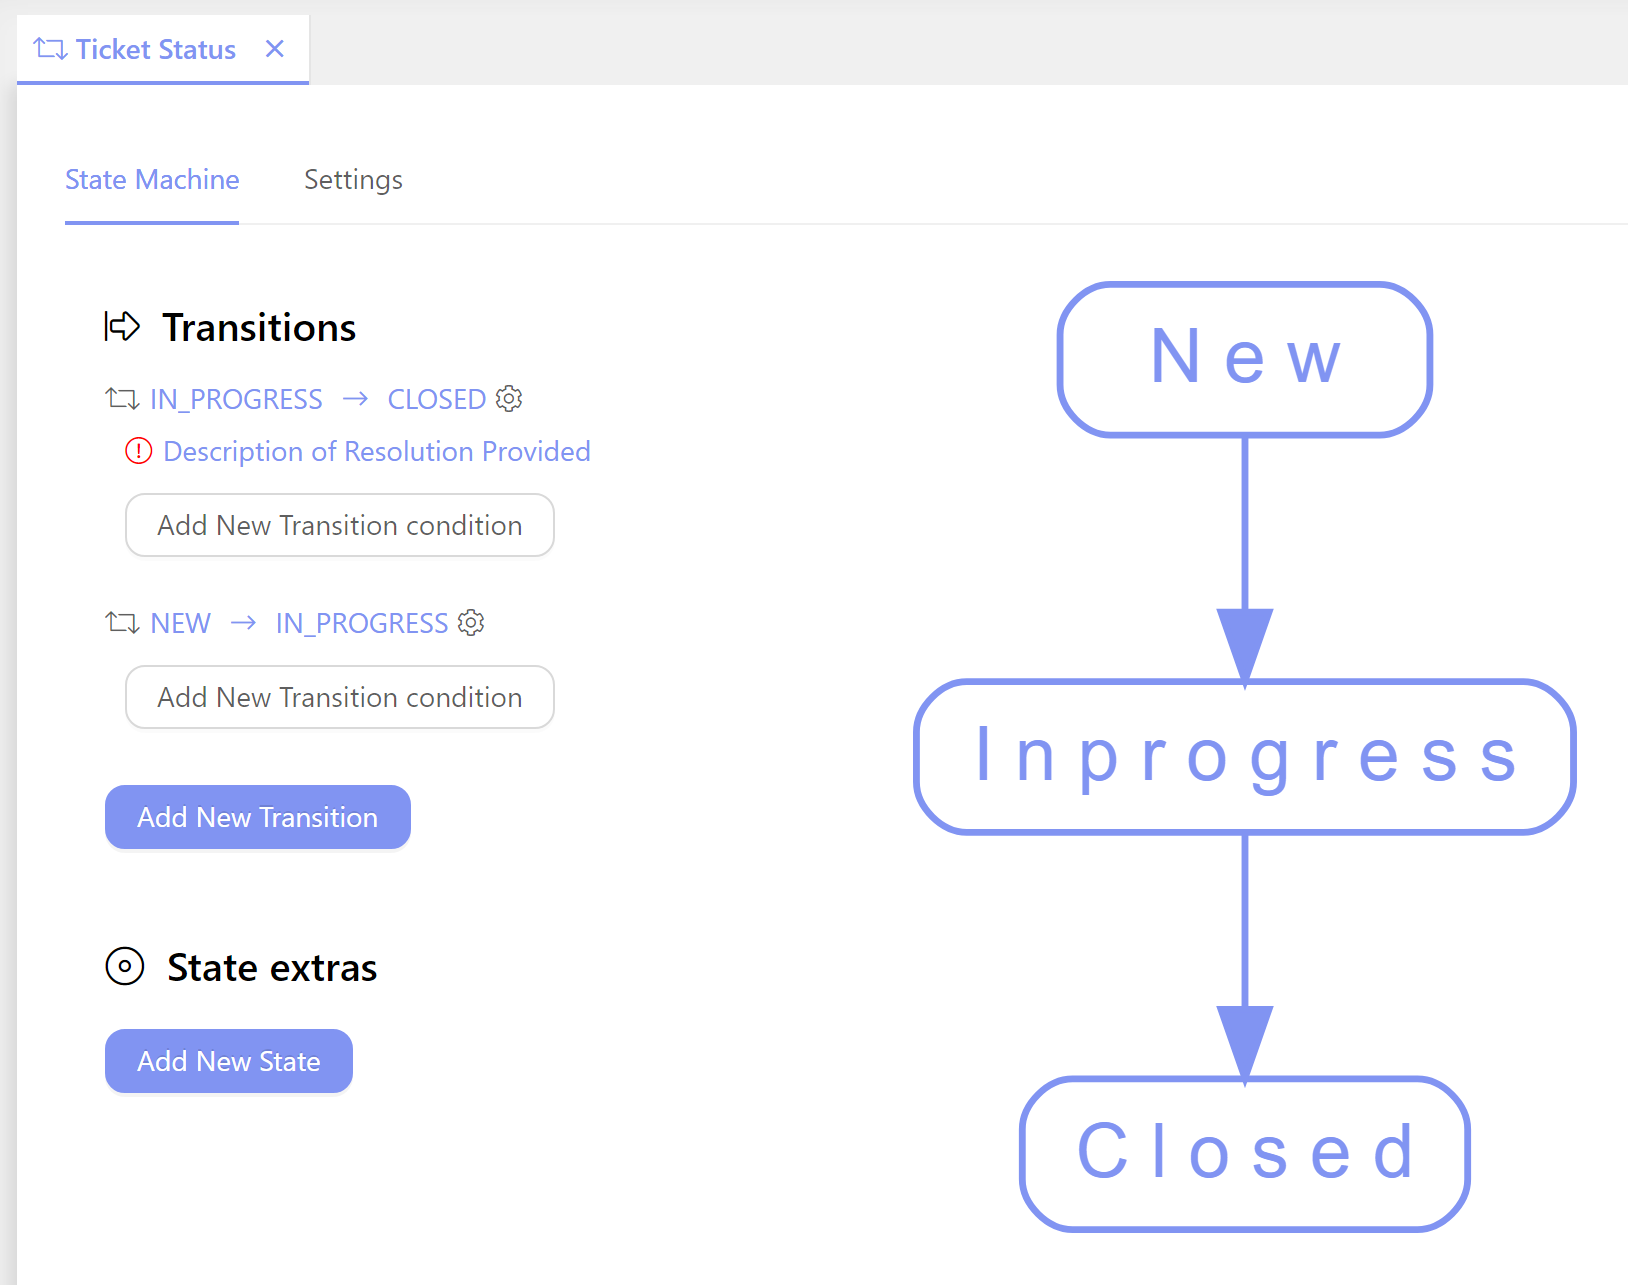
3. Add Workflow
State machines represent workflow transitions and conditions.
- Go to Business > State Machines, click
(+)OR ClickCtrl + Shift + Cand, in the Business section, click State Machine - Set
Nameto: Ticket Status - Set
Entityto: Ticket - Set
Codebook Representing Statesto: TicketStatus
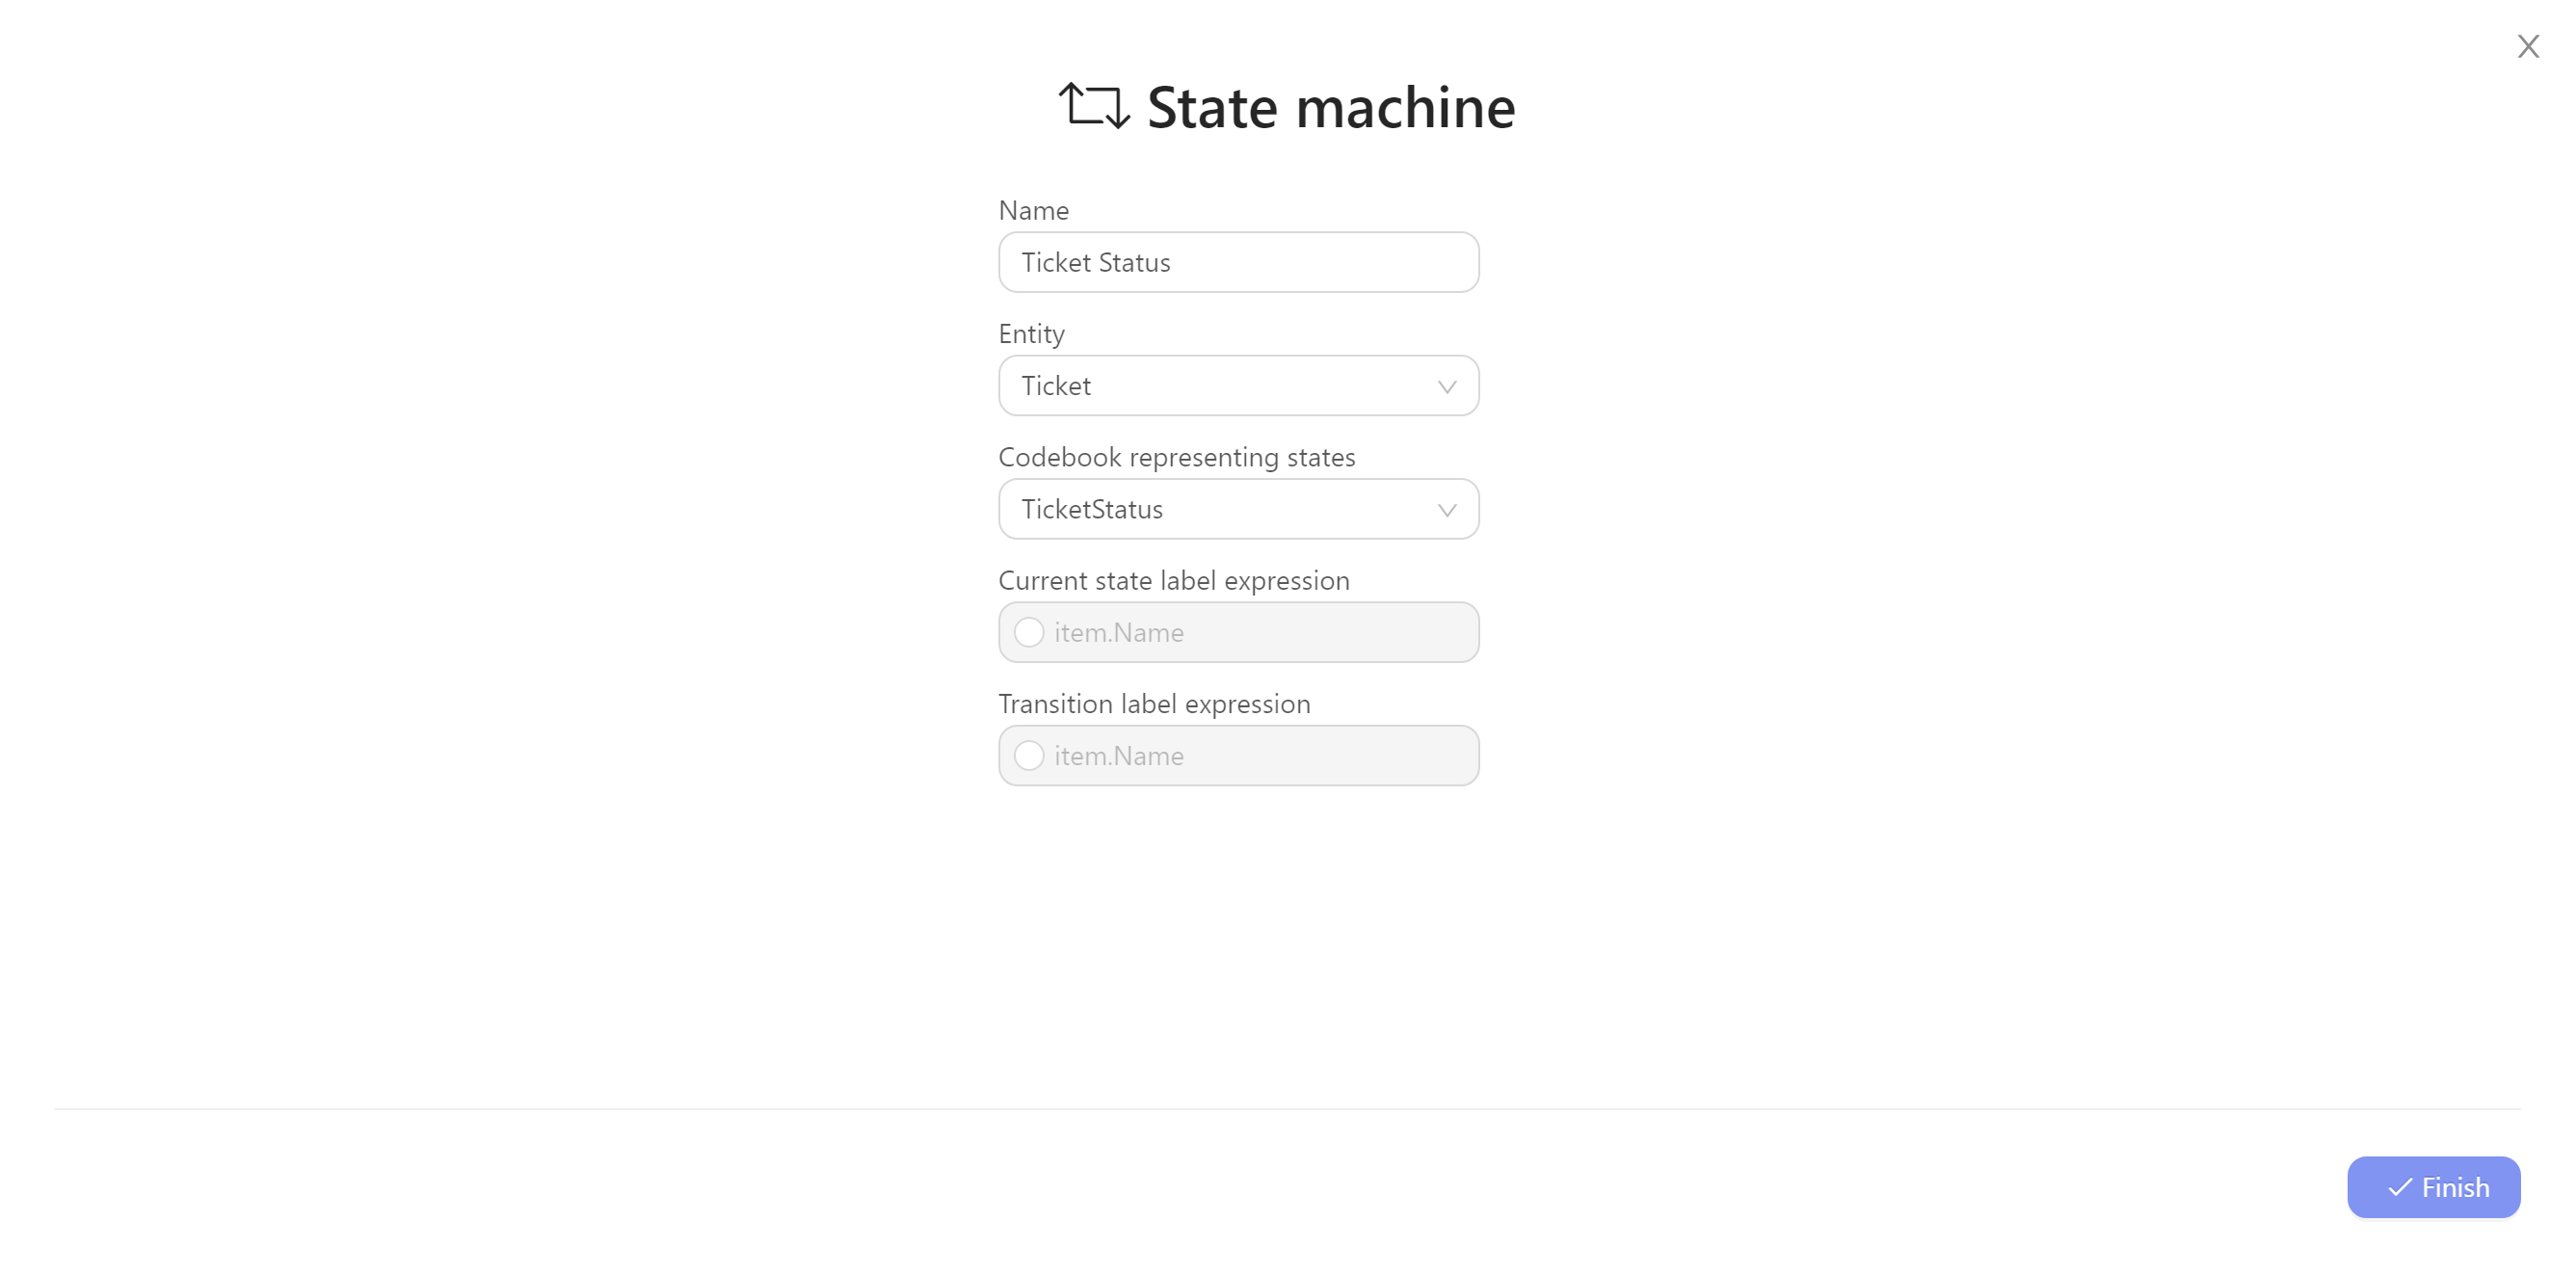
- Click
Finish
4. Add Transitions
In the Ticket Status state machine,
- Click
Add New Transition - Set
Origin Stateto NEW. - Set
Destination Stateto IN_PROGRESS - Mark
Transition Handler. Click in the box. Copy and paste:- It sets the Date In Progress of the Ticket to the current date and time when the transition from NEW to IN_PROGRESS is completed
(ticket, db, ctx) =>
{
    ticket.DateInProgress = DateTime.Now;
}
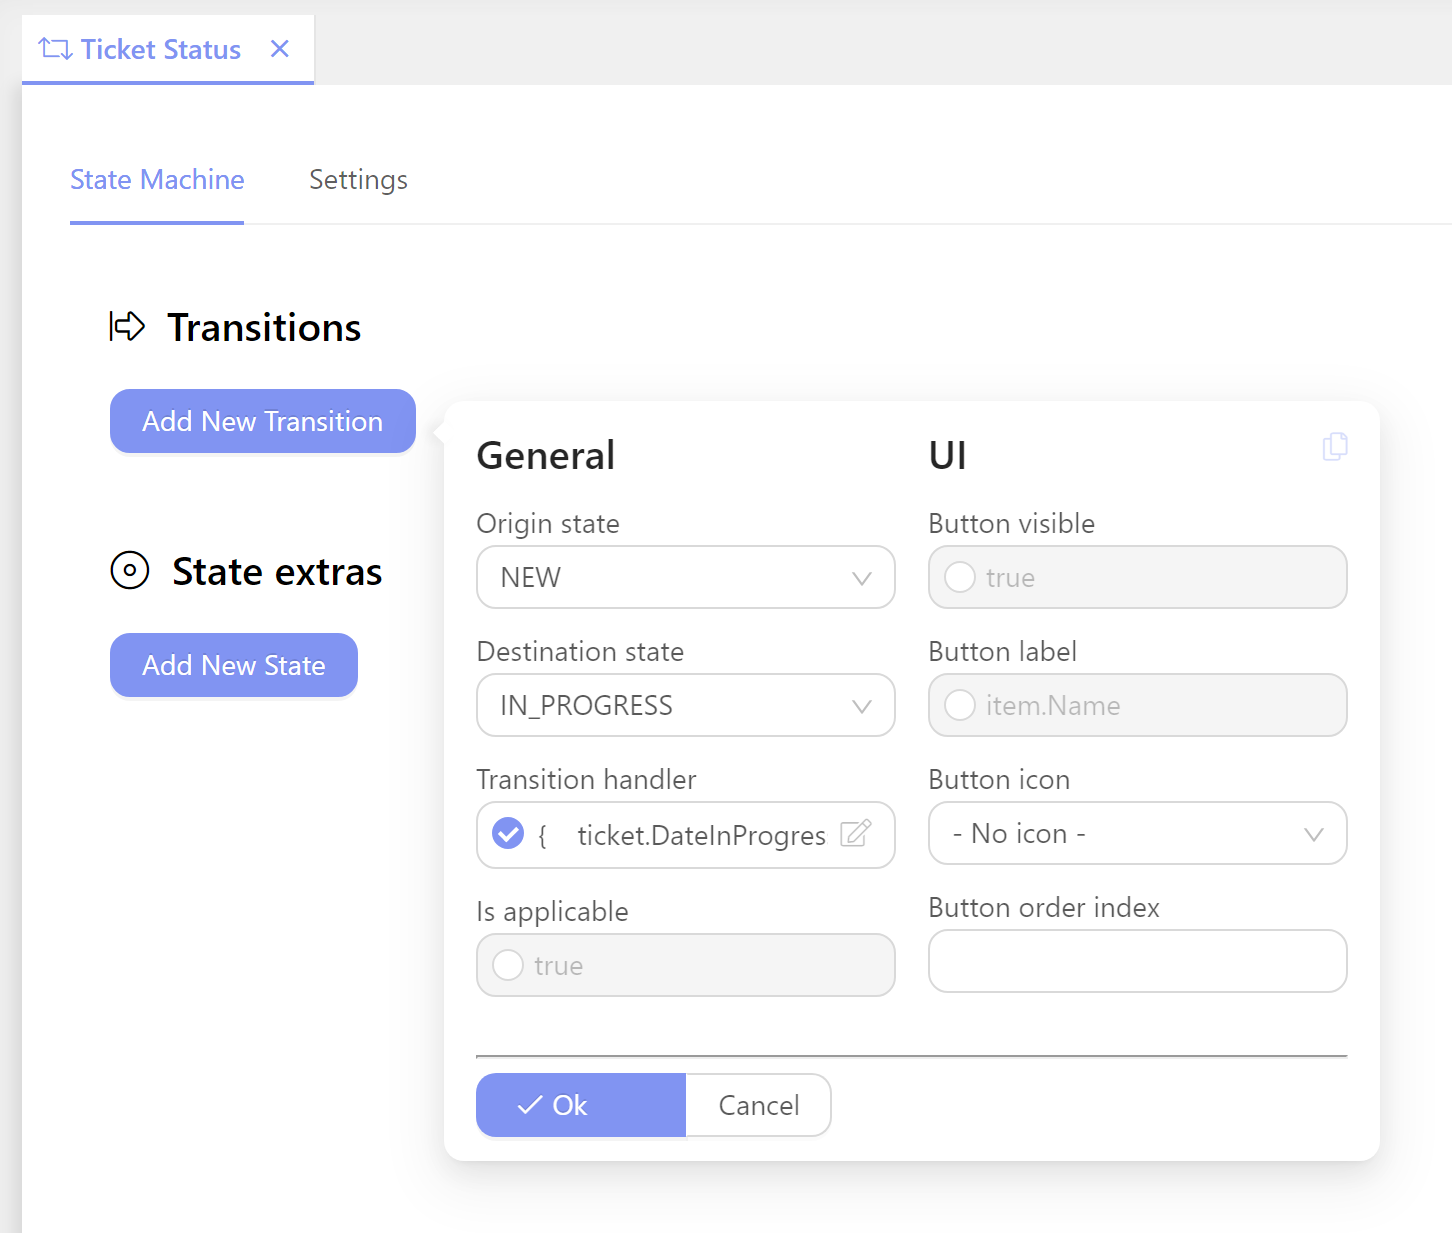
- Click
OK
—
Follow the same steps to establish each additional transition.
- Click
Add New Transition - Set
Origin Stateto: IN_PROGRESS. - Set
Destination Stateto: CLOSED - Mark
Transition Handler. Copy and paste:- It sets the Date Closed of the Ticket to the current date and time when the transition from IN_PROGRESS to CLOSED is completed
(ticket, db, ctx) =>
{
    ticket.DateClosed = DateTime.Now;
}
- Click
OK
—
Only a ticket with a Description of Resolution can be closed. Under the IN_PROGRESS->CLOSED transition, clickAdd New Transition Condition - Set
Title of Conditionto Description of Resolution Provided - Verify that
Severityis set to: Error - Click in the
Conditionbox. Copy and paste:
(ticket, db, ctx) => !string.IsNullOrEmpty(ticket.DescriptionOfResolution)
- Click
OK
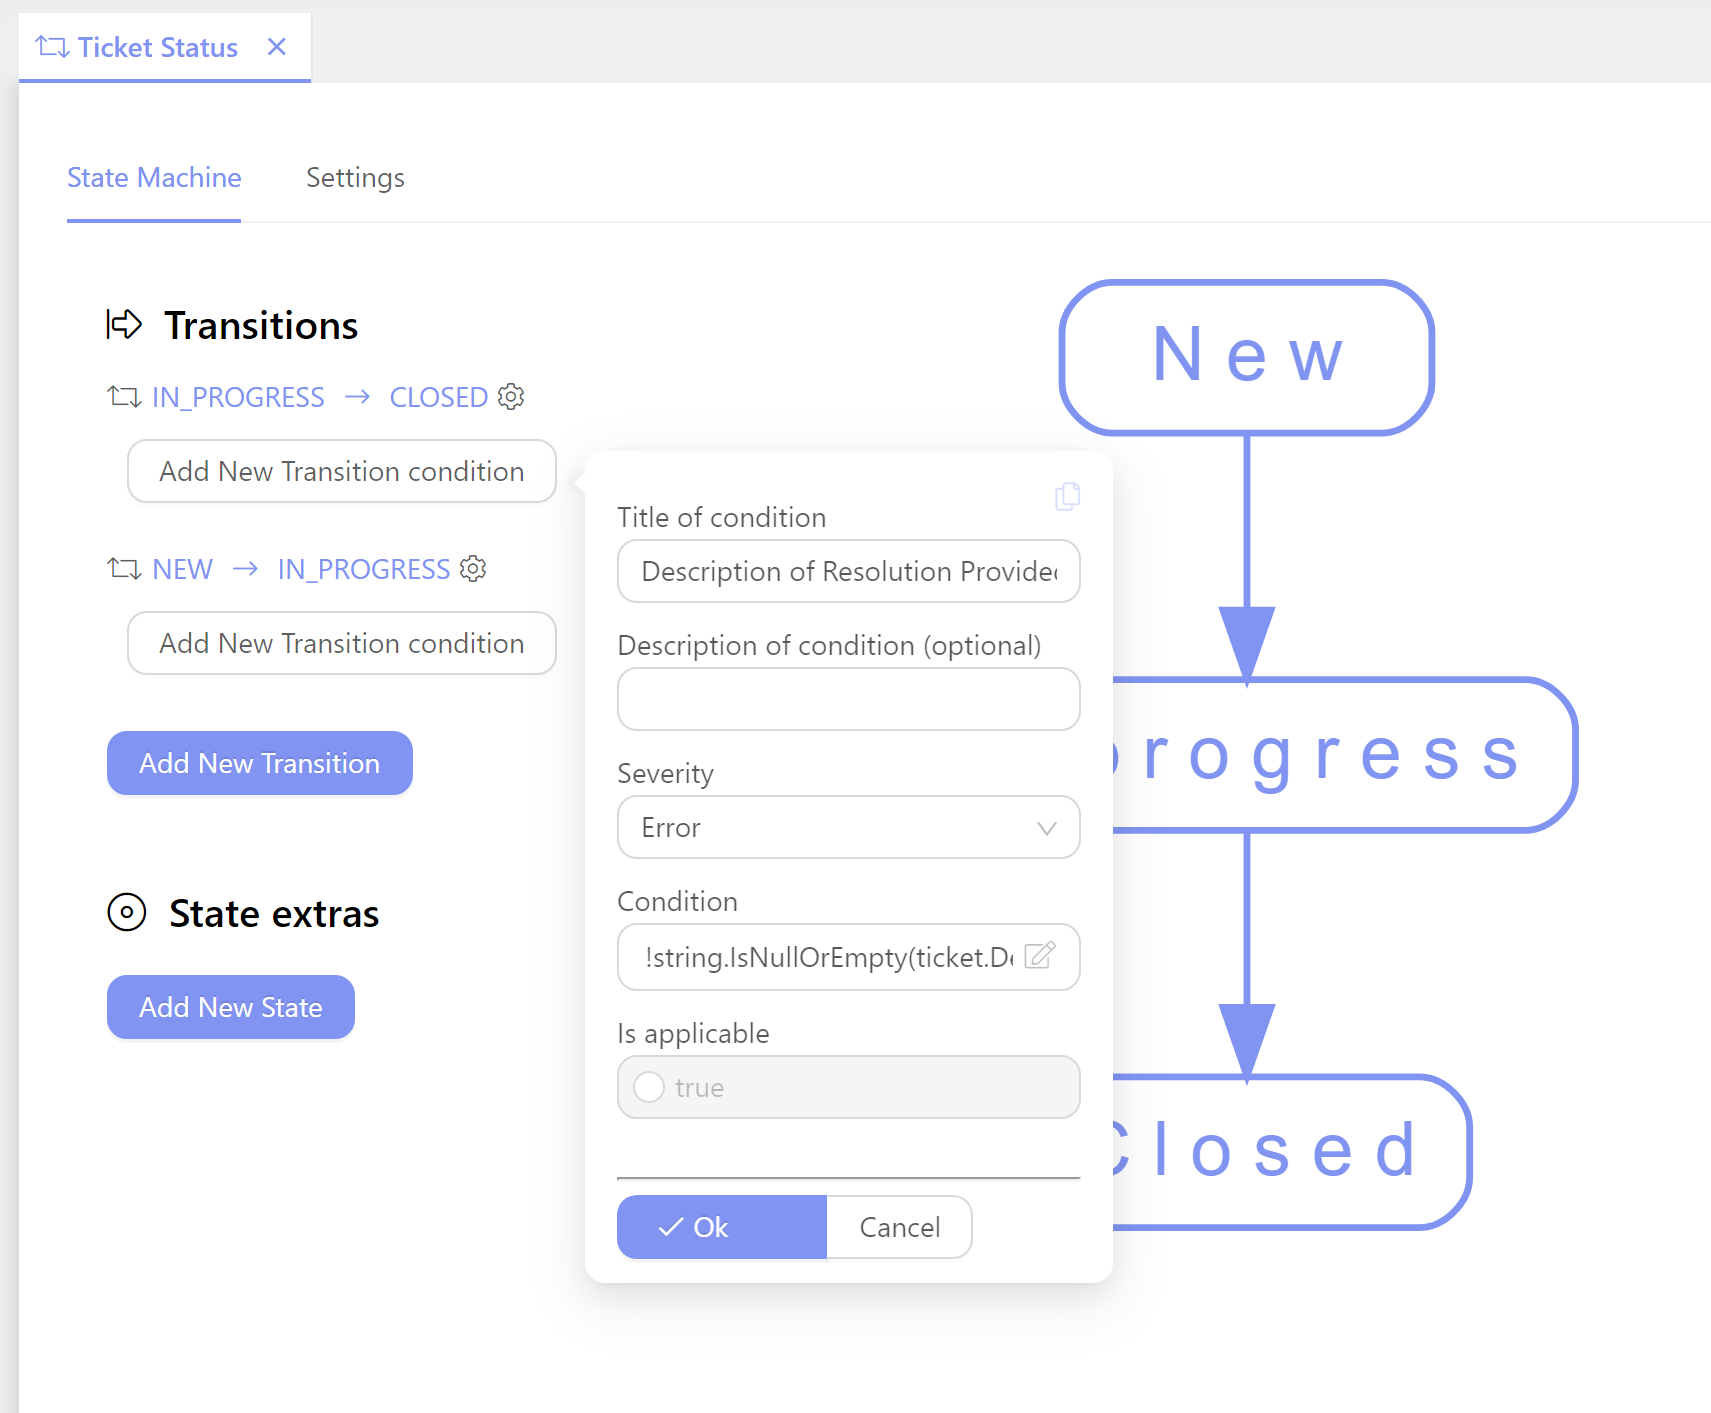
- Click
OK - Save changes:
Ctrl + S
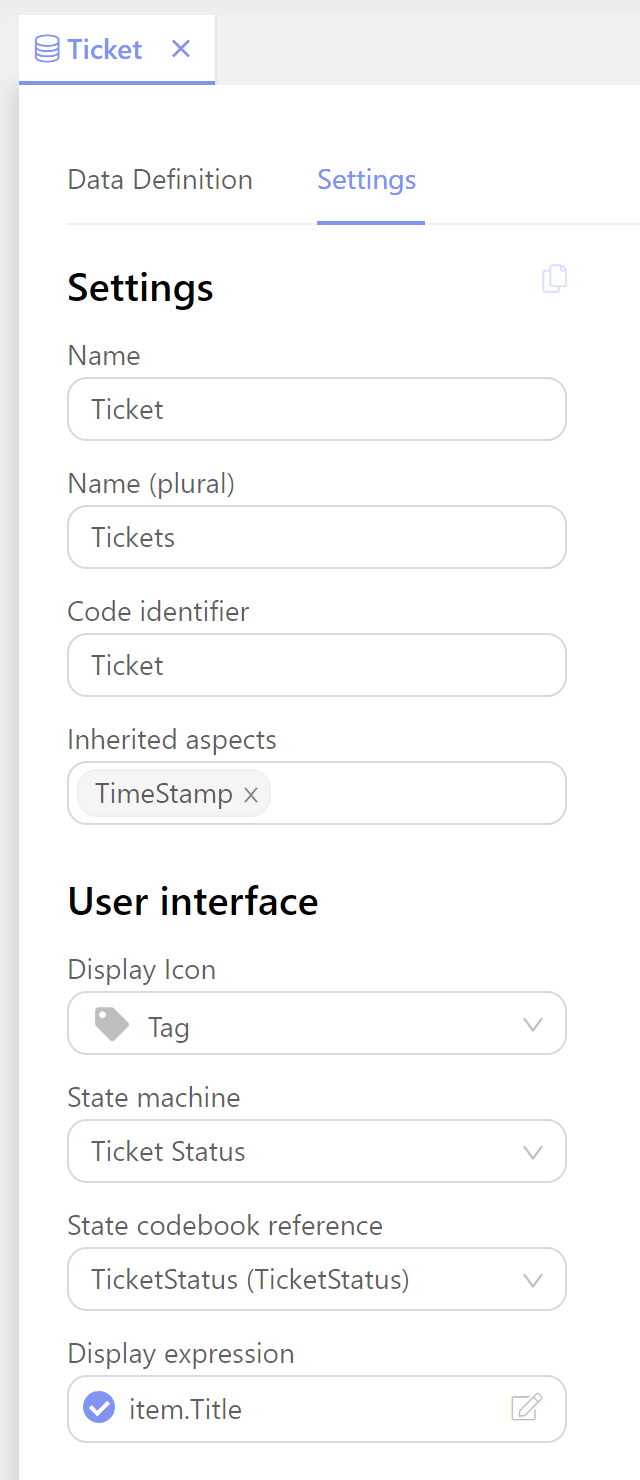
5. Add State Machine to Ticket Entity
- Open the Ticket entity (Go to Data > Entities and double-click Ticket.)
- Click the
Settingstab. In the User Interface section, setState Machineto: Ticket Status - Set
State Codebook Referenceto: TicketStatus (TicketStatus) - Save changes:
Ctrl + S
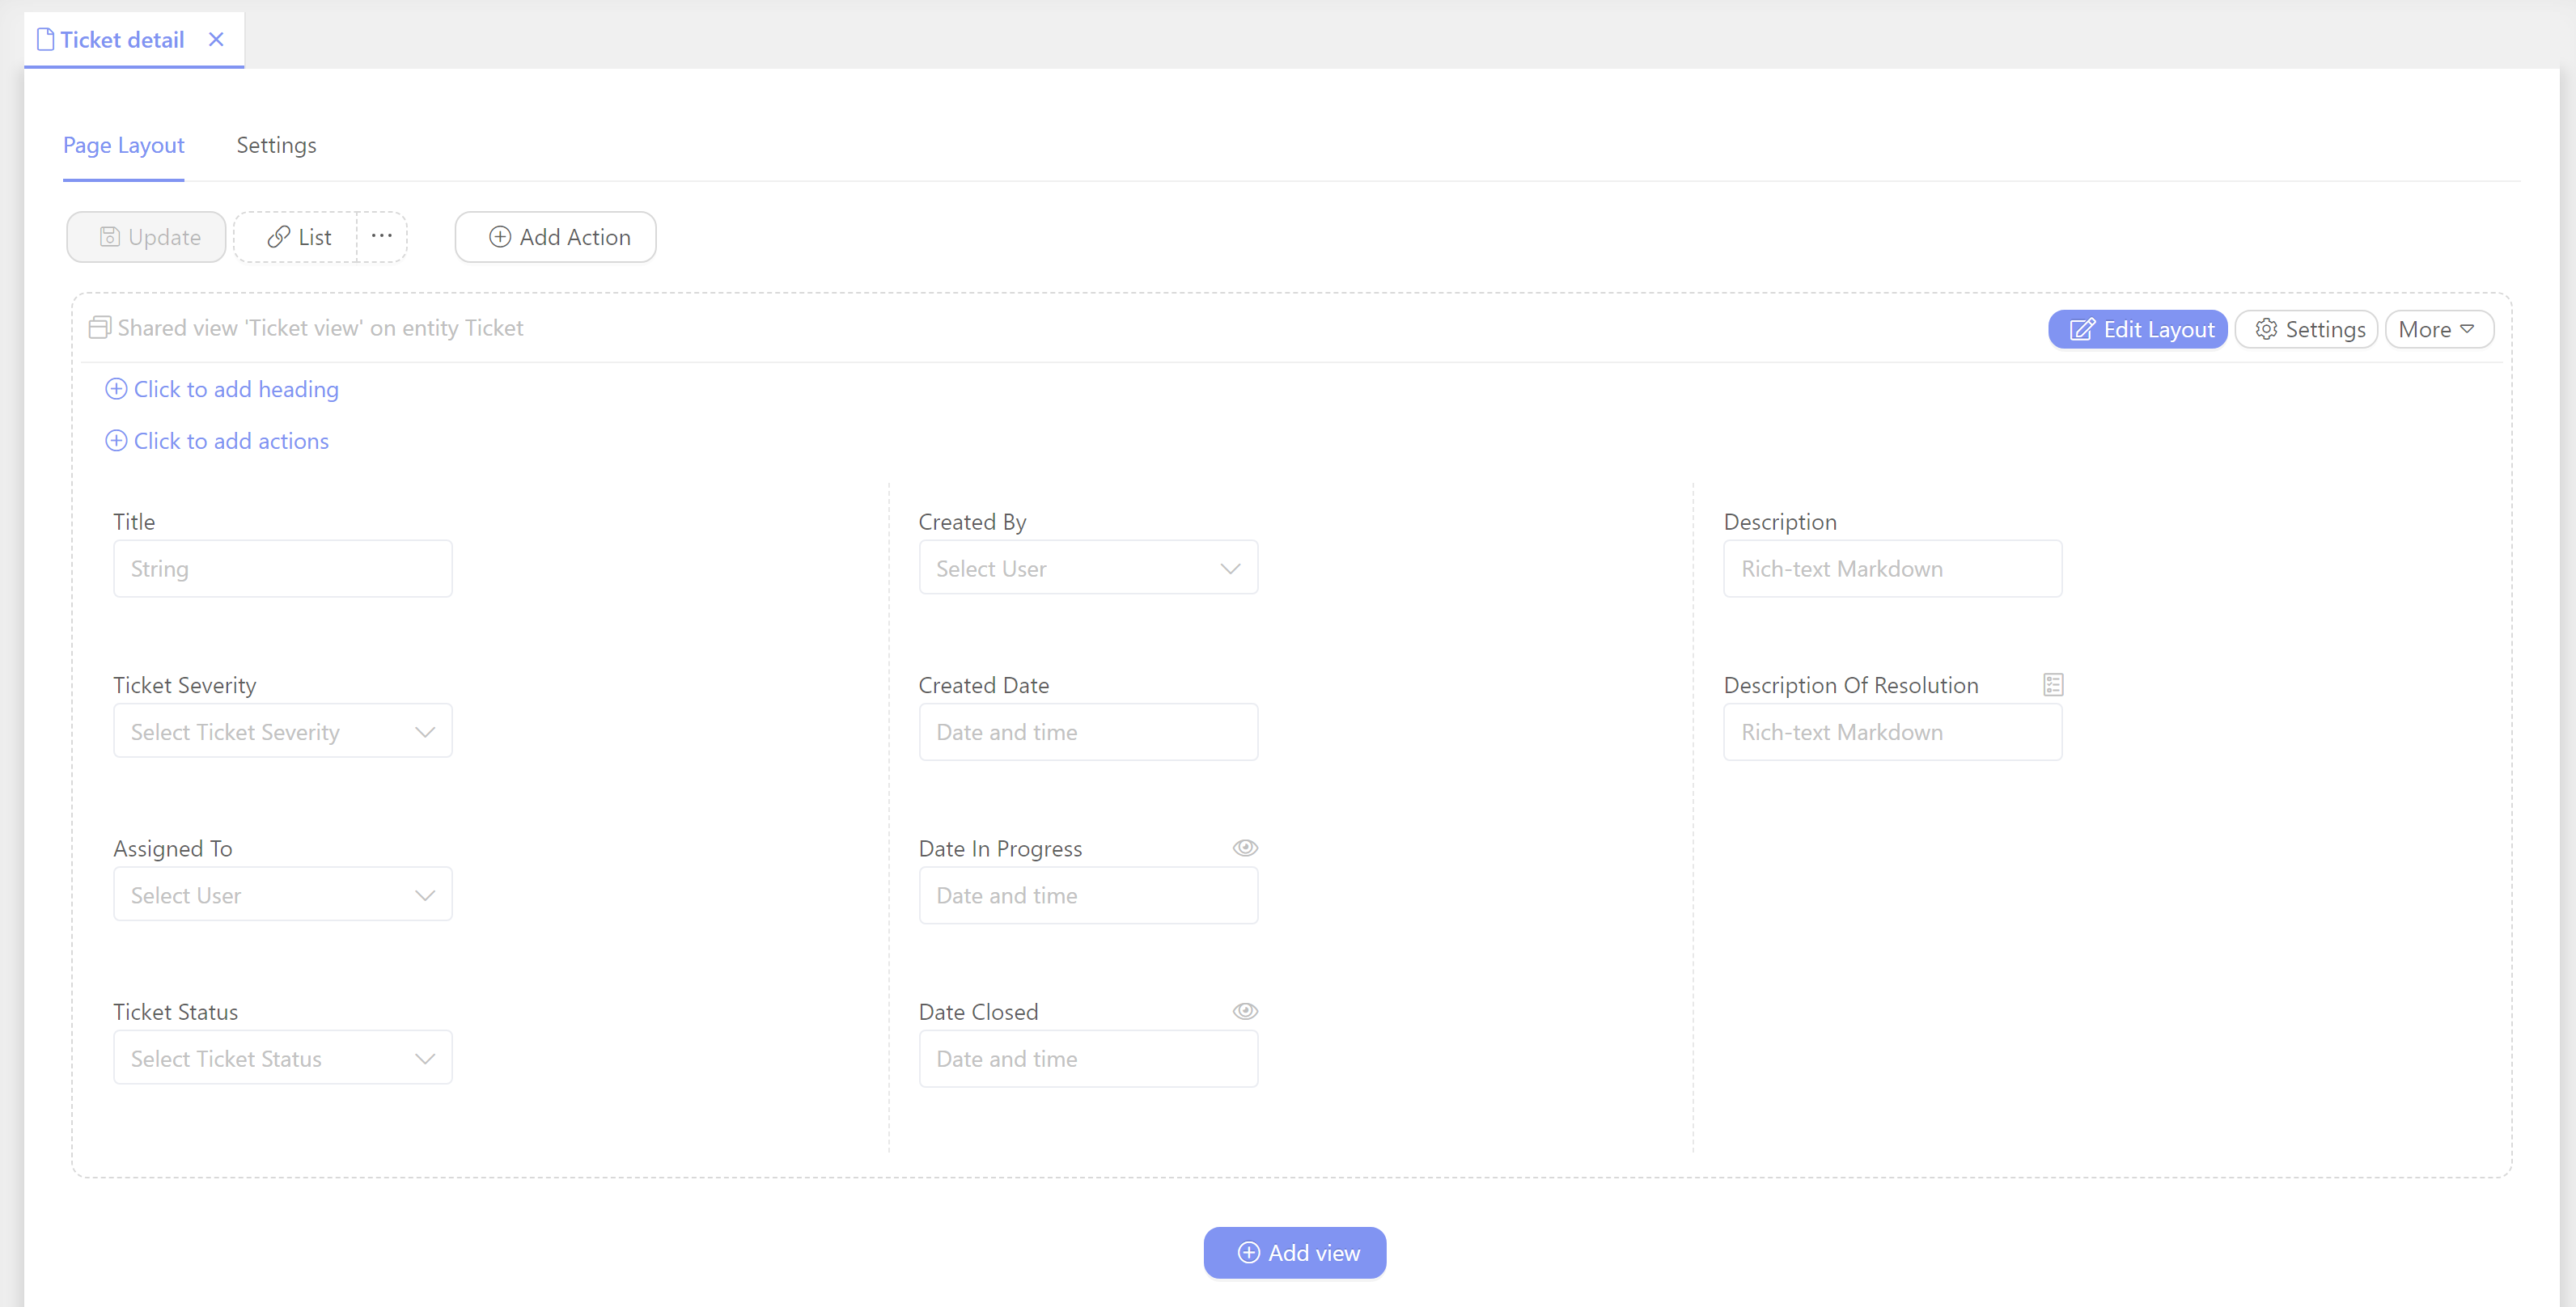
6. Modify your Ticket Detail Page
- Go to UI > Entity Pages and double-click Ticket Detail
- In the top Layout section, click
Edit Layout - Add the following data fields: Ticket Status, Created Date, Date In Progress, Date Closed, Assigned To, Created By and Description of Resolution.
- Drag and drop the data fields around inside the two (or more) columns to the desired layout
—
Set all of the Date data fields to Read Only. Click on each of the following titles one at a time: Created Date, Date In Progress, Date Closed - Mark
Enabled Expressionand type: false
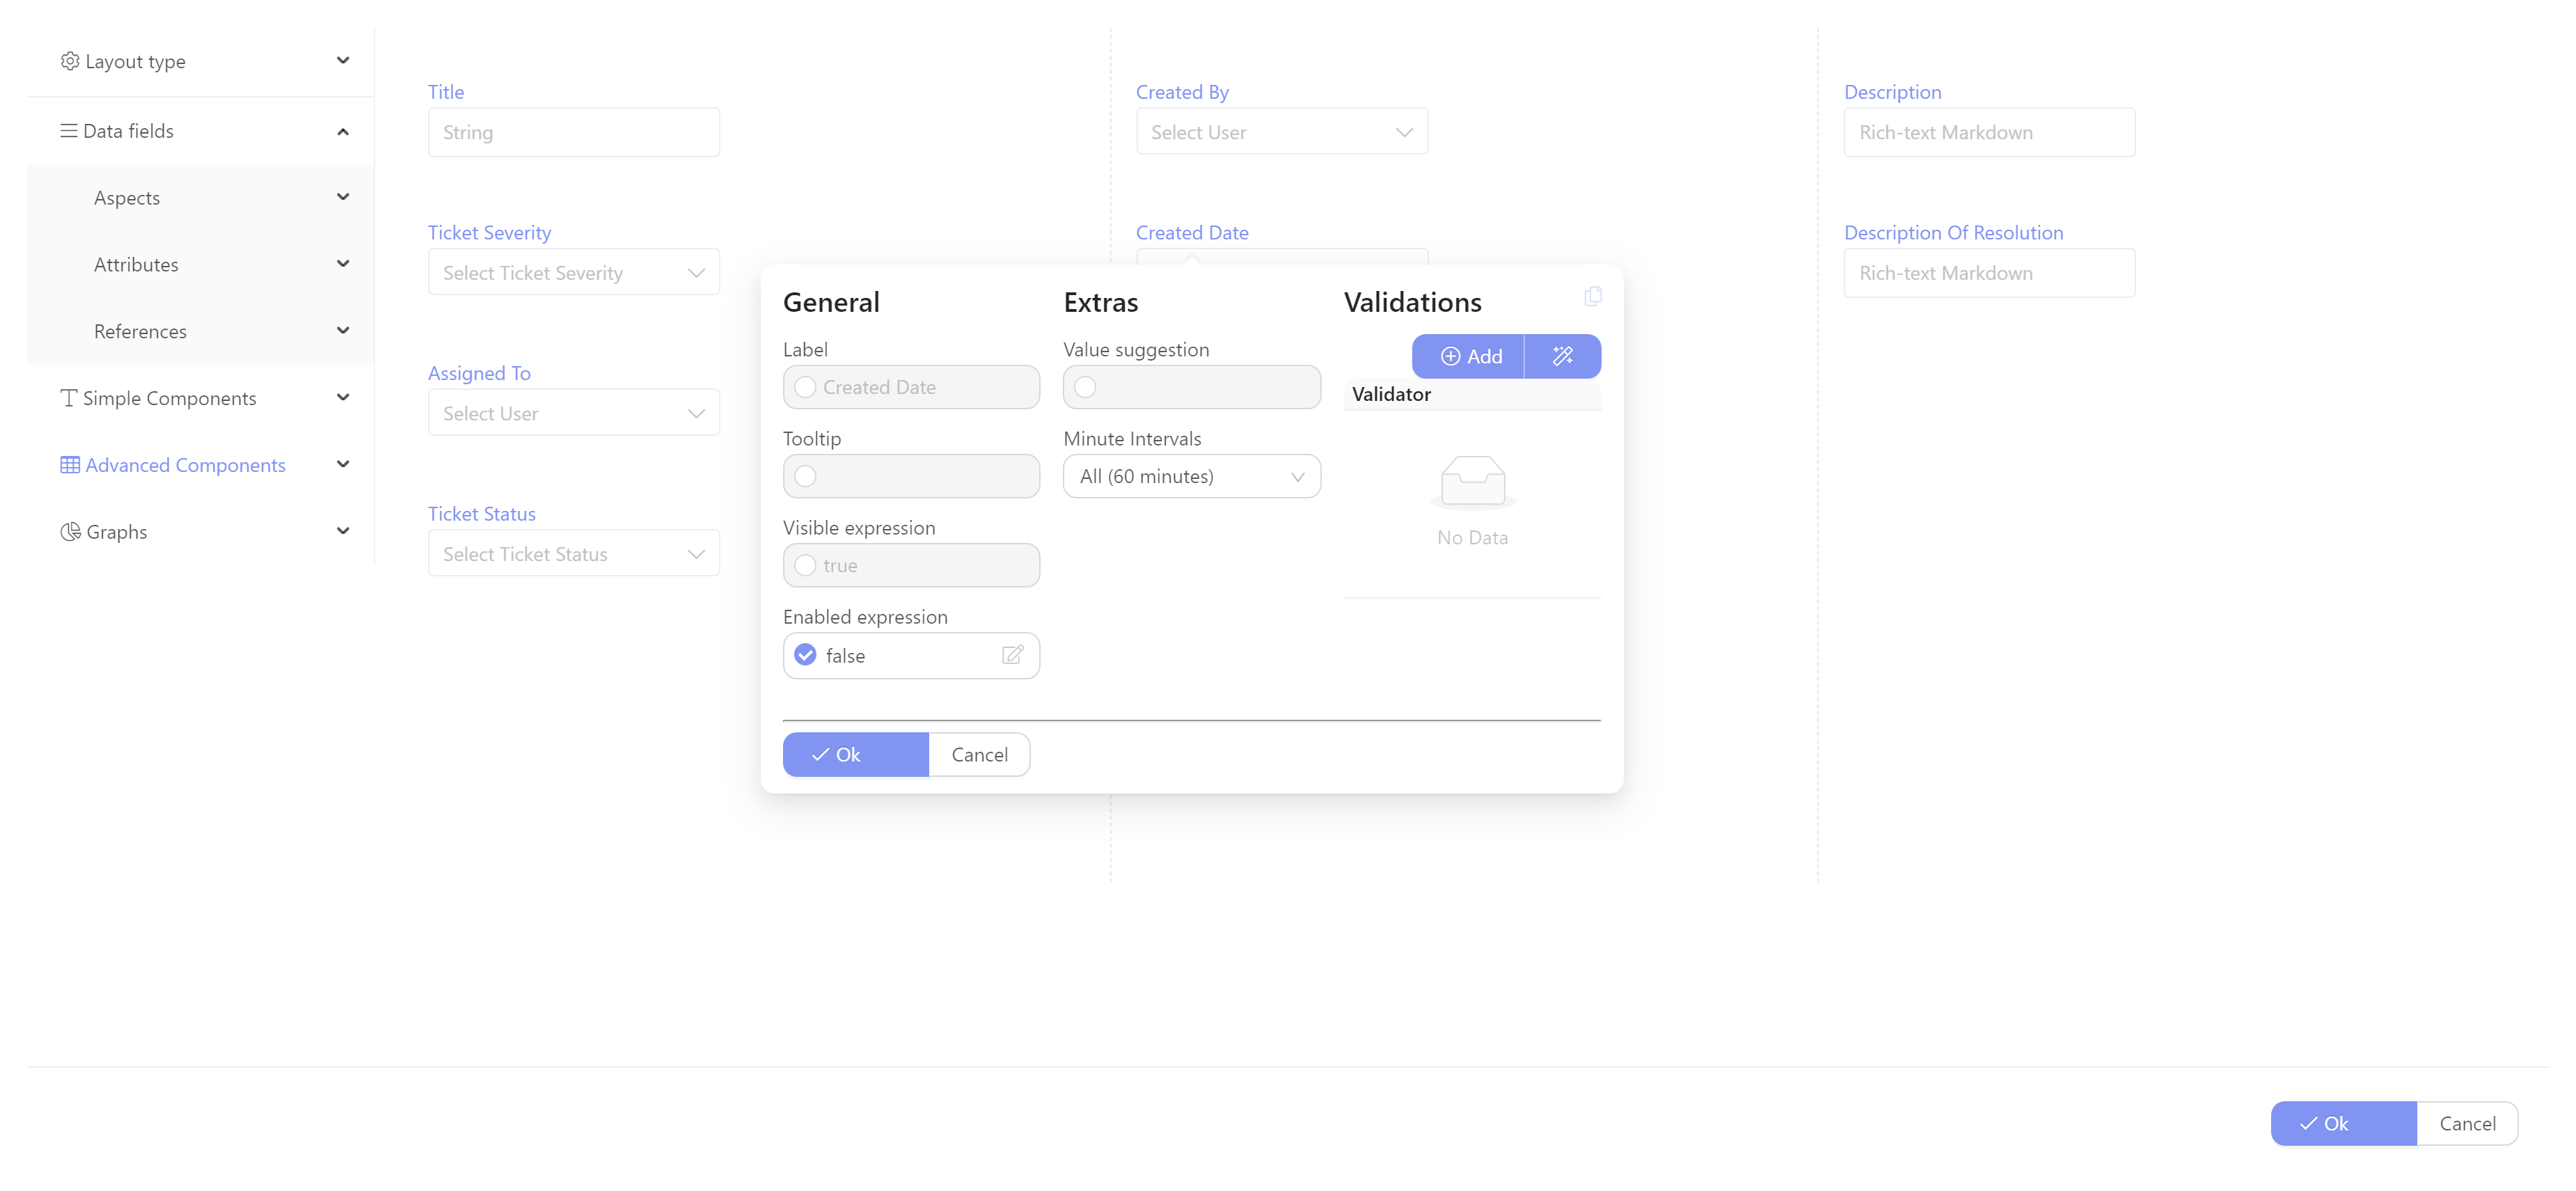
- Click
OK
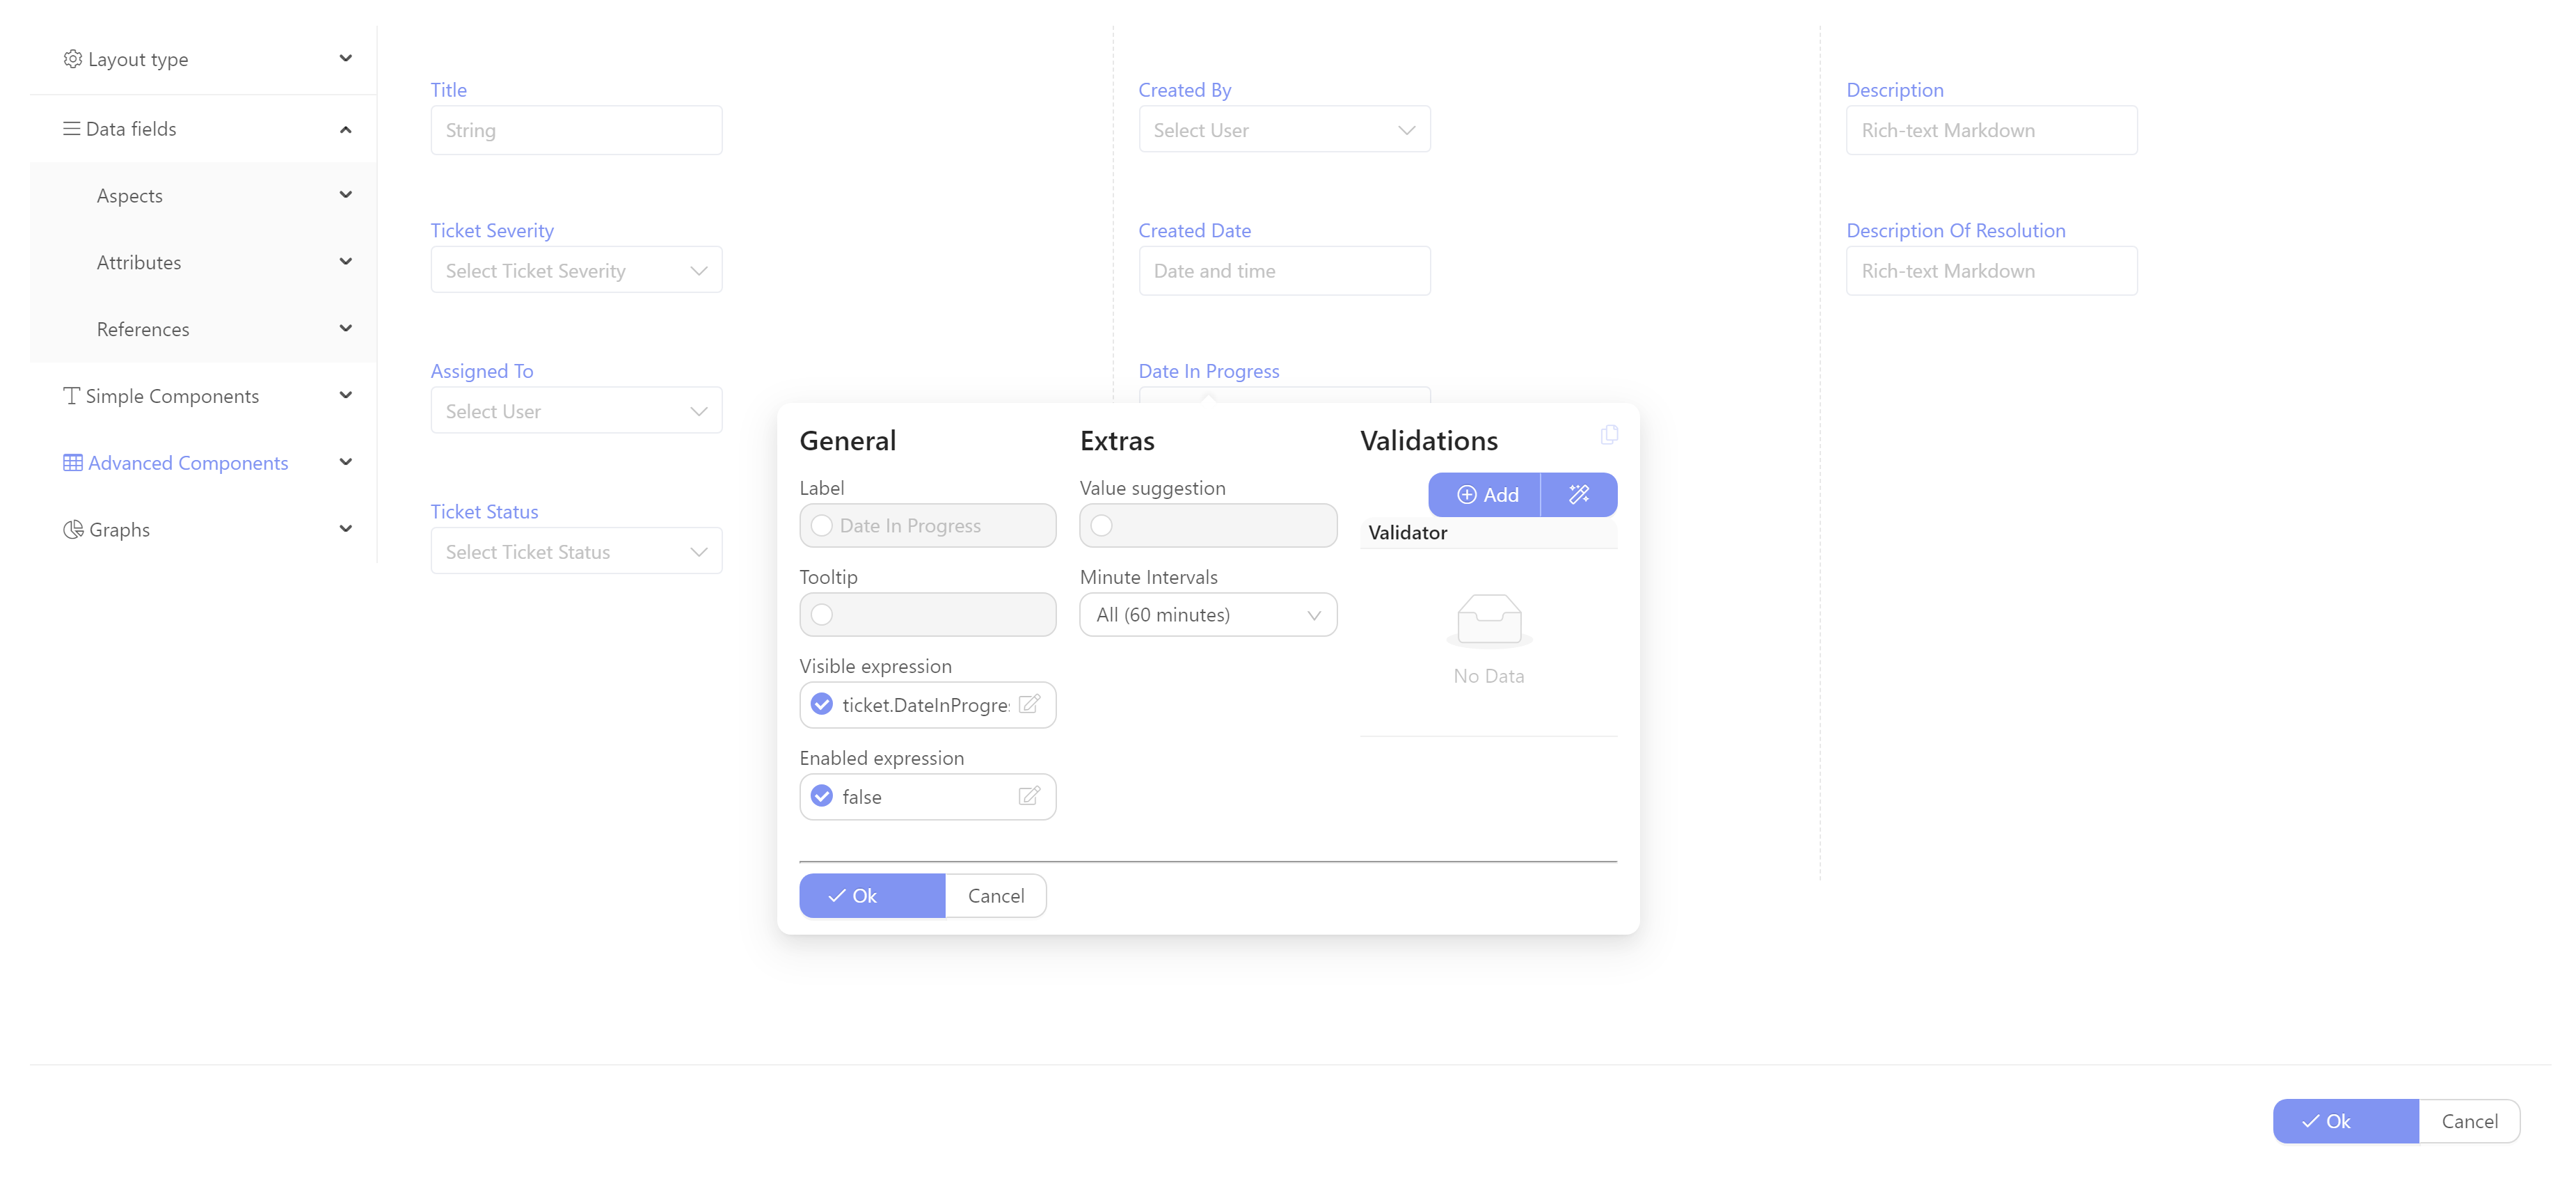
—
Establish that Date In Progress and Date Closed must have values in order to be shown to the user. - Click Date In Progress
- Set
Visible Expressionto:
(ticket, db, ctx) => ticket.DateInProgress.HasValue
- Click
OK
- Click
OK - Click Date Closed
- Set
Visible Expressionto:
(ticket, db, ctx) => ticket.DateClosed.HasValue
- Click
OK - Click
OK
—
Click DescriptionOfResolution - In the Validations section, click the
Magic Wand; select: Not empty string - On the Can't be empty entry, click the Edit icon
- Verify that
Valid Conditionshows the following: !String.IsNullOrEmpty(ticket.DescriptionOfResolution) - Mark
Is Applicable. Copy and paste:
(ticket, db, ctx) => ticket.TicketStatus == TicketStatus.IN_PROGRESS
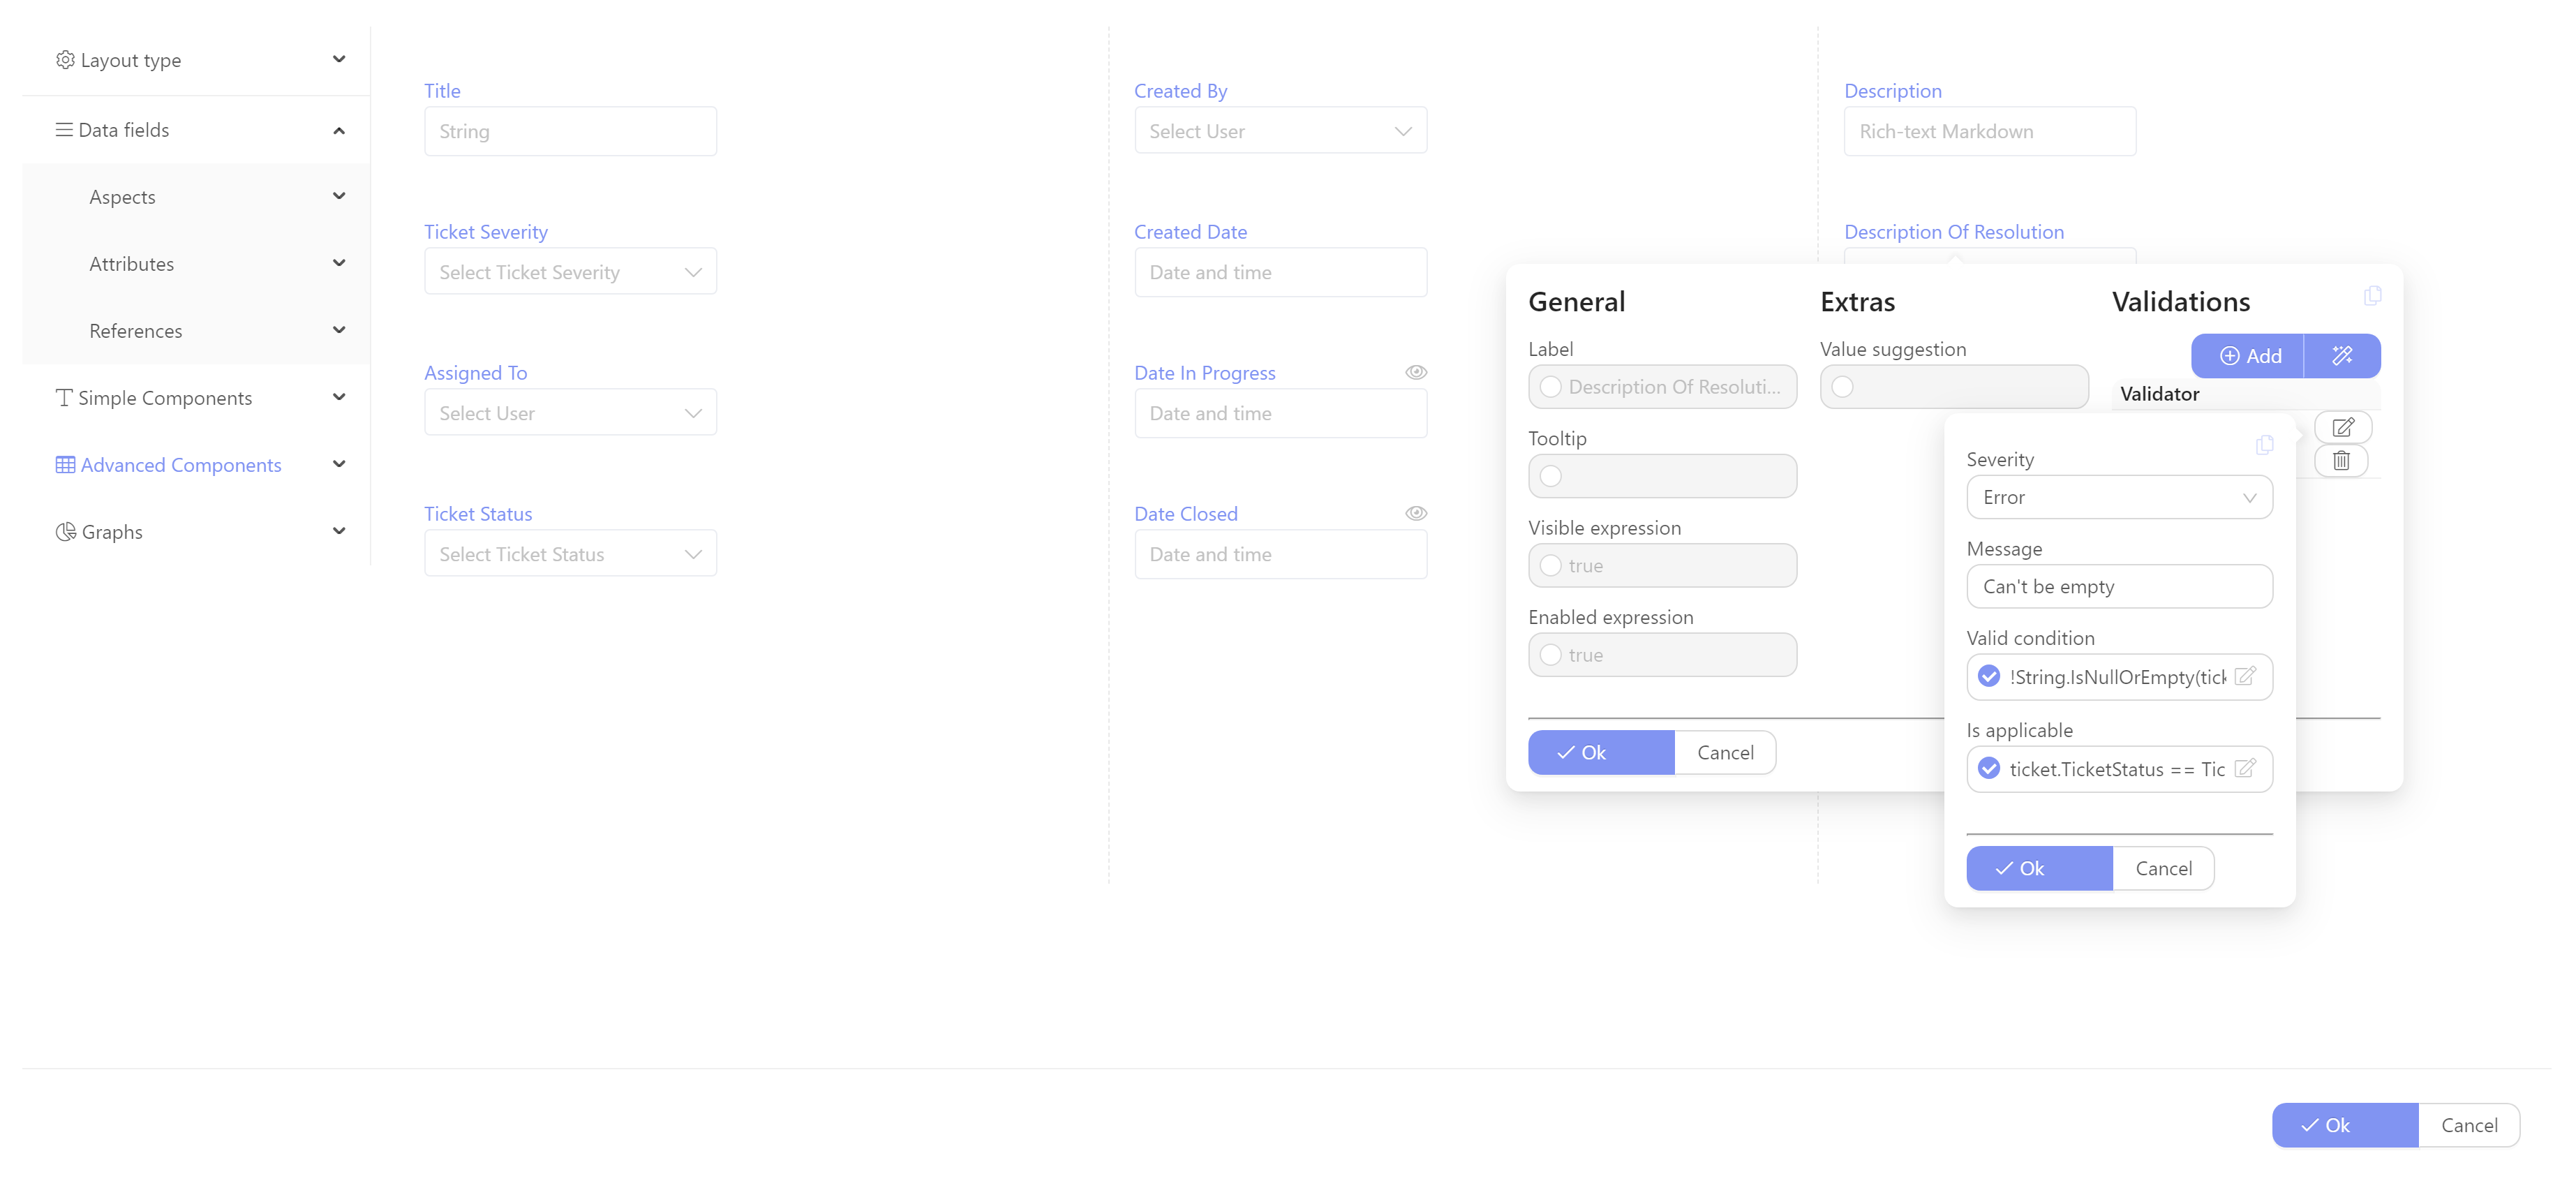
- Click
OK- You have now created a Validator that ensures that each Ticket In Progress has its
Description Of Resolutionfilled in
- You have now created a Validator that ensures that each Ticket In Progress has its
- Click
OK - Click
OK - Click
OK - Save changes:
Ctrl + S
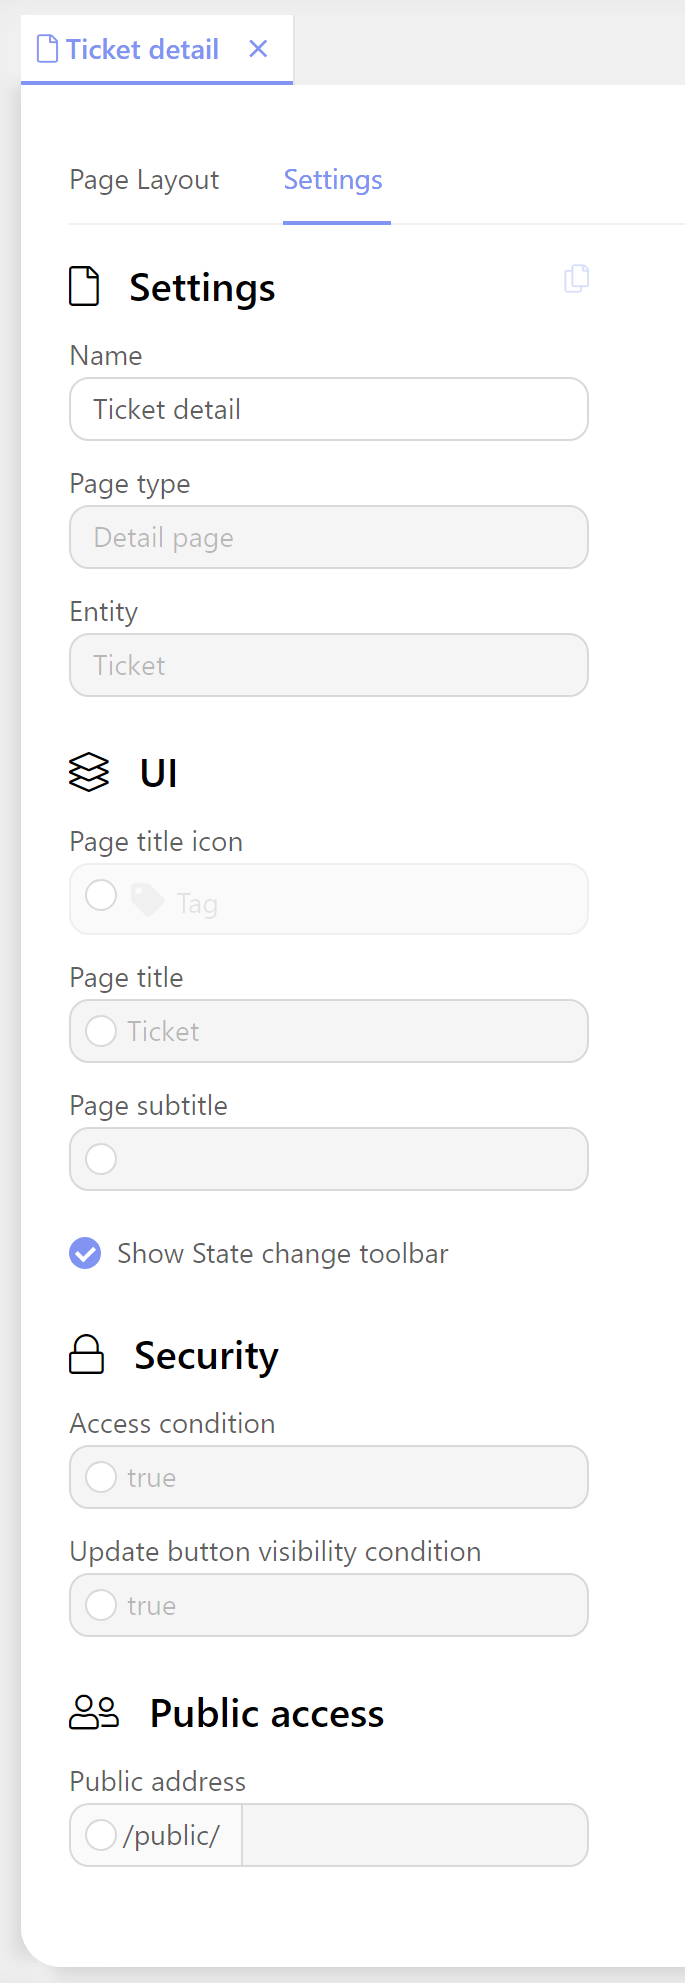
7. Show State Machine Buttons
- Continue on the Ticket Detail page (UI > Entity Pages, double-click Ticket Detail.)
- Click the
Settingstab. In the UI section, checkShow State Change Toolbar - Save changes:
Ctrl + S
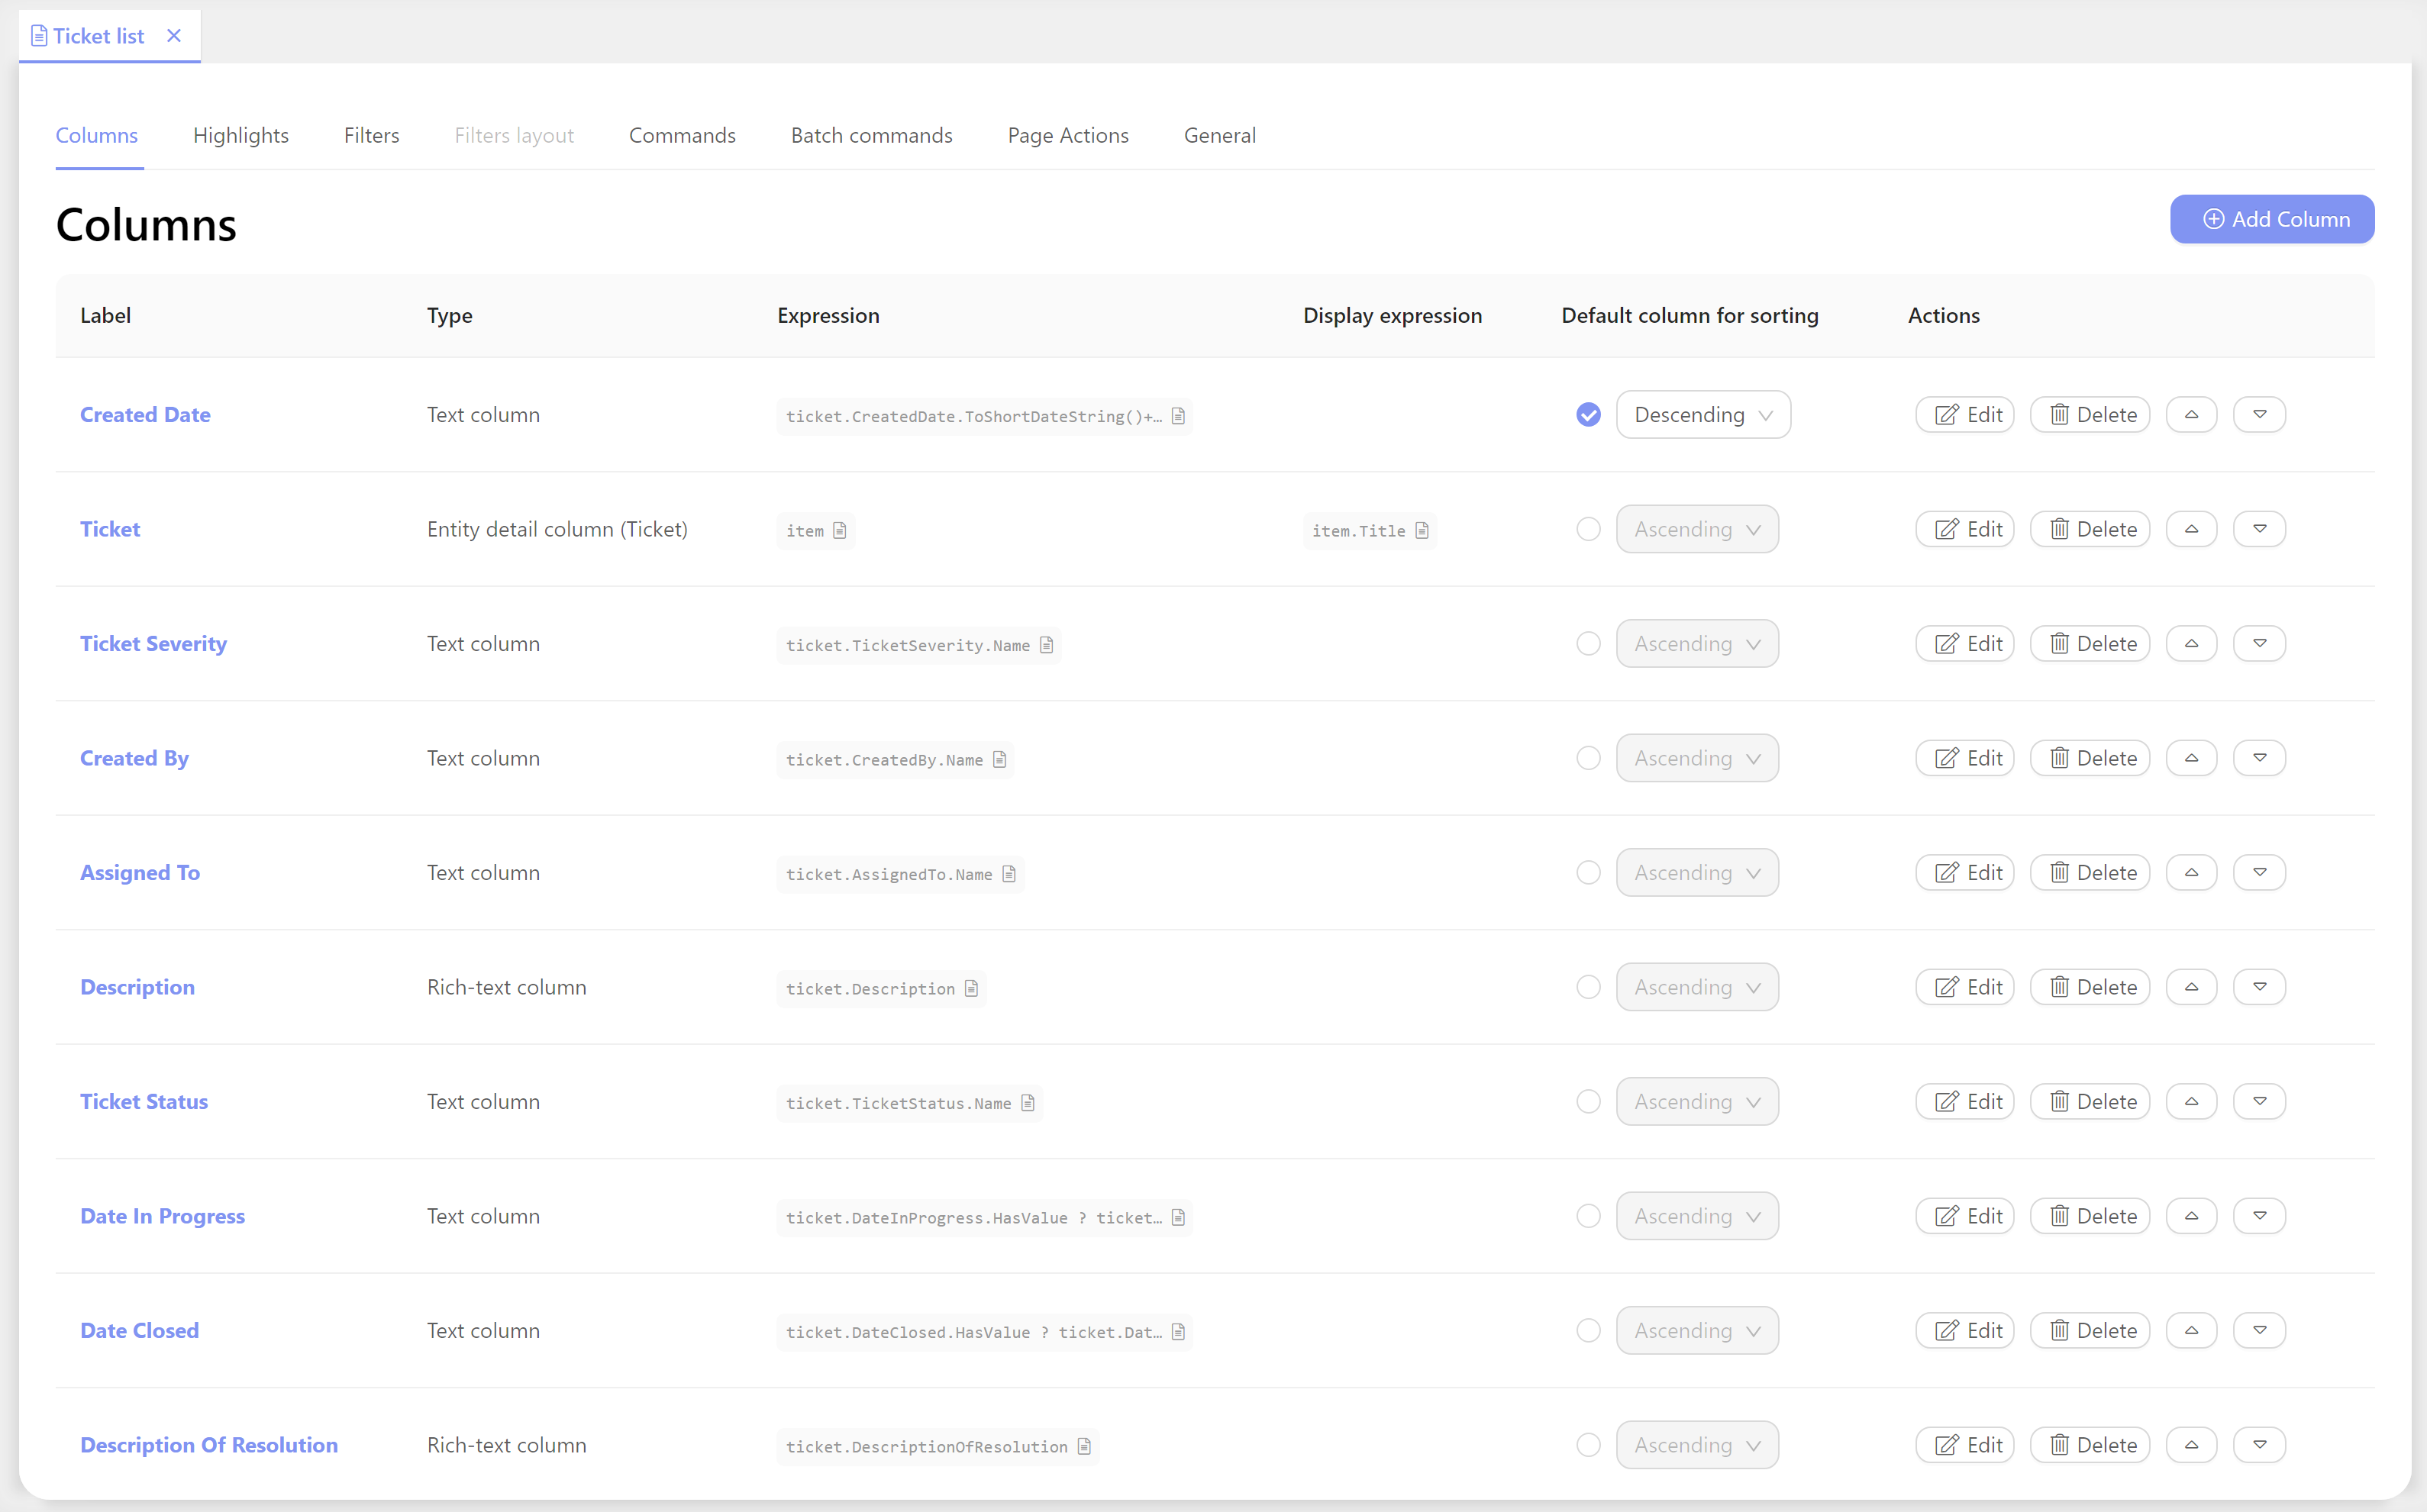
8. Update Ticket List Page
The main list page should include this new information.
- In UI > Entity Pages, double-click Ticket list
- Click the Columns tab (if necessary).
- Click
(+) Add Column
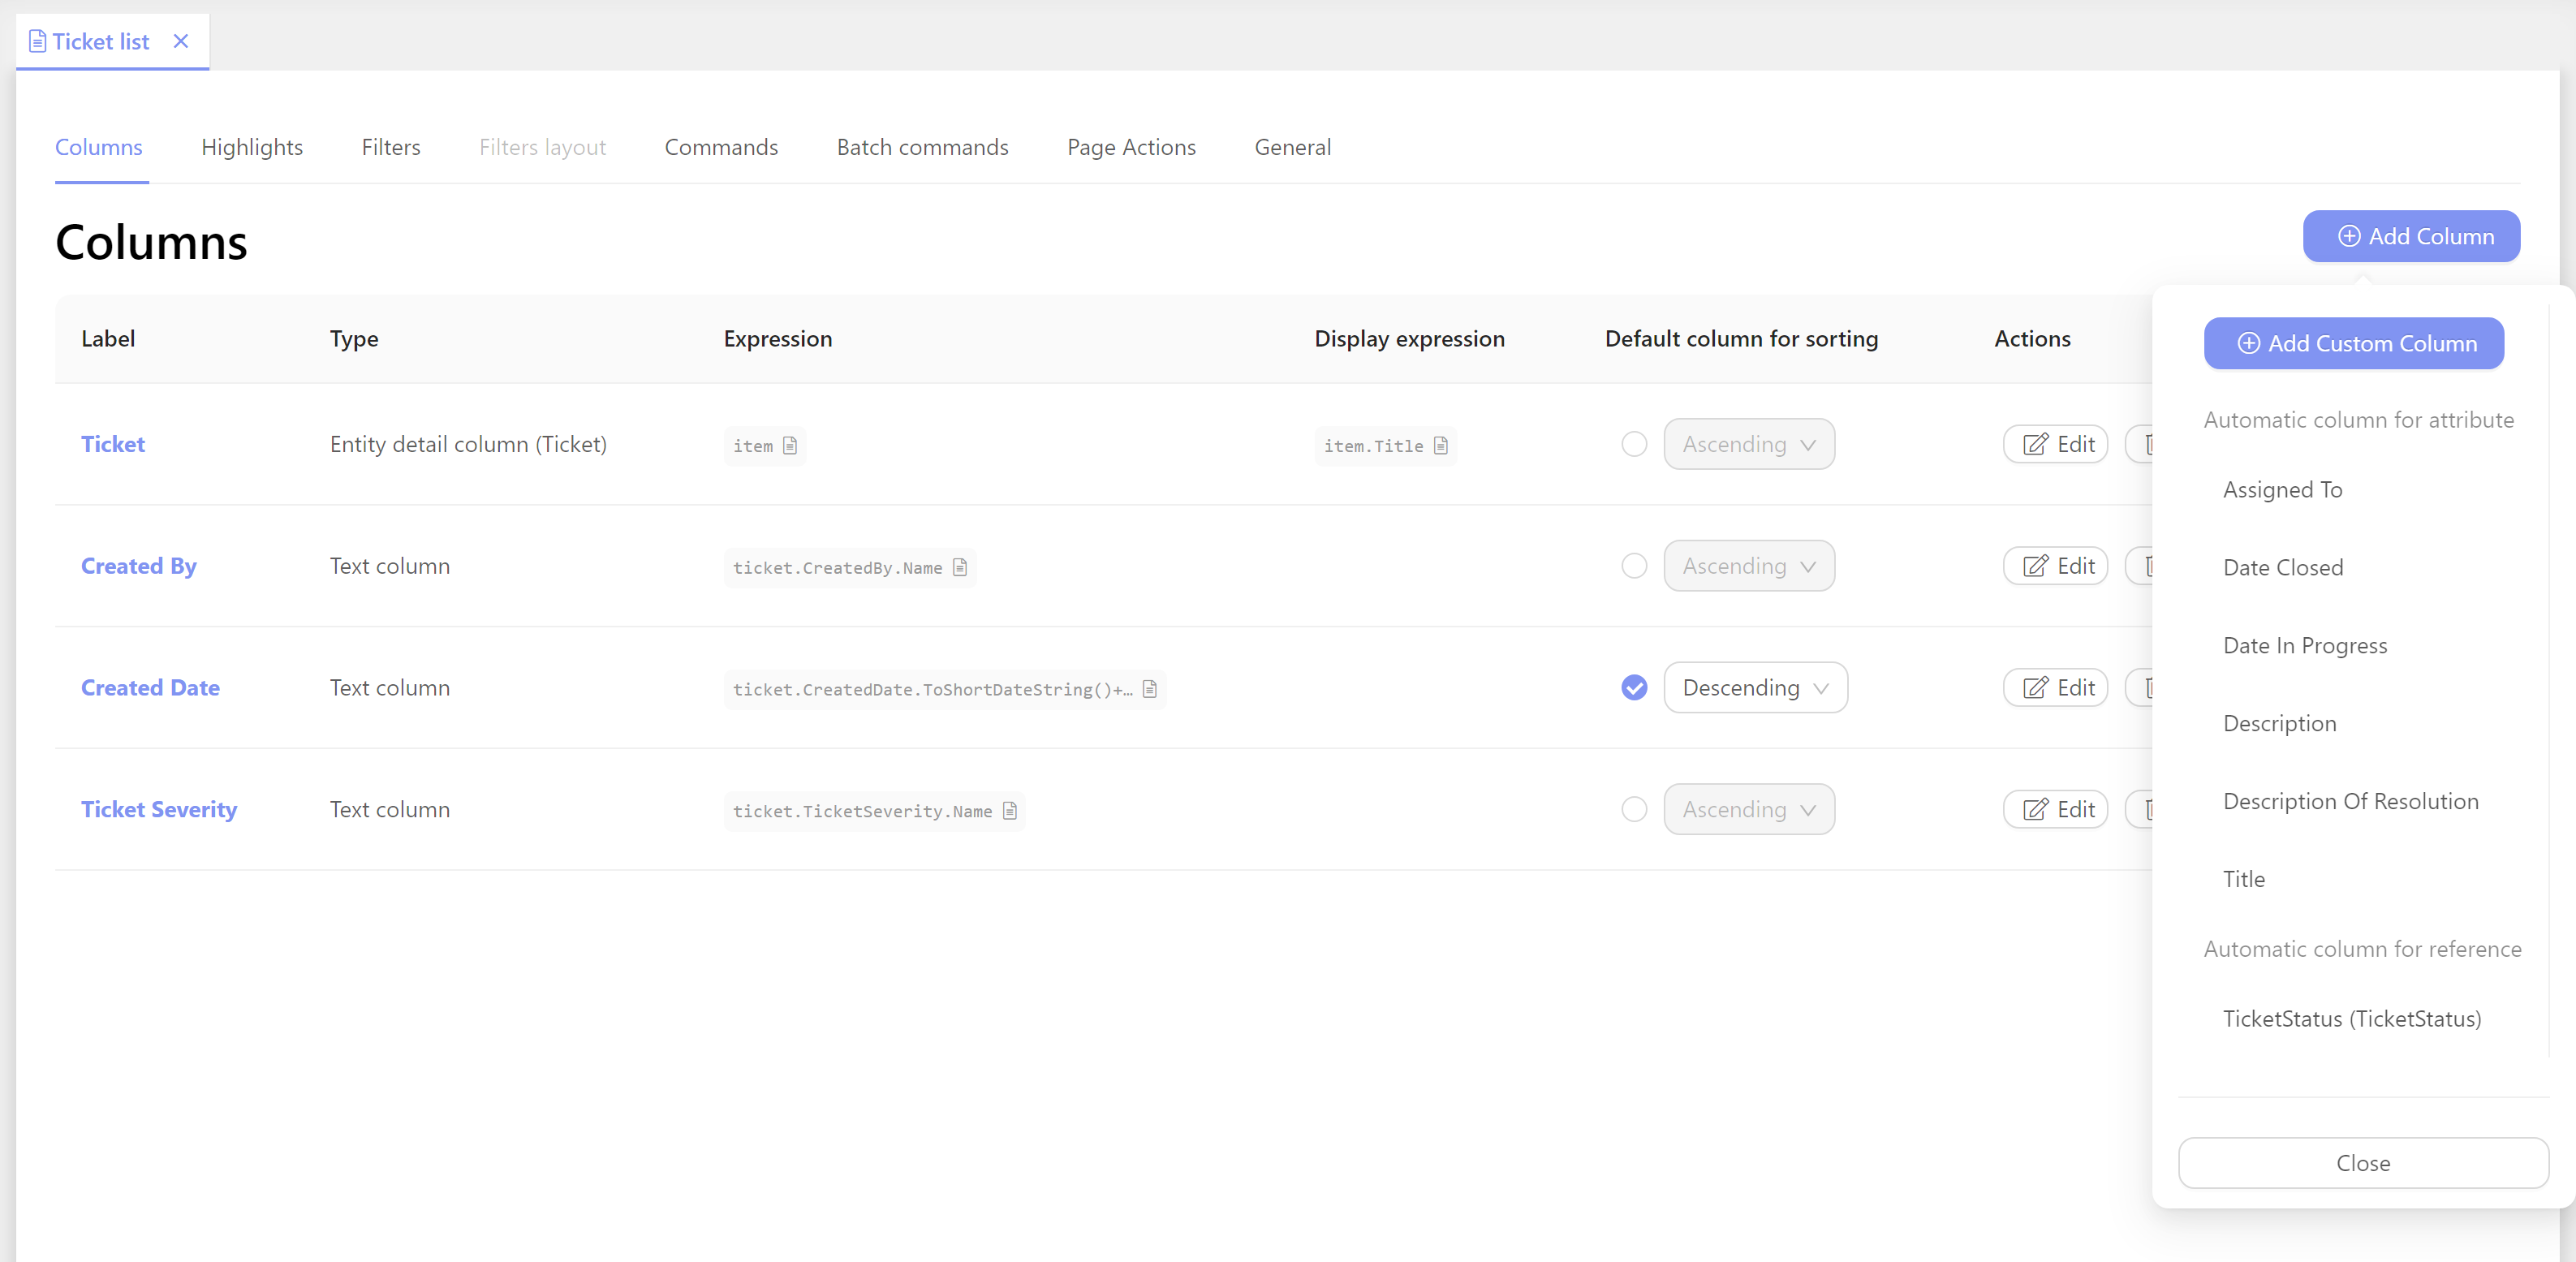
- Add TicketStatus (TicketStatus)
- Add other new columns (except Title) and organize the columns for the desired layout
- Click
Close - Save changes:
Ctrl + S
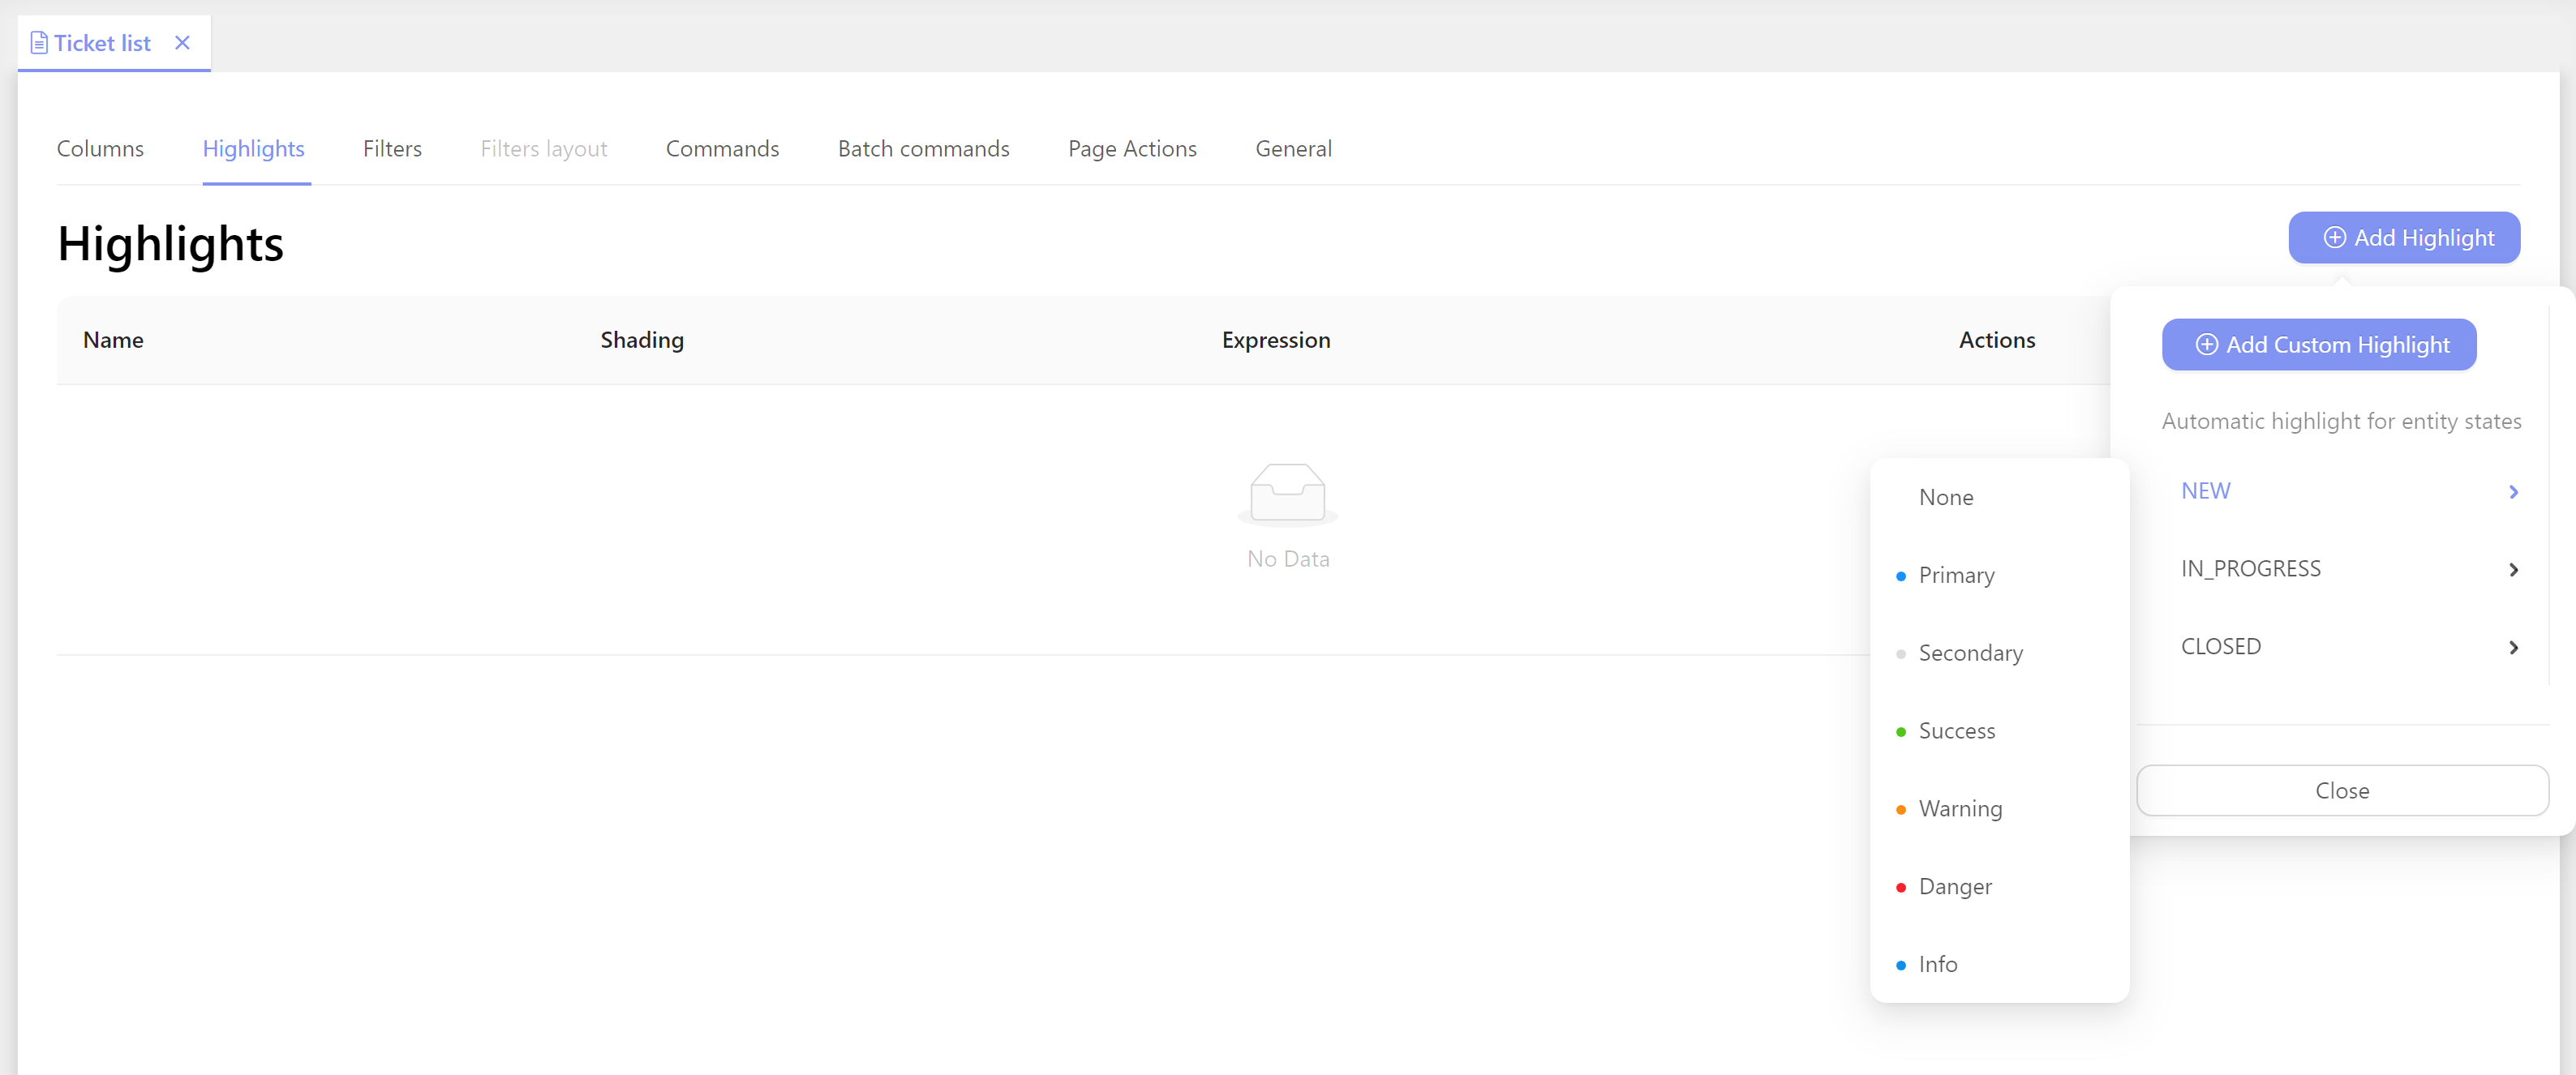
Create some Highlights to make the Ticket list easy to navigate.
-
Go to Highlights tab
-
Click
(+) Add Highlight -
As you can see, automatic highlights for Ticket Statuses are already created.
- Hover over NEW
- Click
Danger
—
- Hover over IN_PROGRESS
- Click
Primary
— - Hover over CLOSED
- Click
Success
—
-
Click
(+) Add Custom Highlight -
Set
Nameto: Ticket is critical -
Set
Iconto: Exclamation circle -
Set
Highlight conditionto:(ticket, db, ctx) => ticket.TicketSeverity == TicketSeverity.CRITICAL
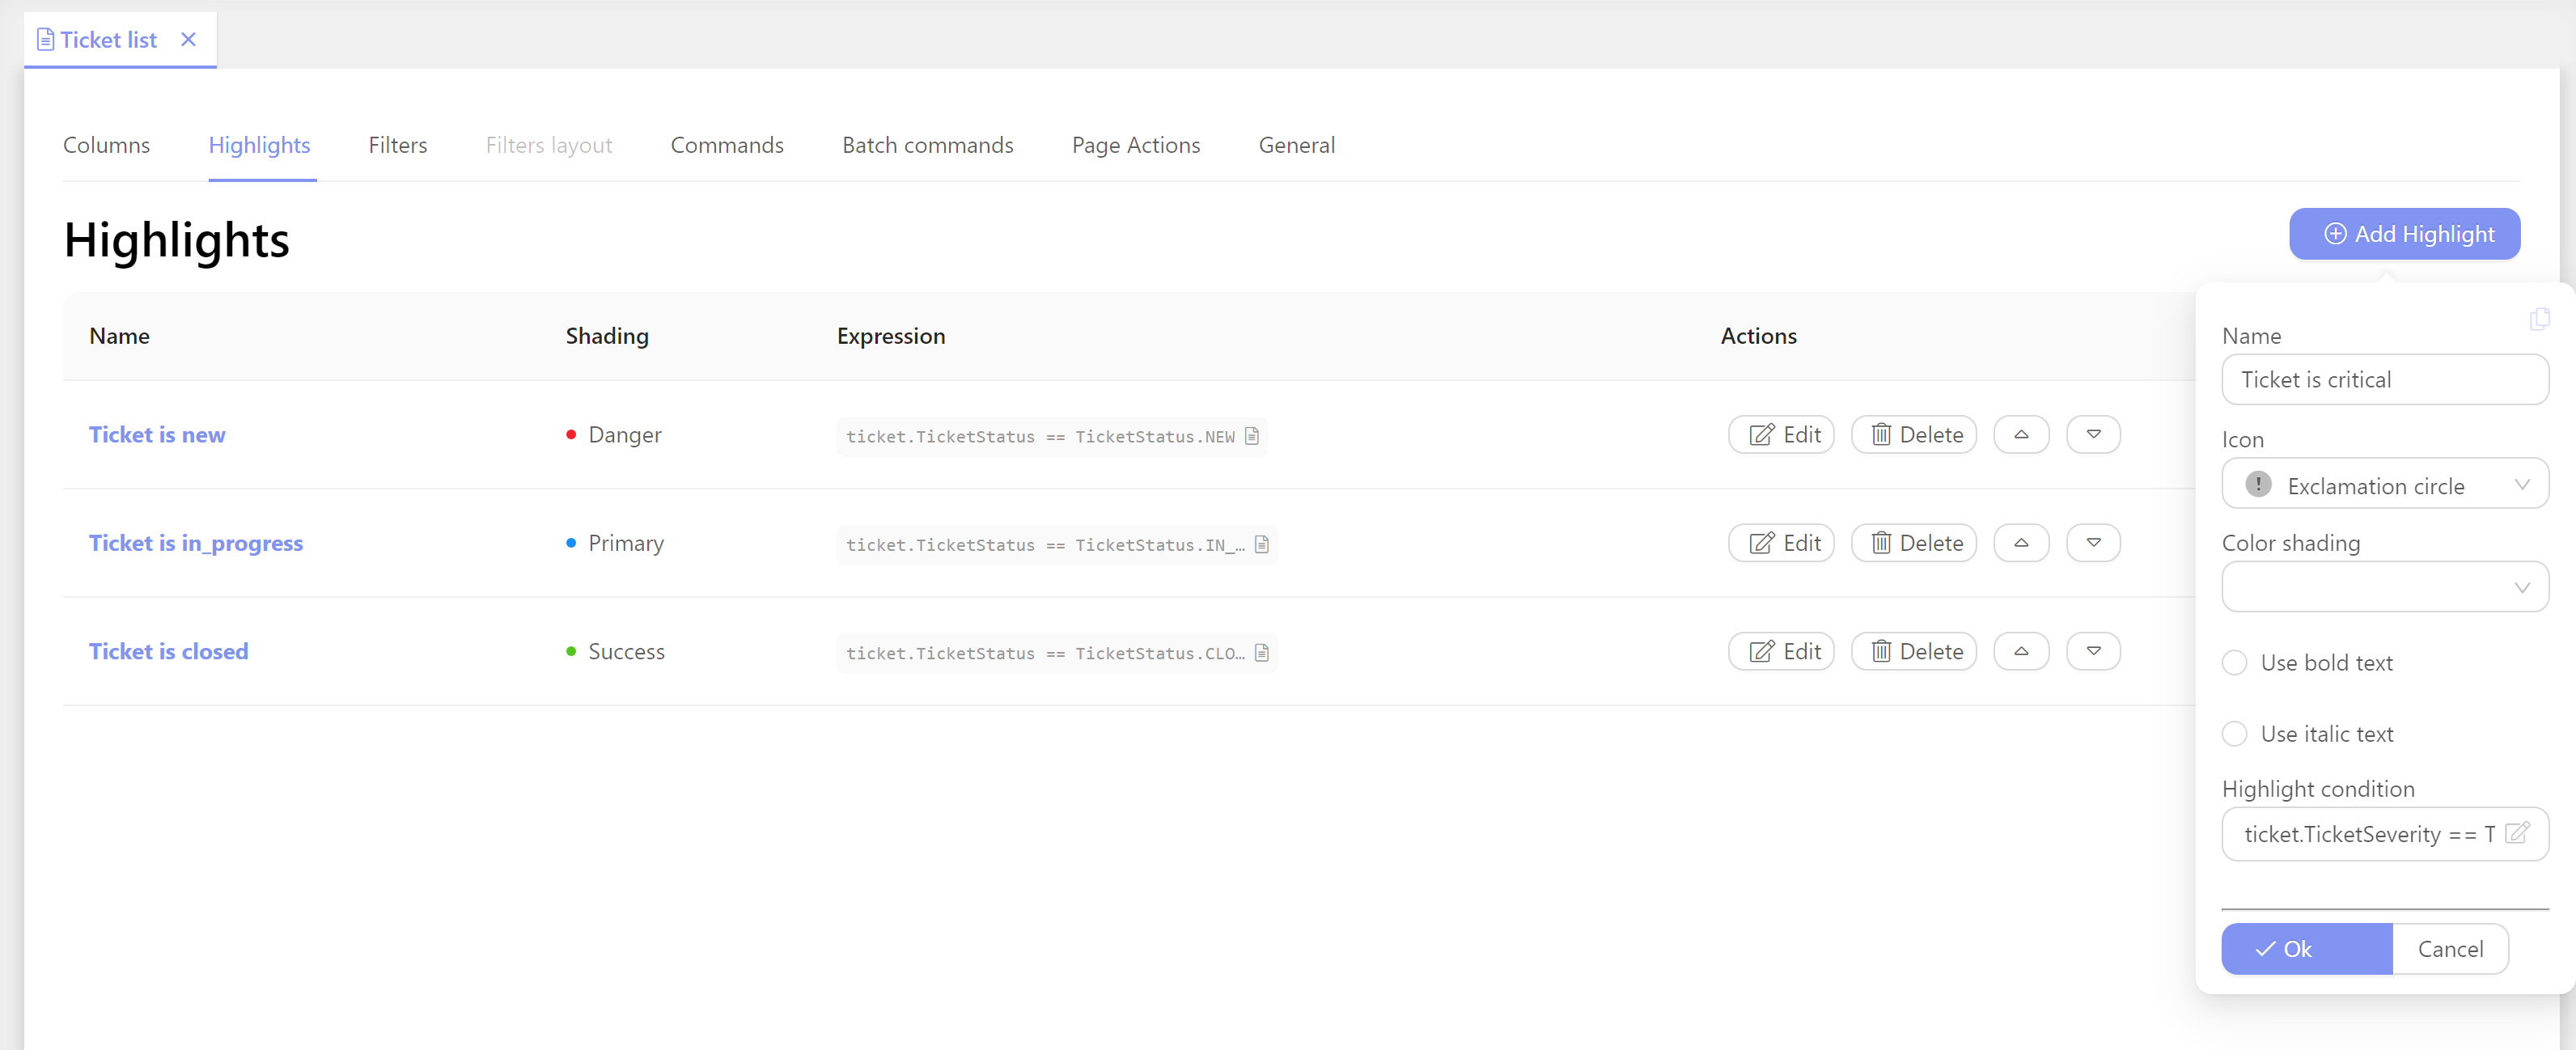
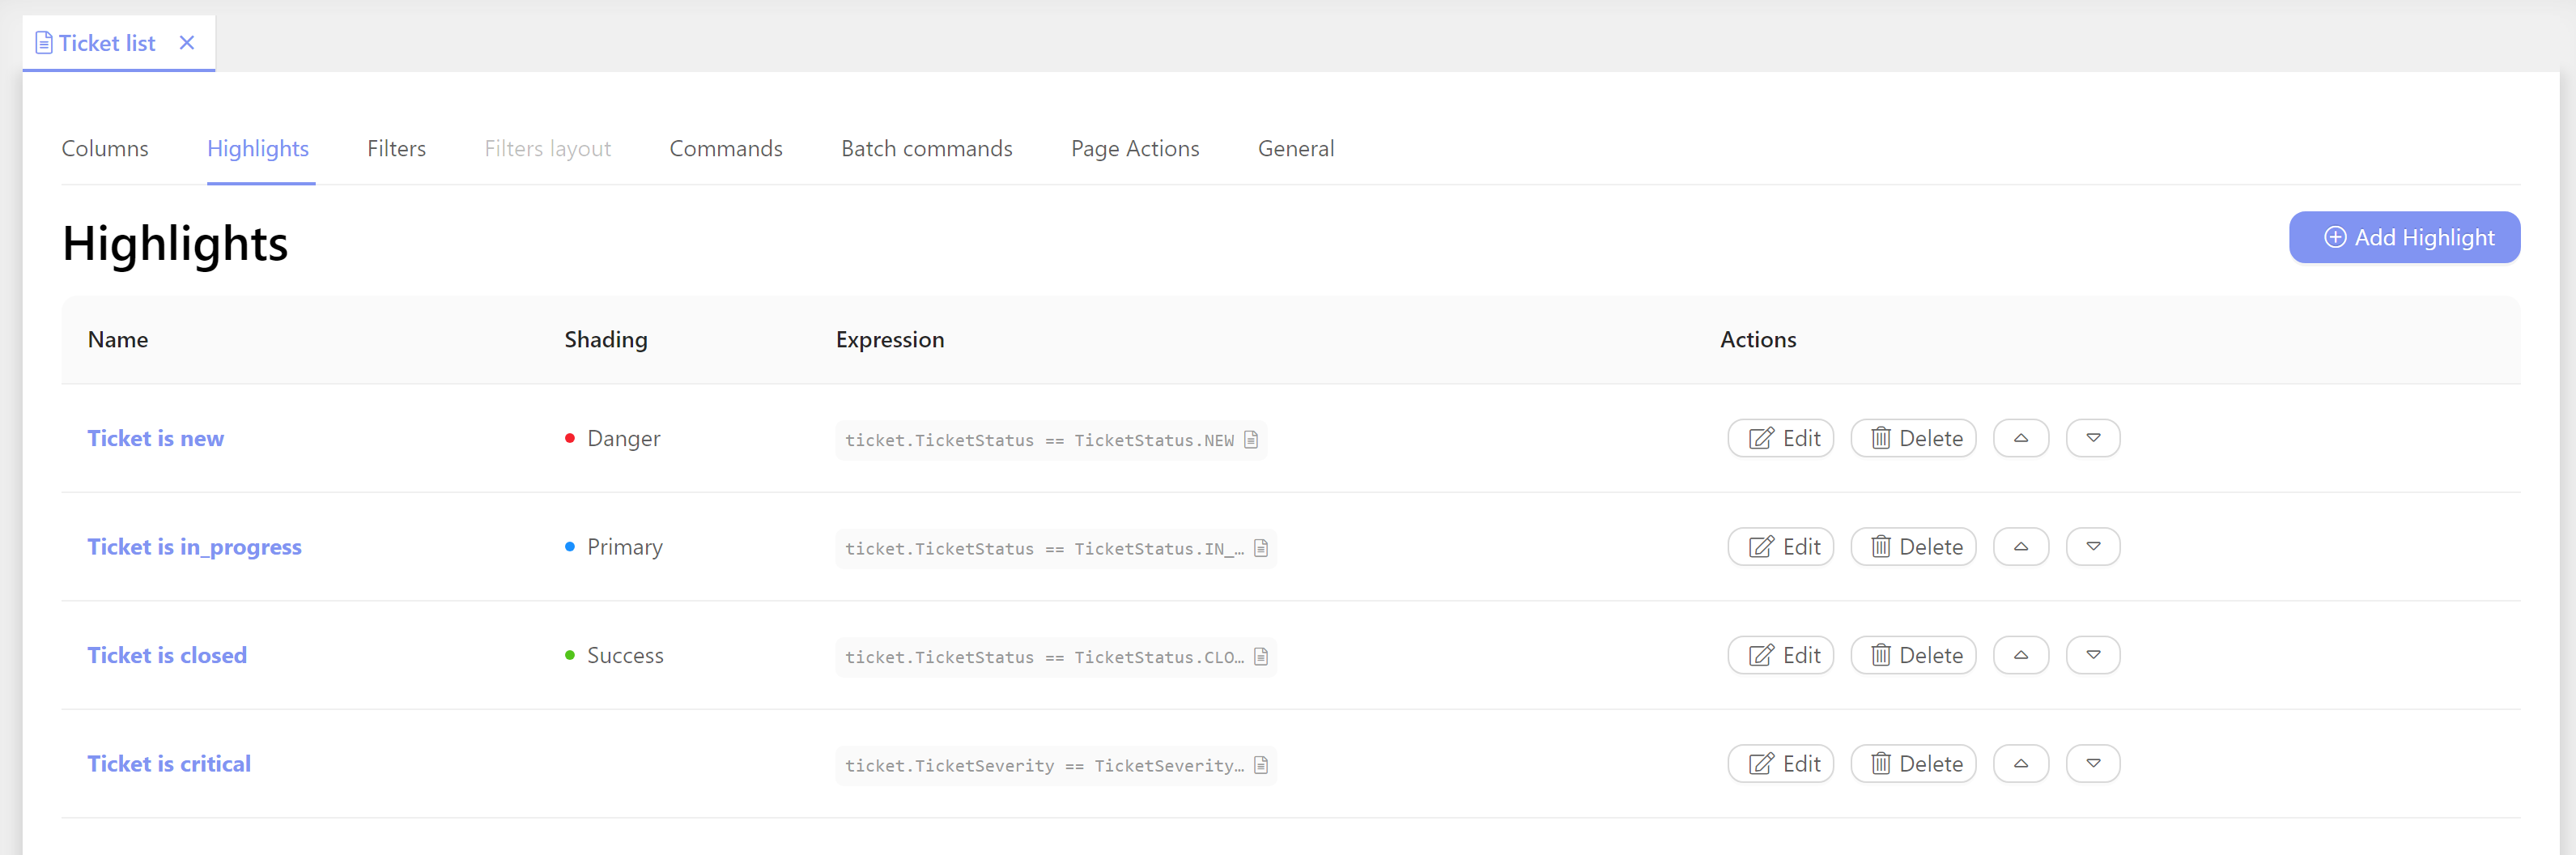
- Click
OK - Save changes:
Ctrl + S
The final improvement to the Ticket list will be the creation of Filters.
- Go to Filters tab
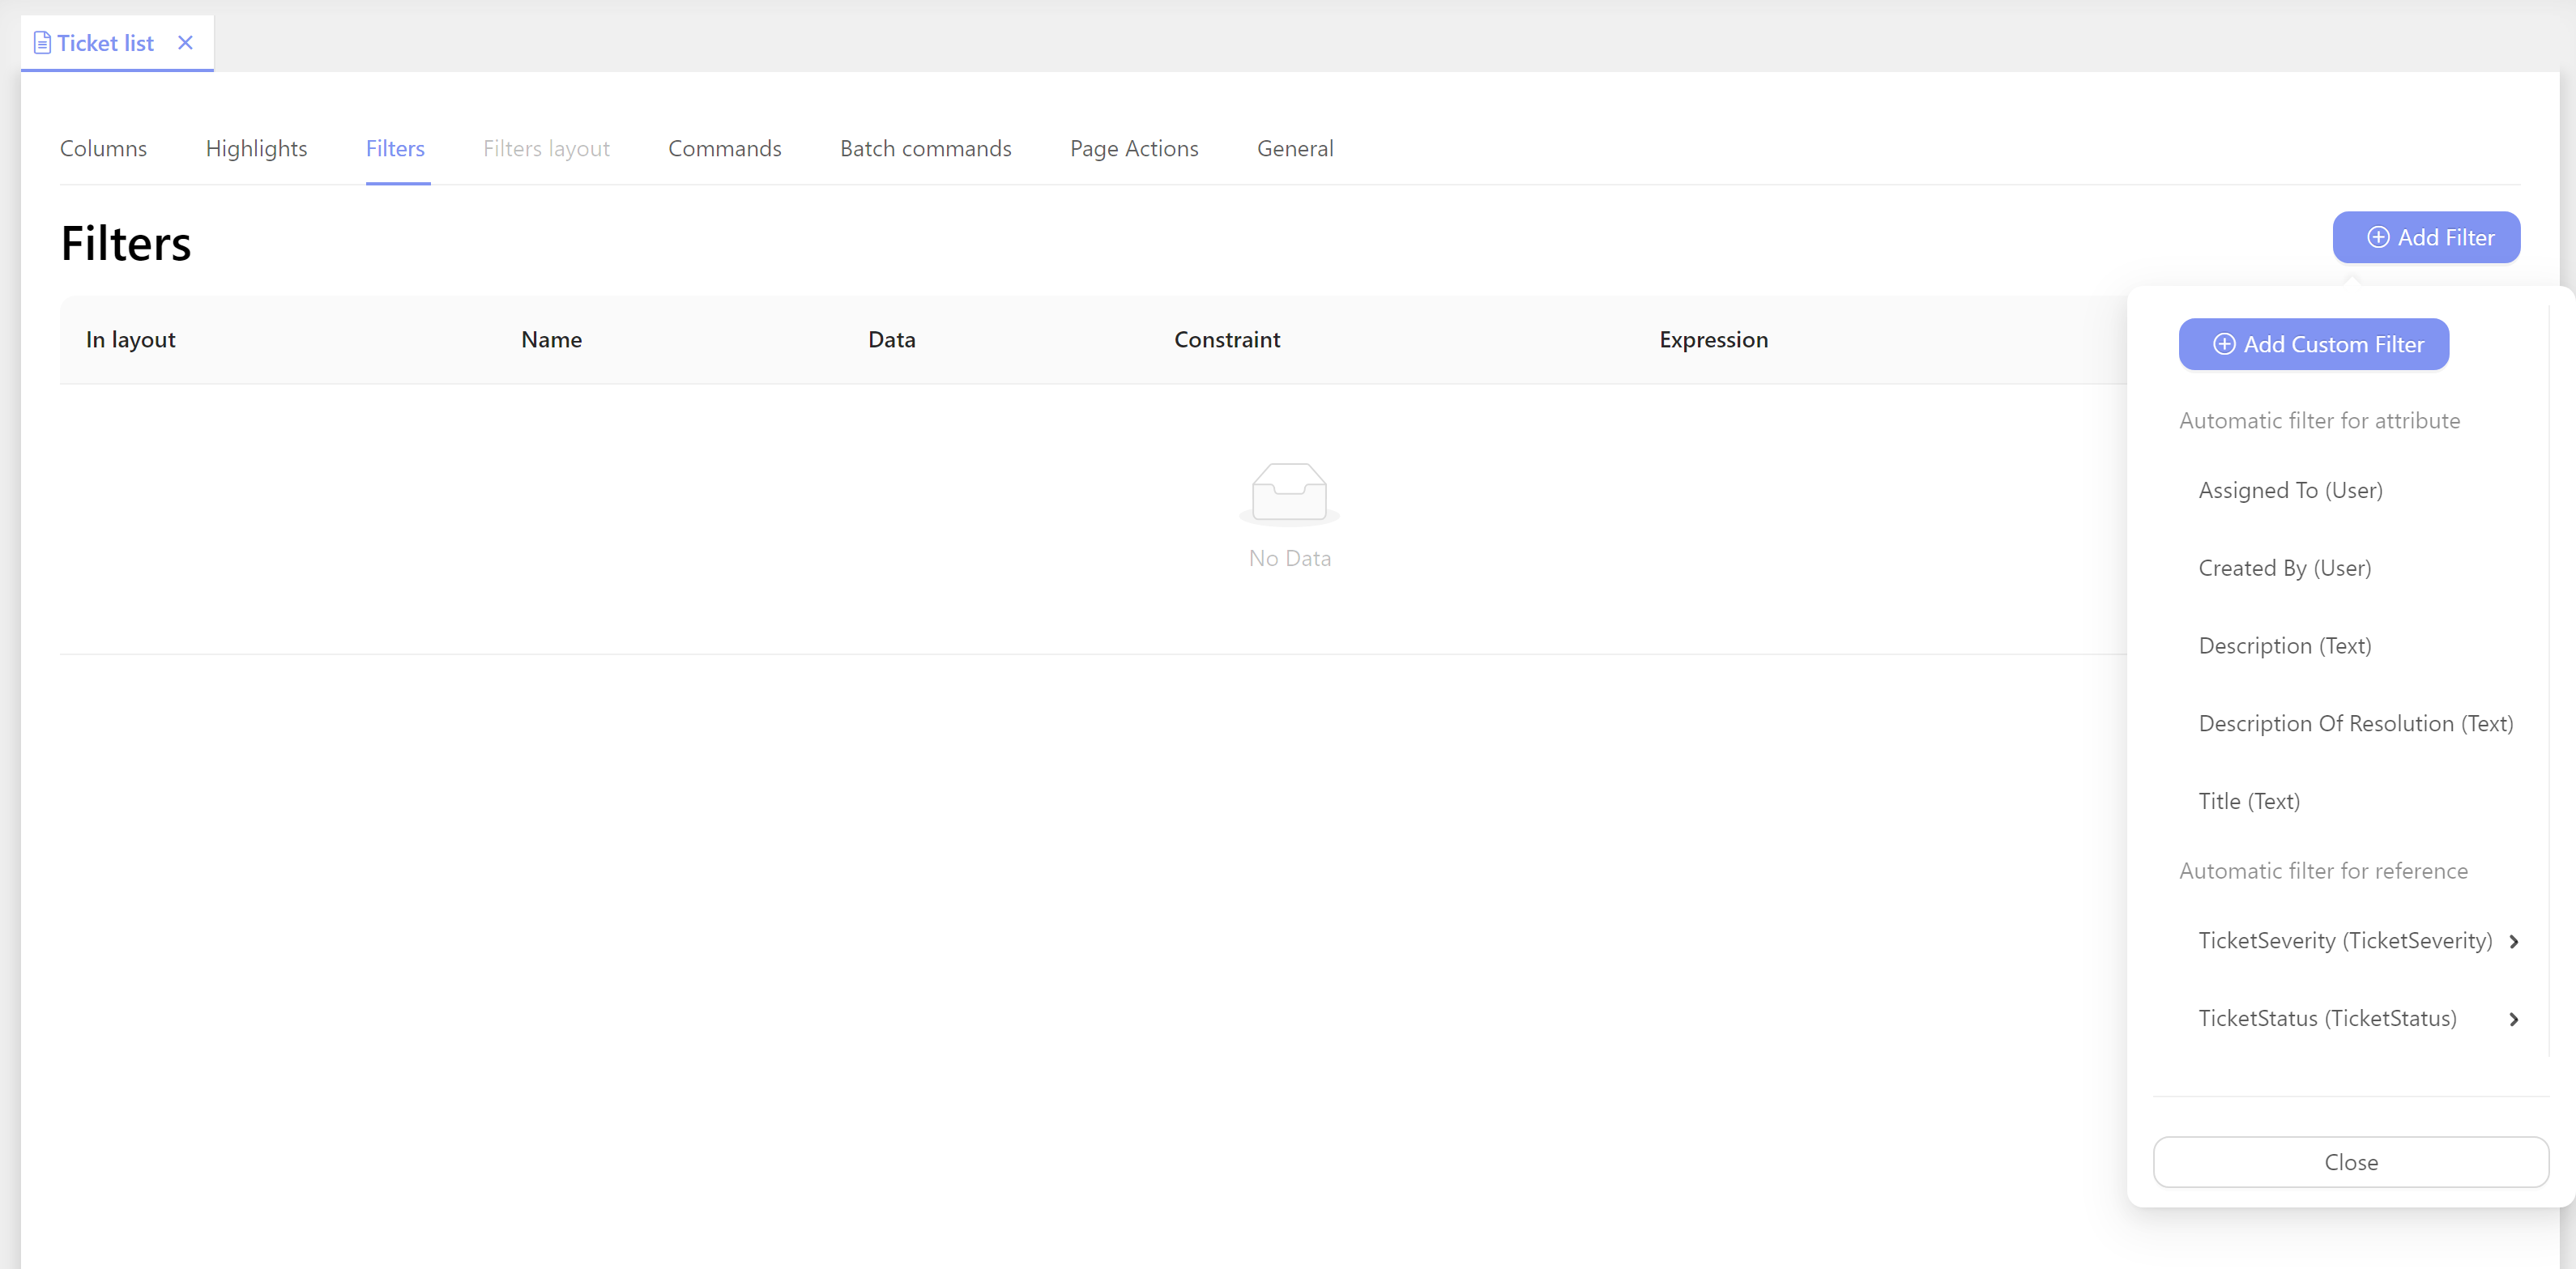
- Select these automatically created filters:
- Assigned To
- Created By
- Description
- Title
- TicketSeverity > Multi select filter
- TicketStatus > Multi select filter
—
- Go to Filters layout tab
- In the layout editor, expand the
Data Fieldsmenu. Click each of them. Drag and drop the elements as desired. - Save changes:
Ctrl + S